Our Christmas decorations will be fairly simple this year since we’re going to be splitting our time between our home and California. Printables are such an inexpensive way to decorate especially for holidays. I still really love the chalkboard look so I’ve decided to make a few chalkboard printables for Christmas. This Joy to the World printable is my first this season.
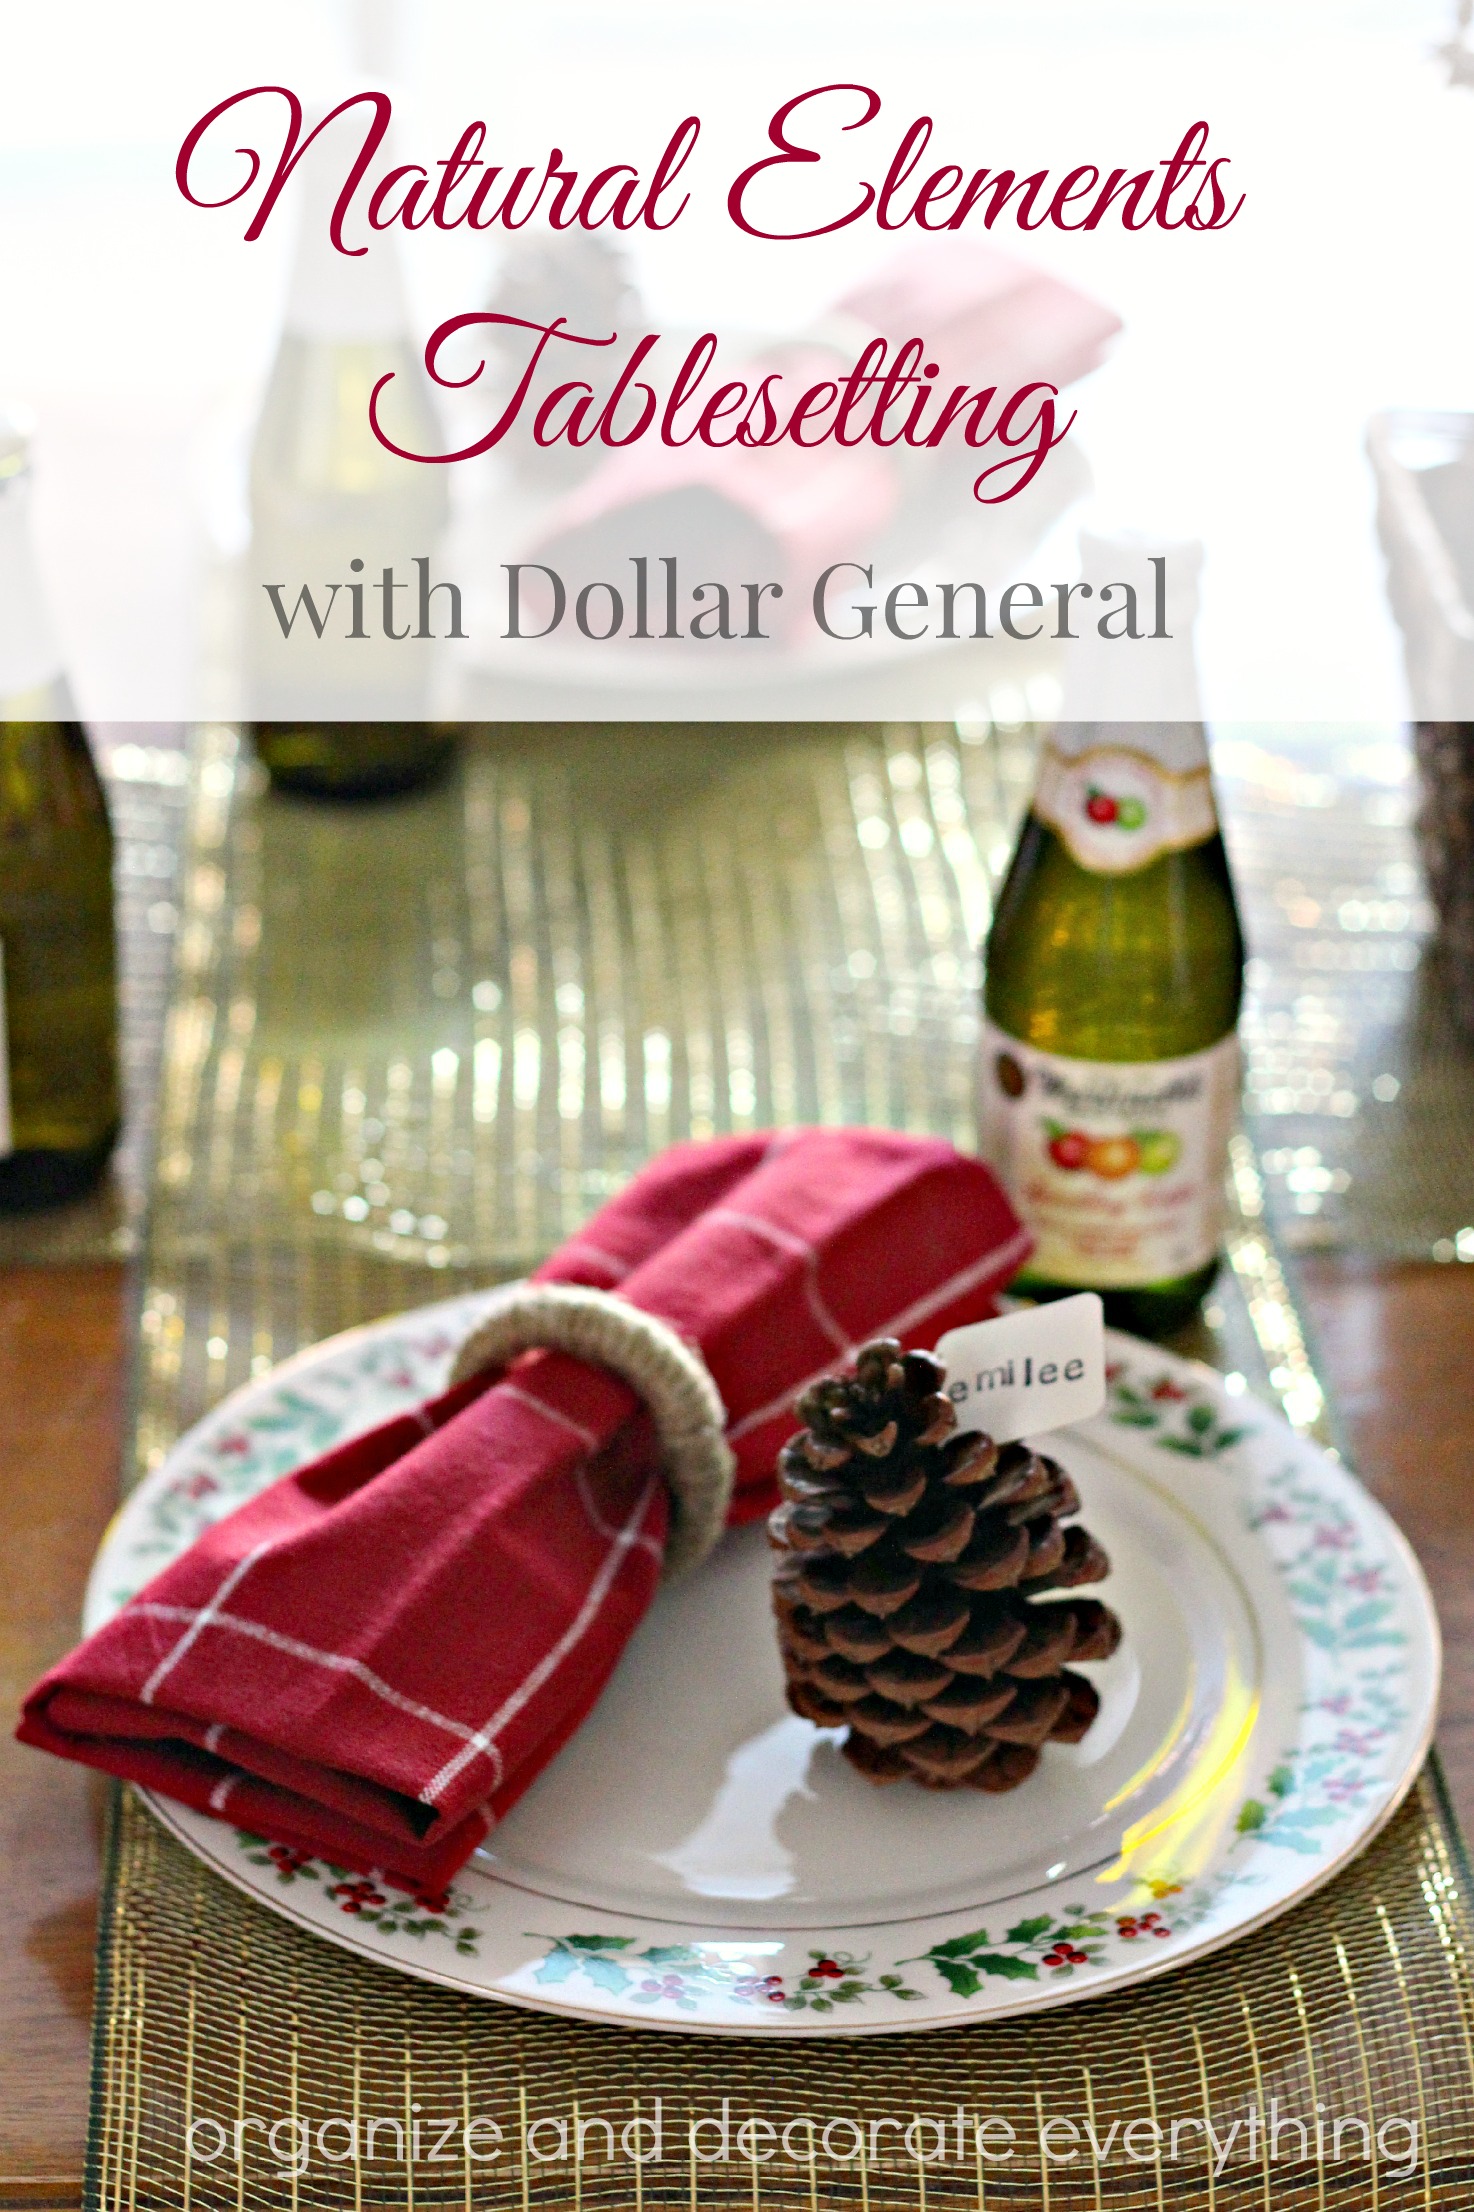
I have loved the look of Natural Elements lately. There’s just something about bringing nature in that’s comforting and relaxing. I think that’s why is so relaxing to sit and look out a window when it isn’t possible to go outside.
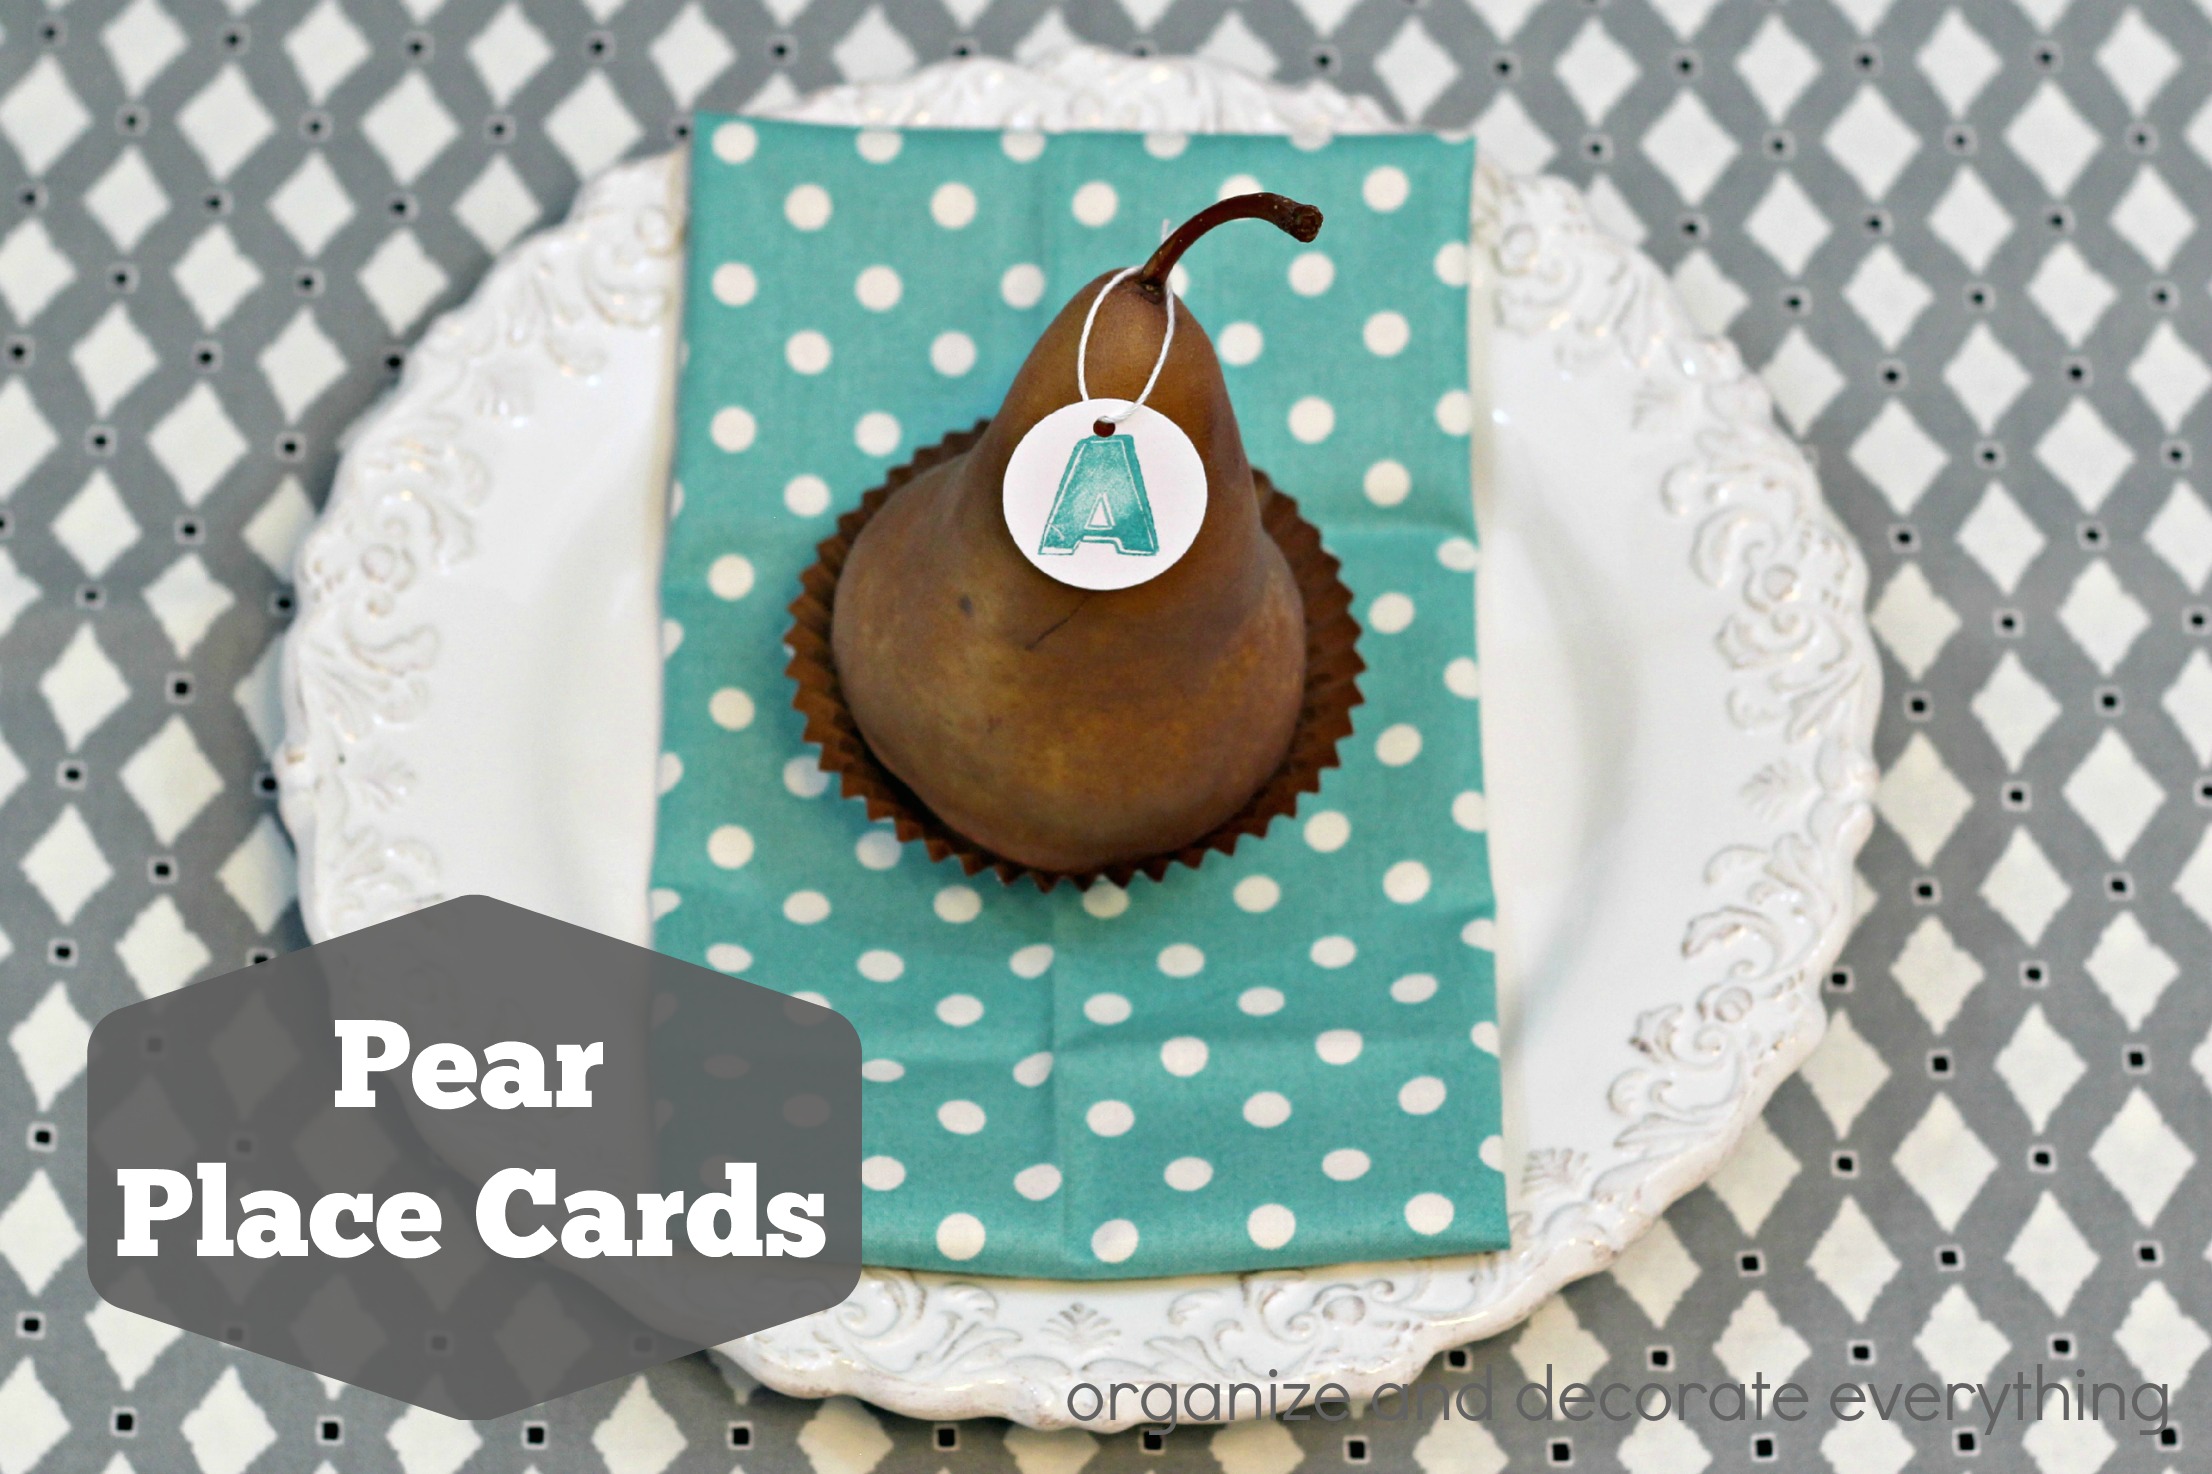
This is the last post in the series Simple Place Cards. I hope I’ve helped you with some creative and easy ideas for place cards this holiday season. I’ve used a lot of natural elements in my ideas. Today we are making simple Pear Place Cards.
The best thing about these is that you can grab a few at the grocery store while you’re shopping. And they come in a few different colors so you can pick the kind that matches your table.
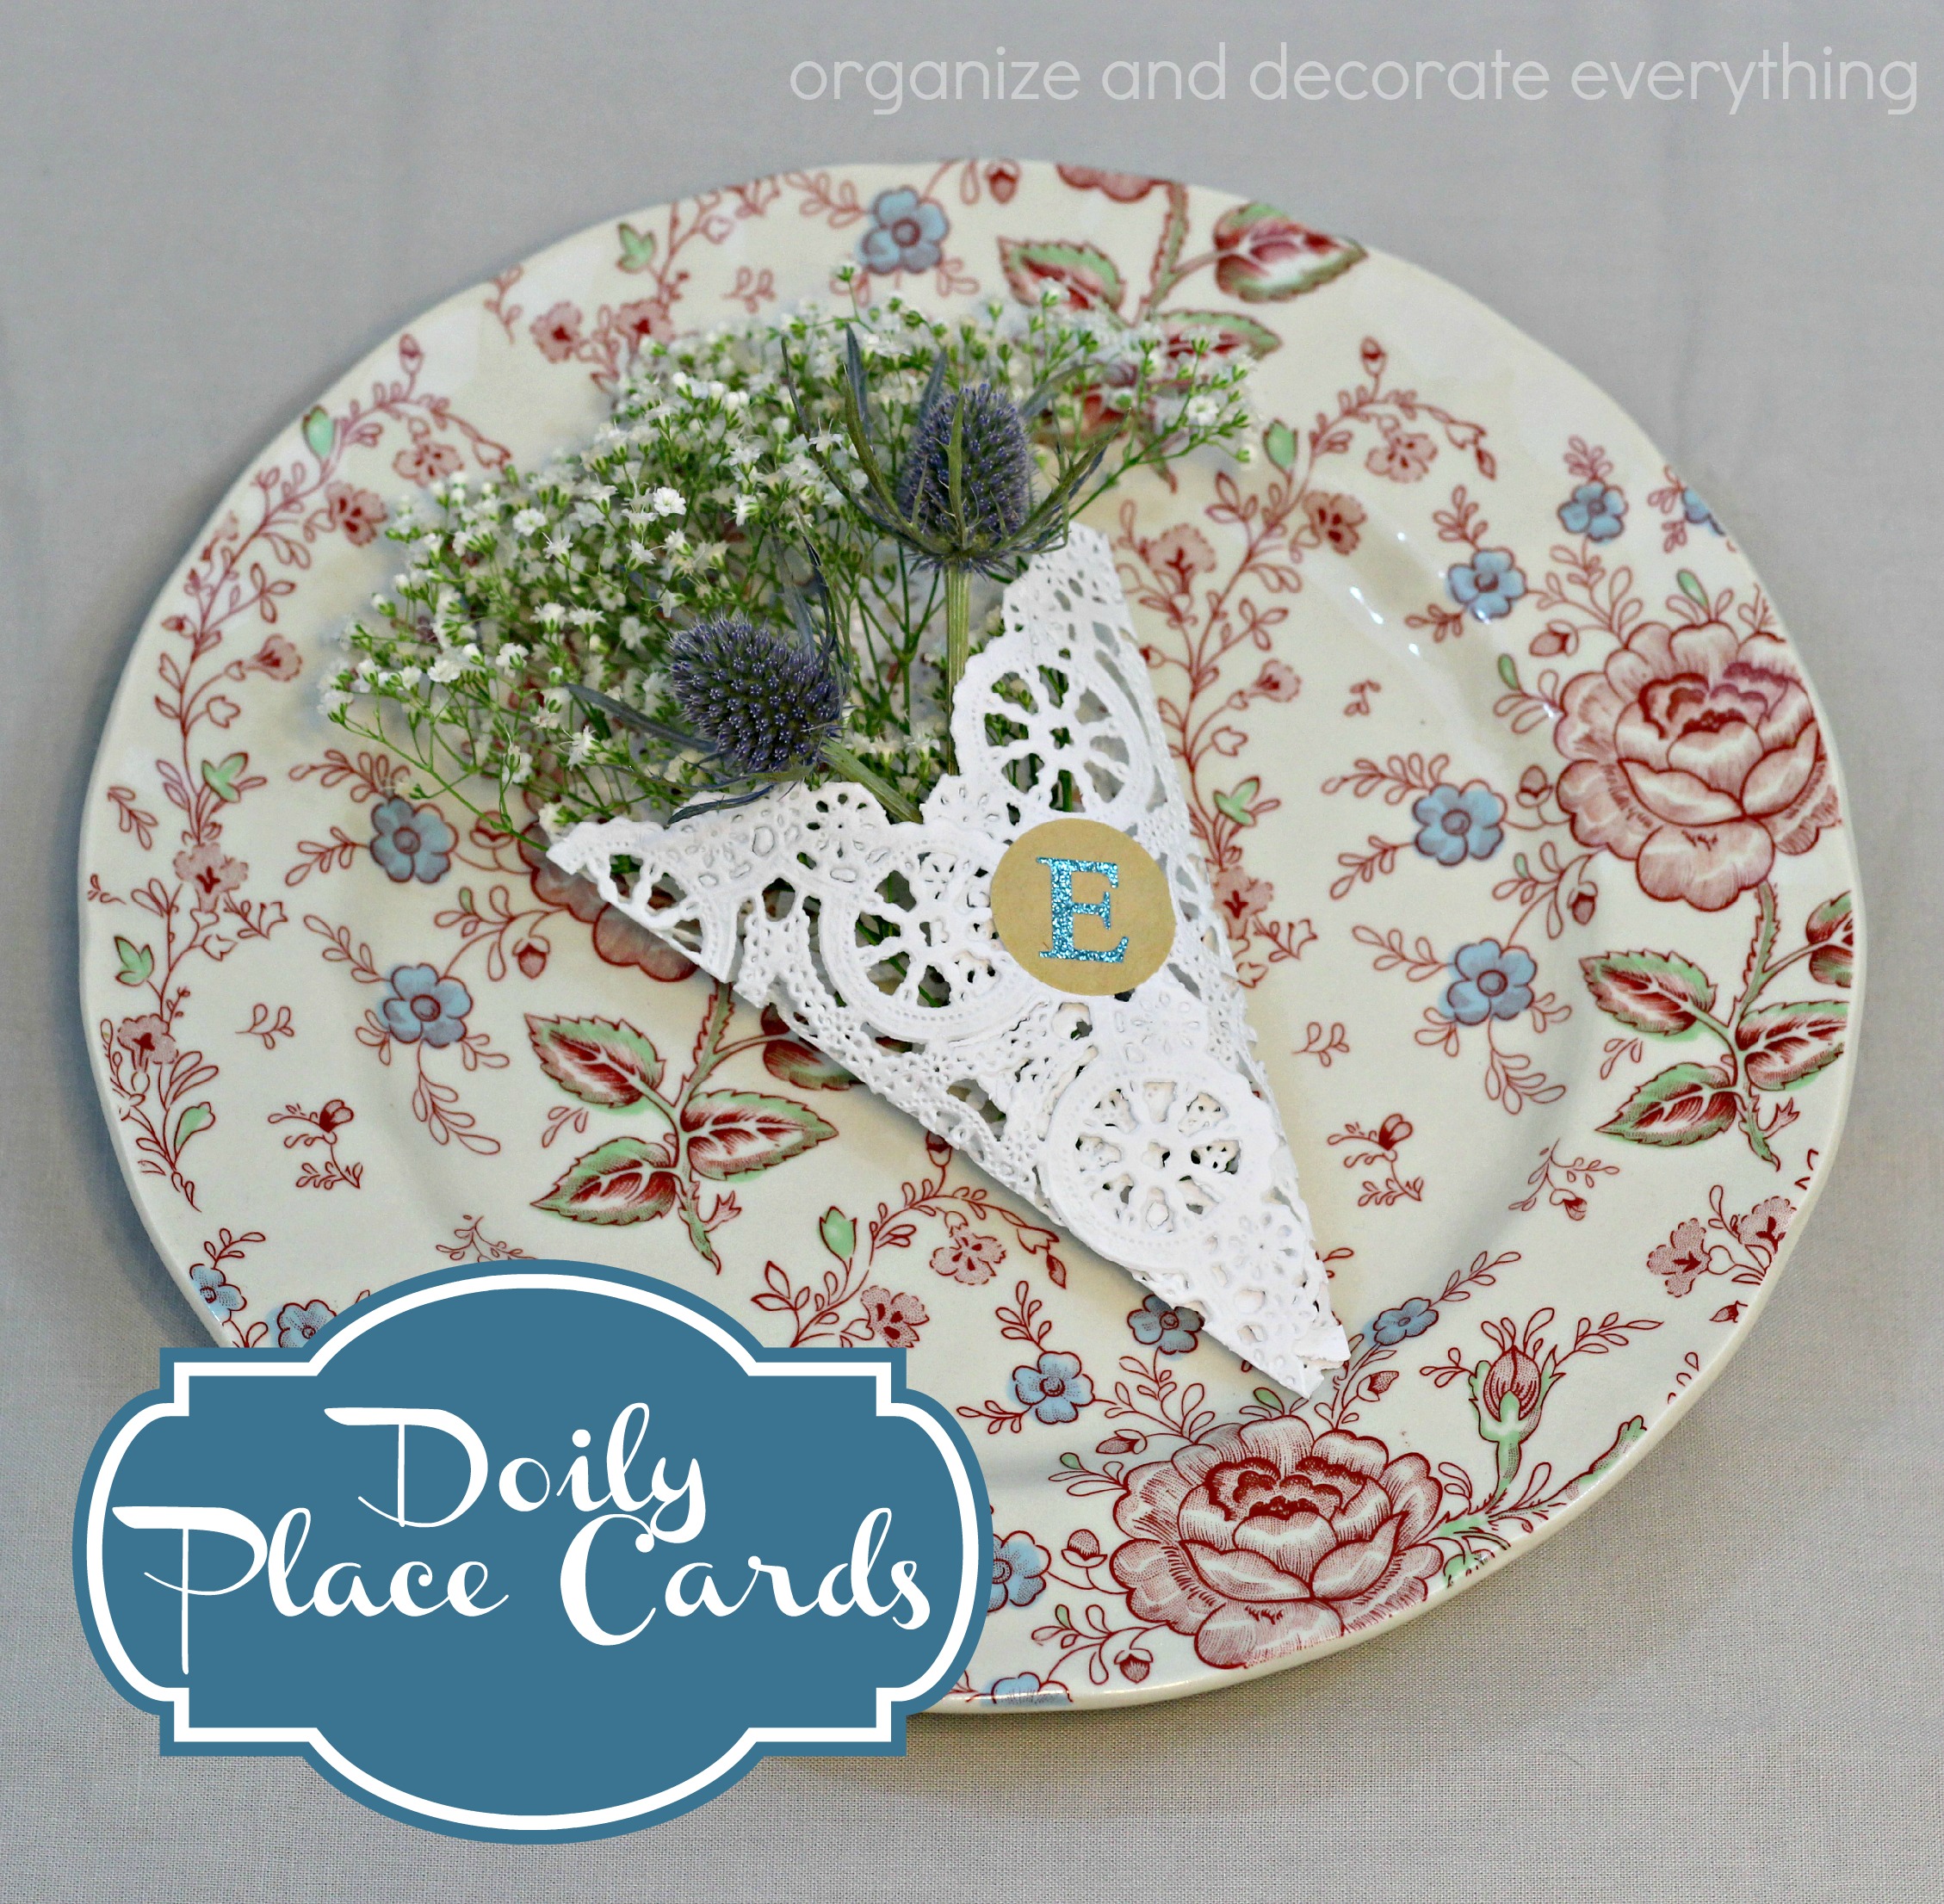
I love place cards and think they add so much to a special dinner or special occasion. With the holidays fast approaching I’m sharing some Simple Place Cardexamples with you. I’m not sure which ones I will be using yet but I love these Doily Place Cards I made today.
They might be a bit feminine for my boys though. They would be perfect for a garden party or the adult table for Thanksgiving. I love these floral plates too. I had a lot of the flowers left over so I was able to use them as a centerpiece for the table.
Wow, today’s post is really late. Technically it’s on the right day though since it’s 11:30pm at my house. This is the 3rd day ofSimple Place Cards. I probably could’ve called this series Simple and Natural. It seems like the most beautiful and simple things come from nature so don’t blame me for using a lot of natural things in these posts. Today I decided to make some Wood Slice Place Cards.
I could lie and tell you I went out back, cut a branch off my tree and cut it into little slices, but I didn’t. I actually bought them in a bag at Hobby Lobby. I’ve also seen them at other craft and hobby stores. You wanna talk super simple place cards? These are the ones.
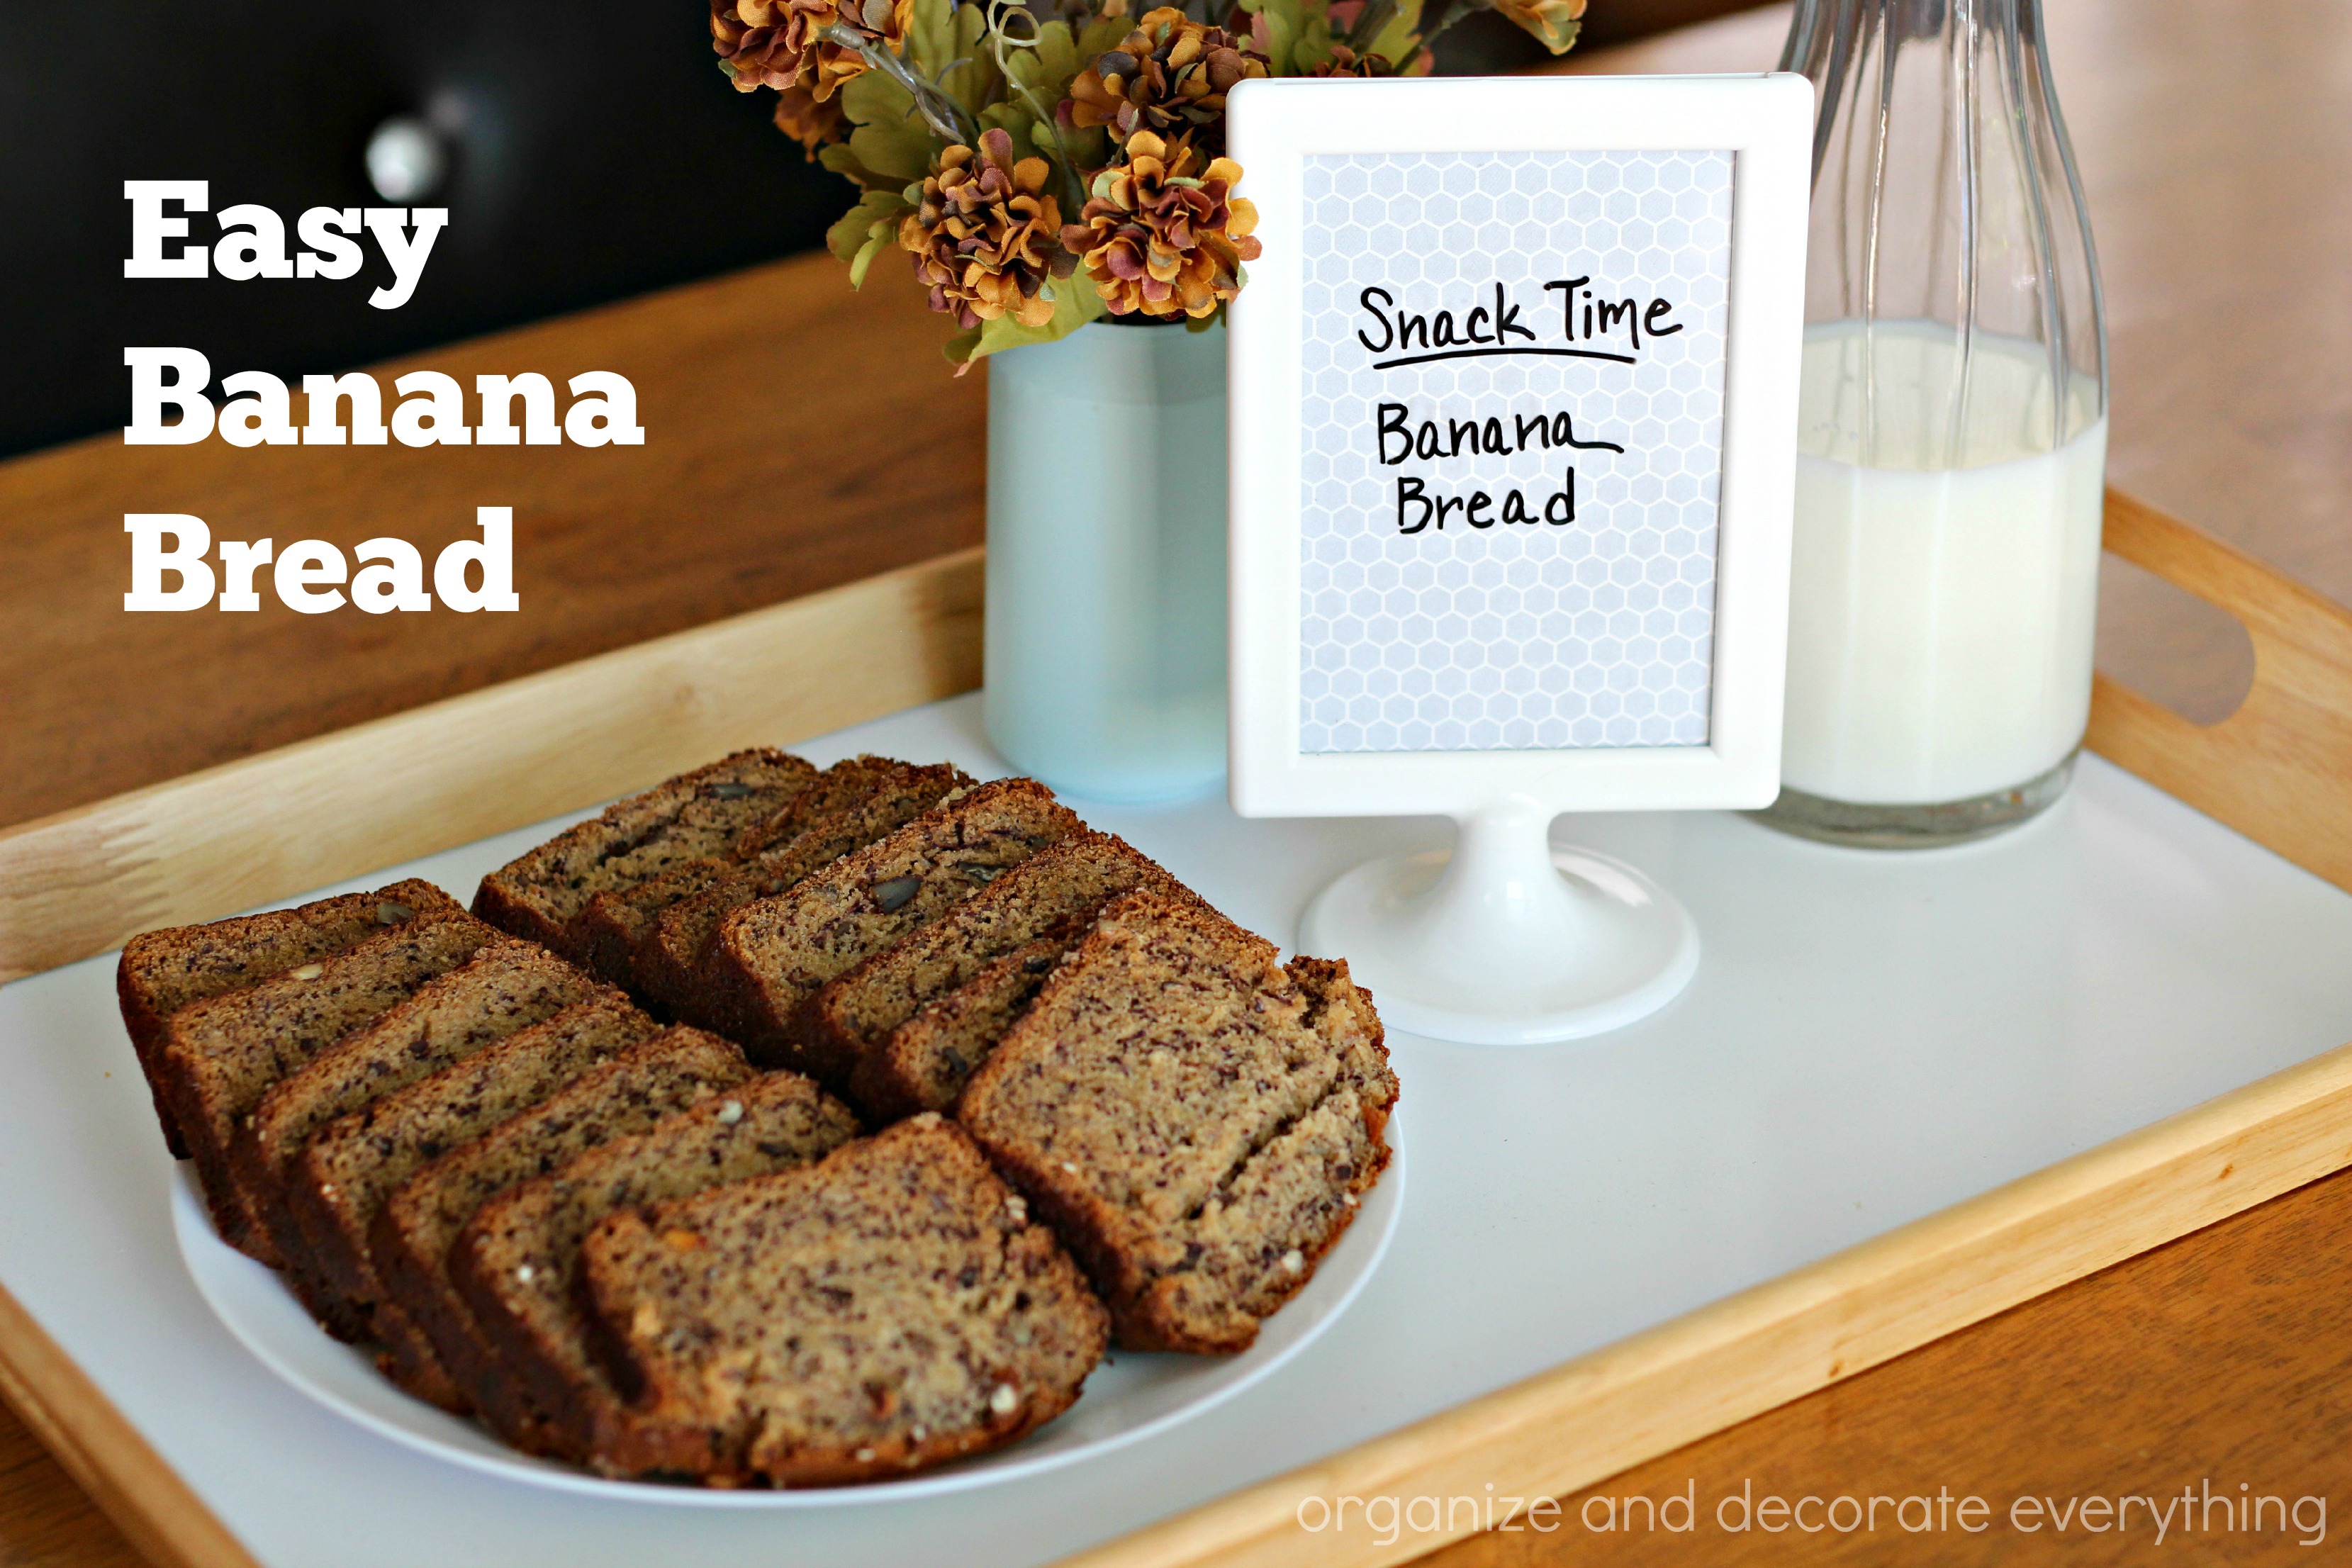
I have some picky eaters in my family but one thing they will all eat is banana bread. Really, who doesn’t love banana bread? You are going to love this Easy Banana Bread recipe for how quick and delicious it is and the secret ingredient makes it even more tasty.
All this week I will be sharing Simple Place Cardsfor the Holidays. Most of these can be used for any of the upcoming holidays by simply changing the linens or colors depending on your theme. Today I created simple Berry Place Cards and I love how beautiful they turned out.
The holidays are sneaking up on us and I like to find simple ways to bring in personal touches that are beautiful and unique without spending much time or money. This week I am sharing a week’s worth of Simple Place Cards for your holiday dinners. I think you’re going to love these ideas and how easy yet beautiful they dress your table. Let’s start withFeather Place Cards today.
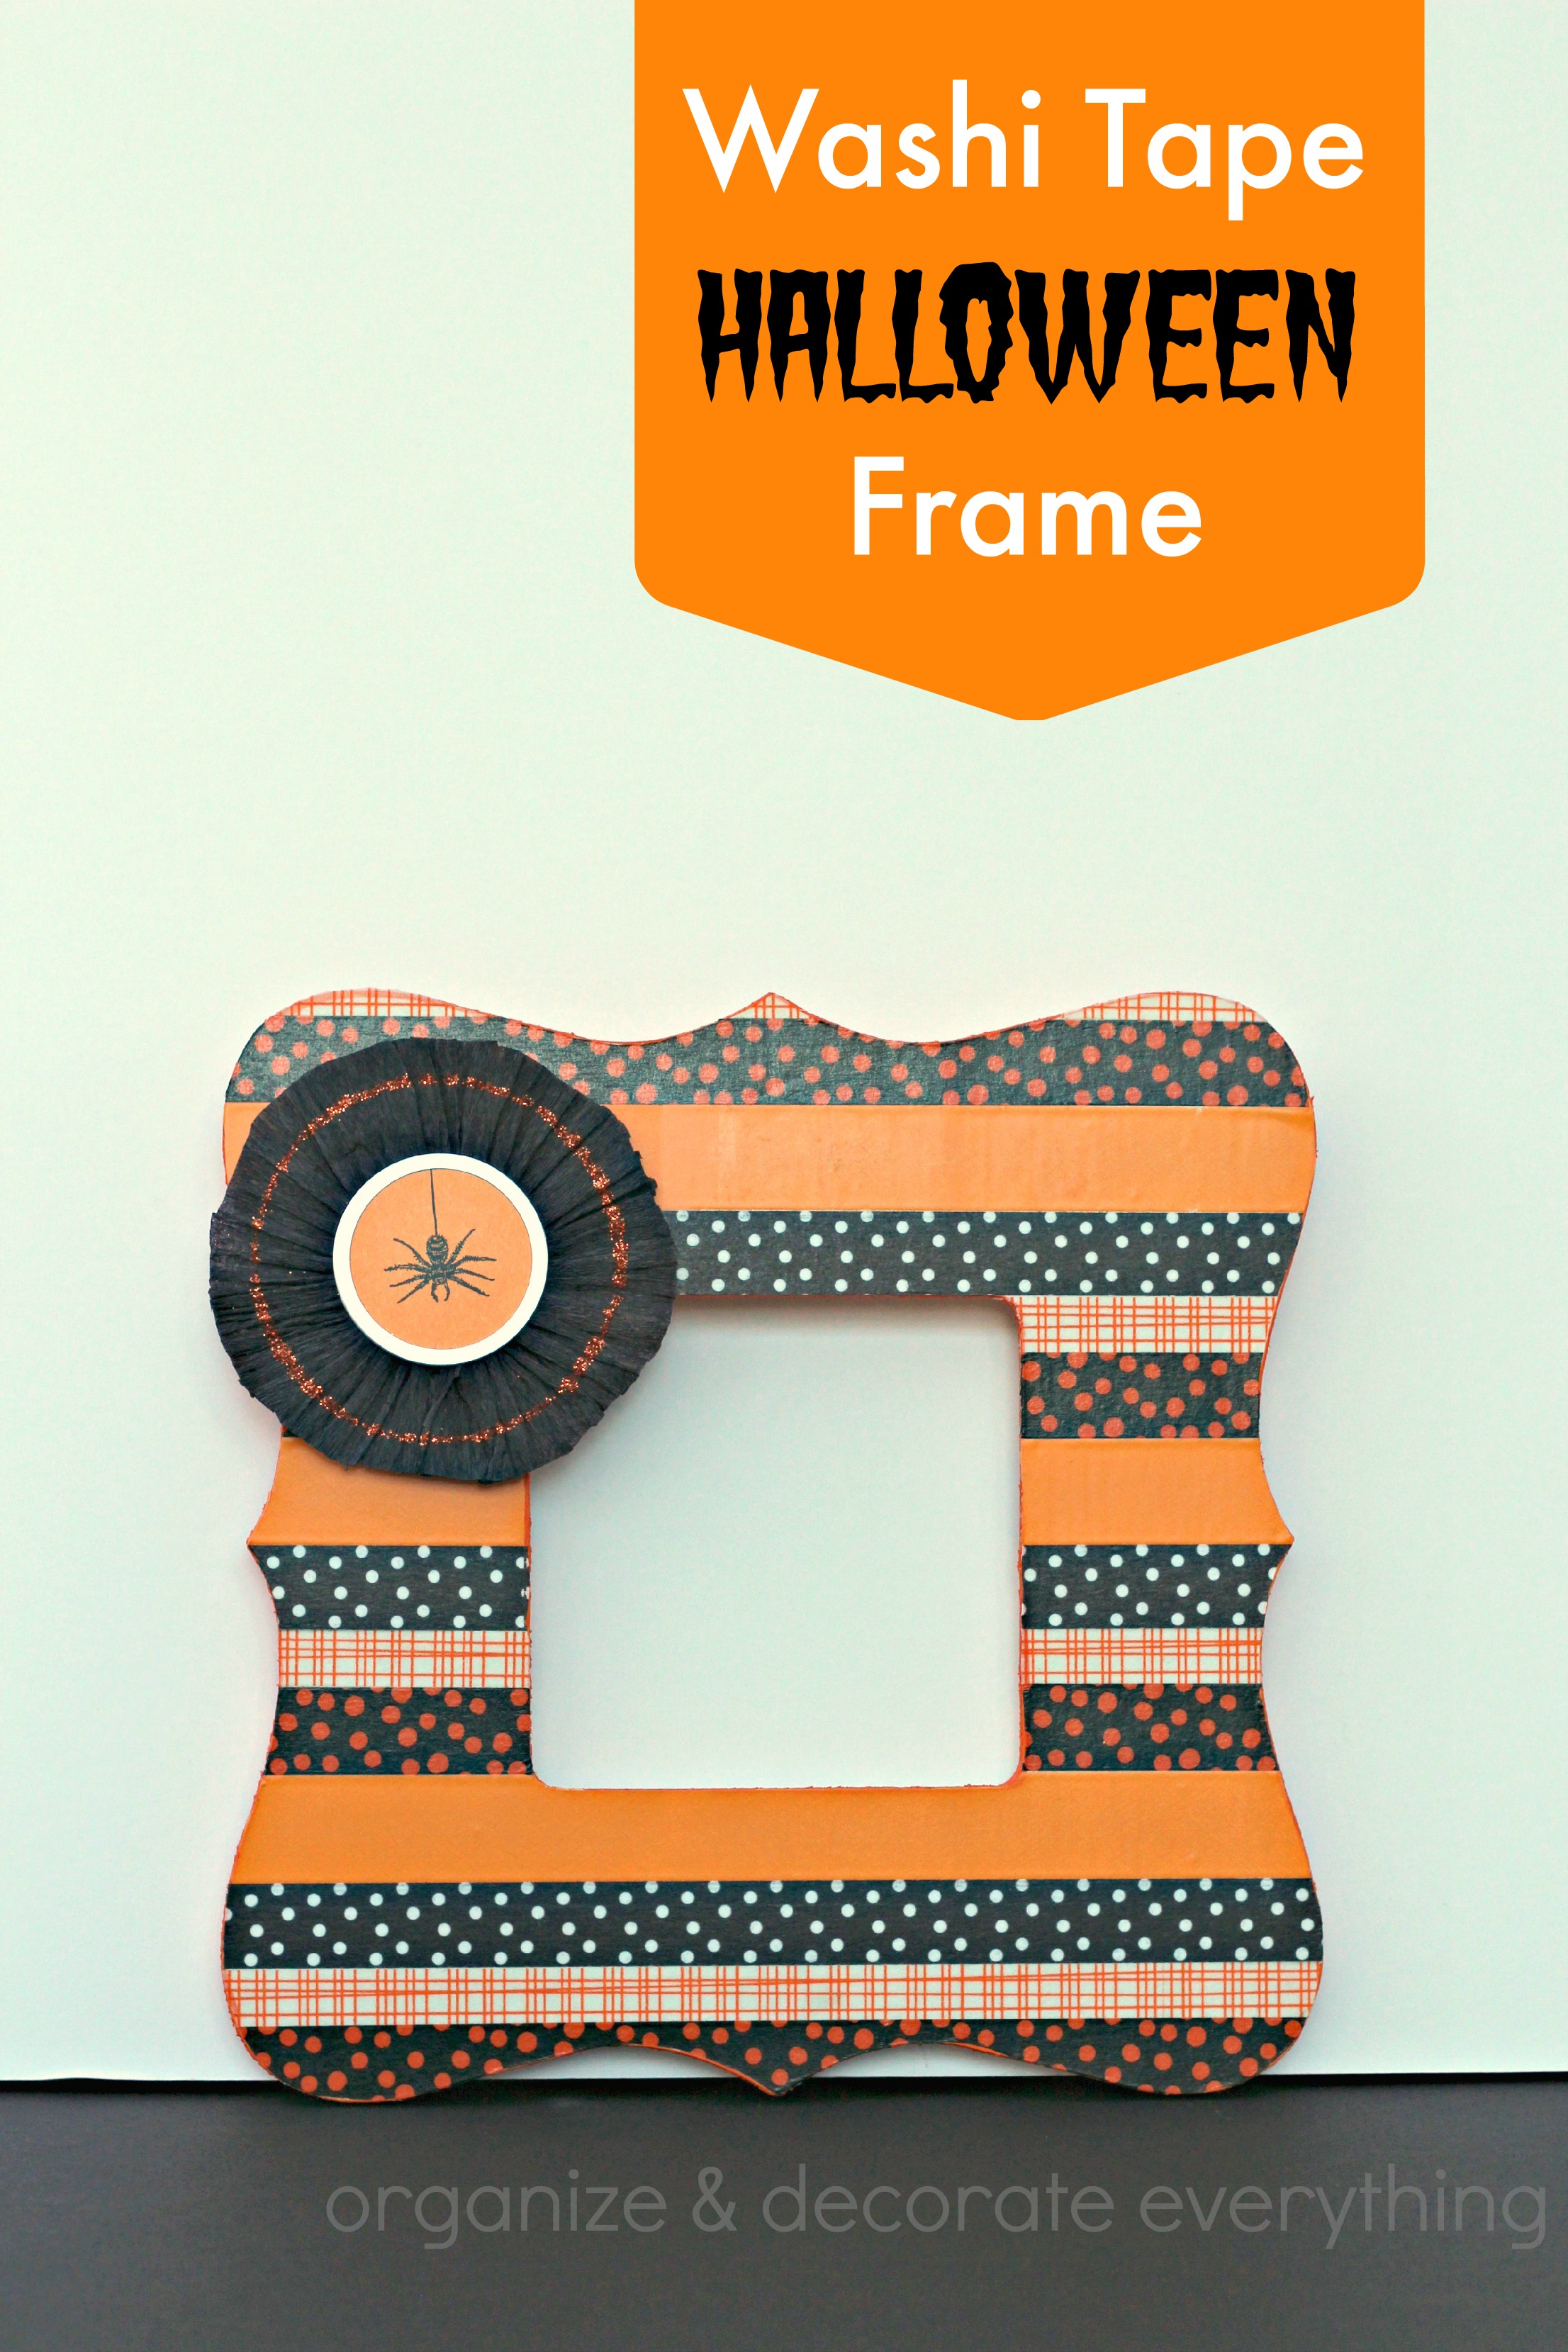
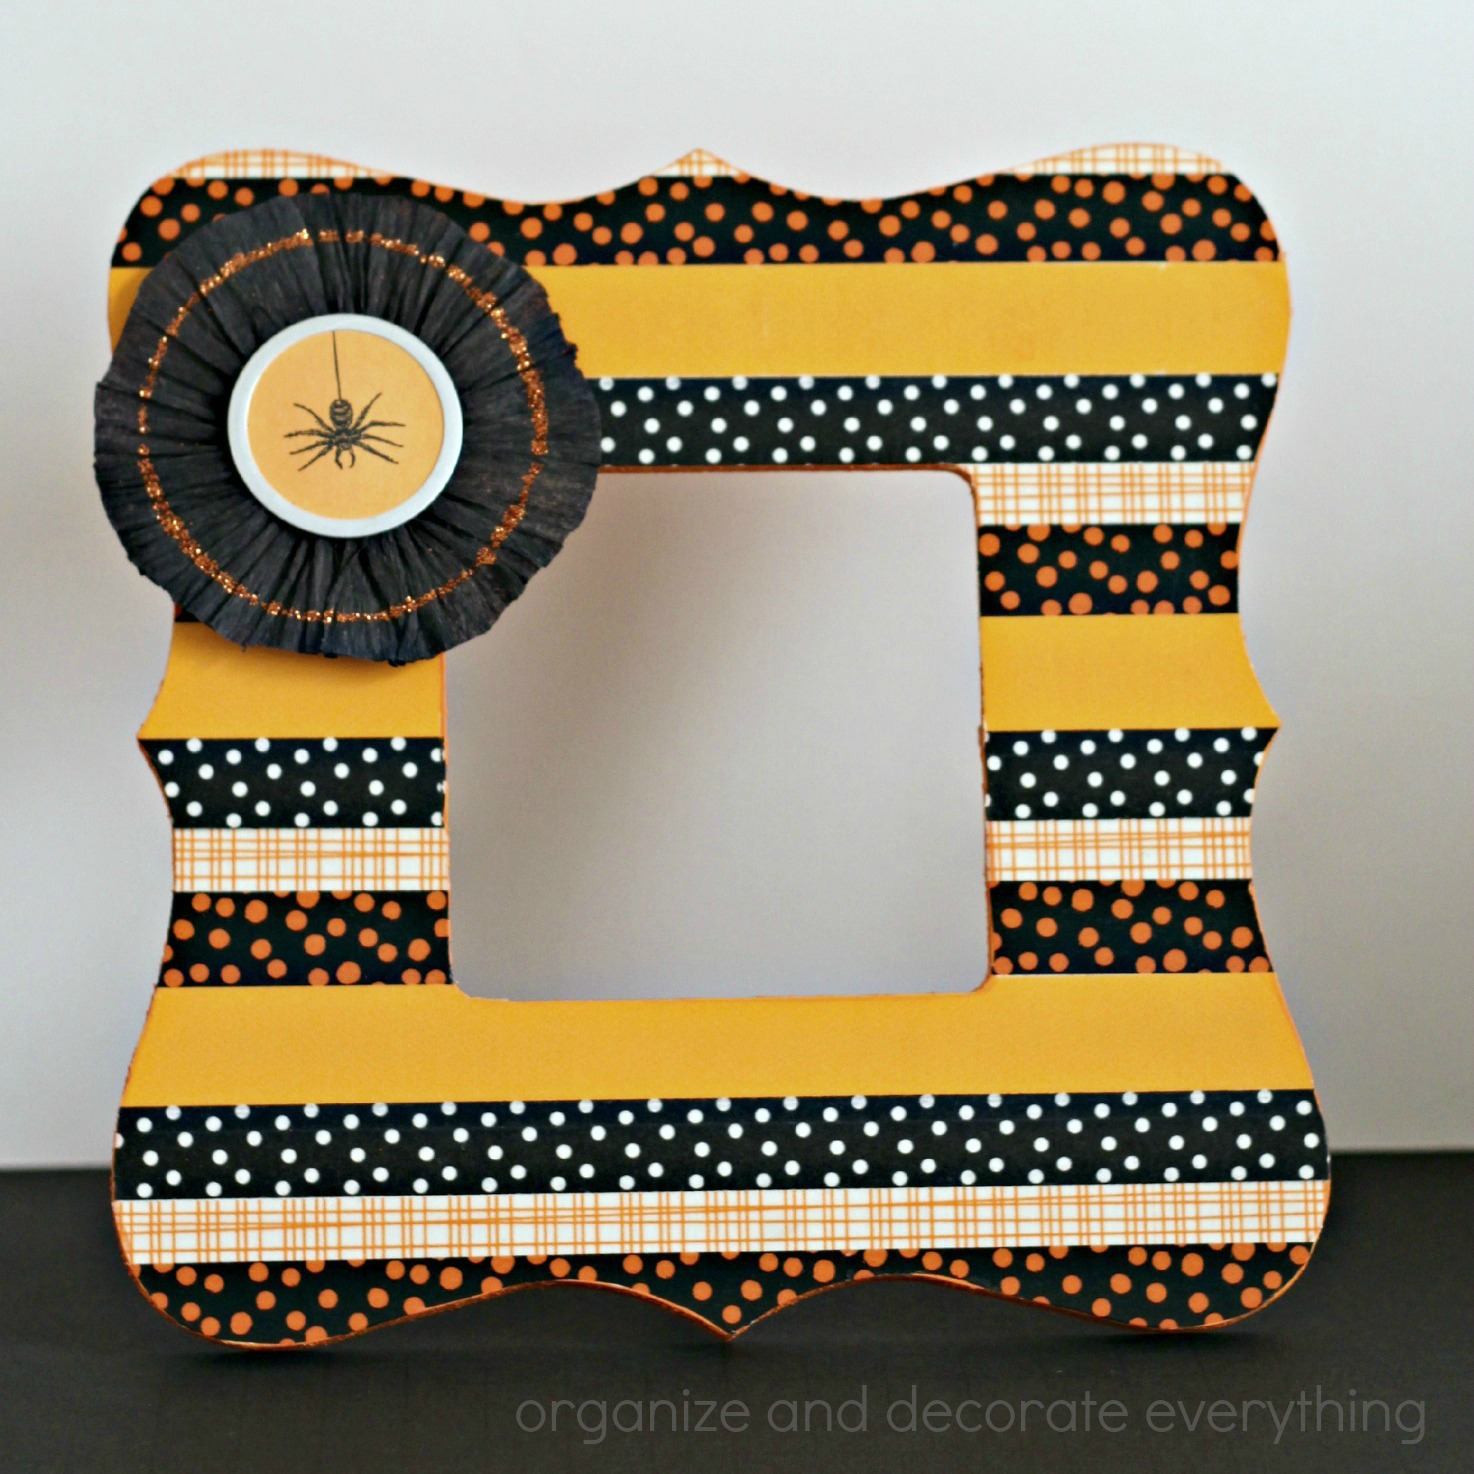
For my project, I’m sharing how to make this decorative Washi Tape Halloween Frame. It’s really easy and inexpensive and adds a ton of fun to your Halloween decor. Let’s get started!
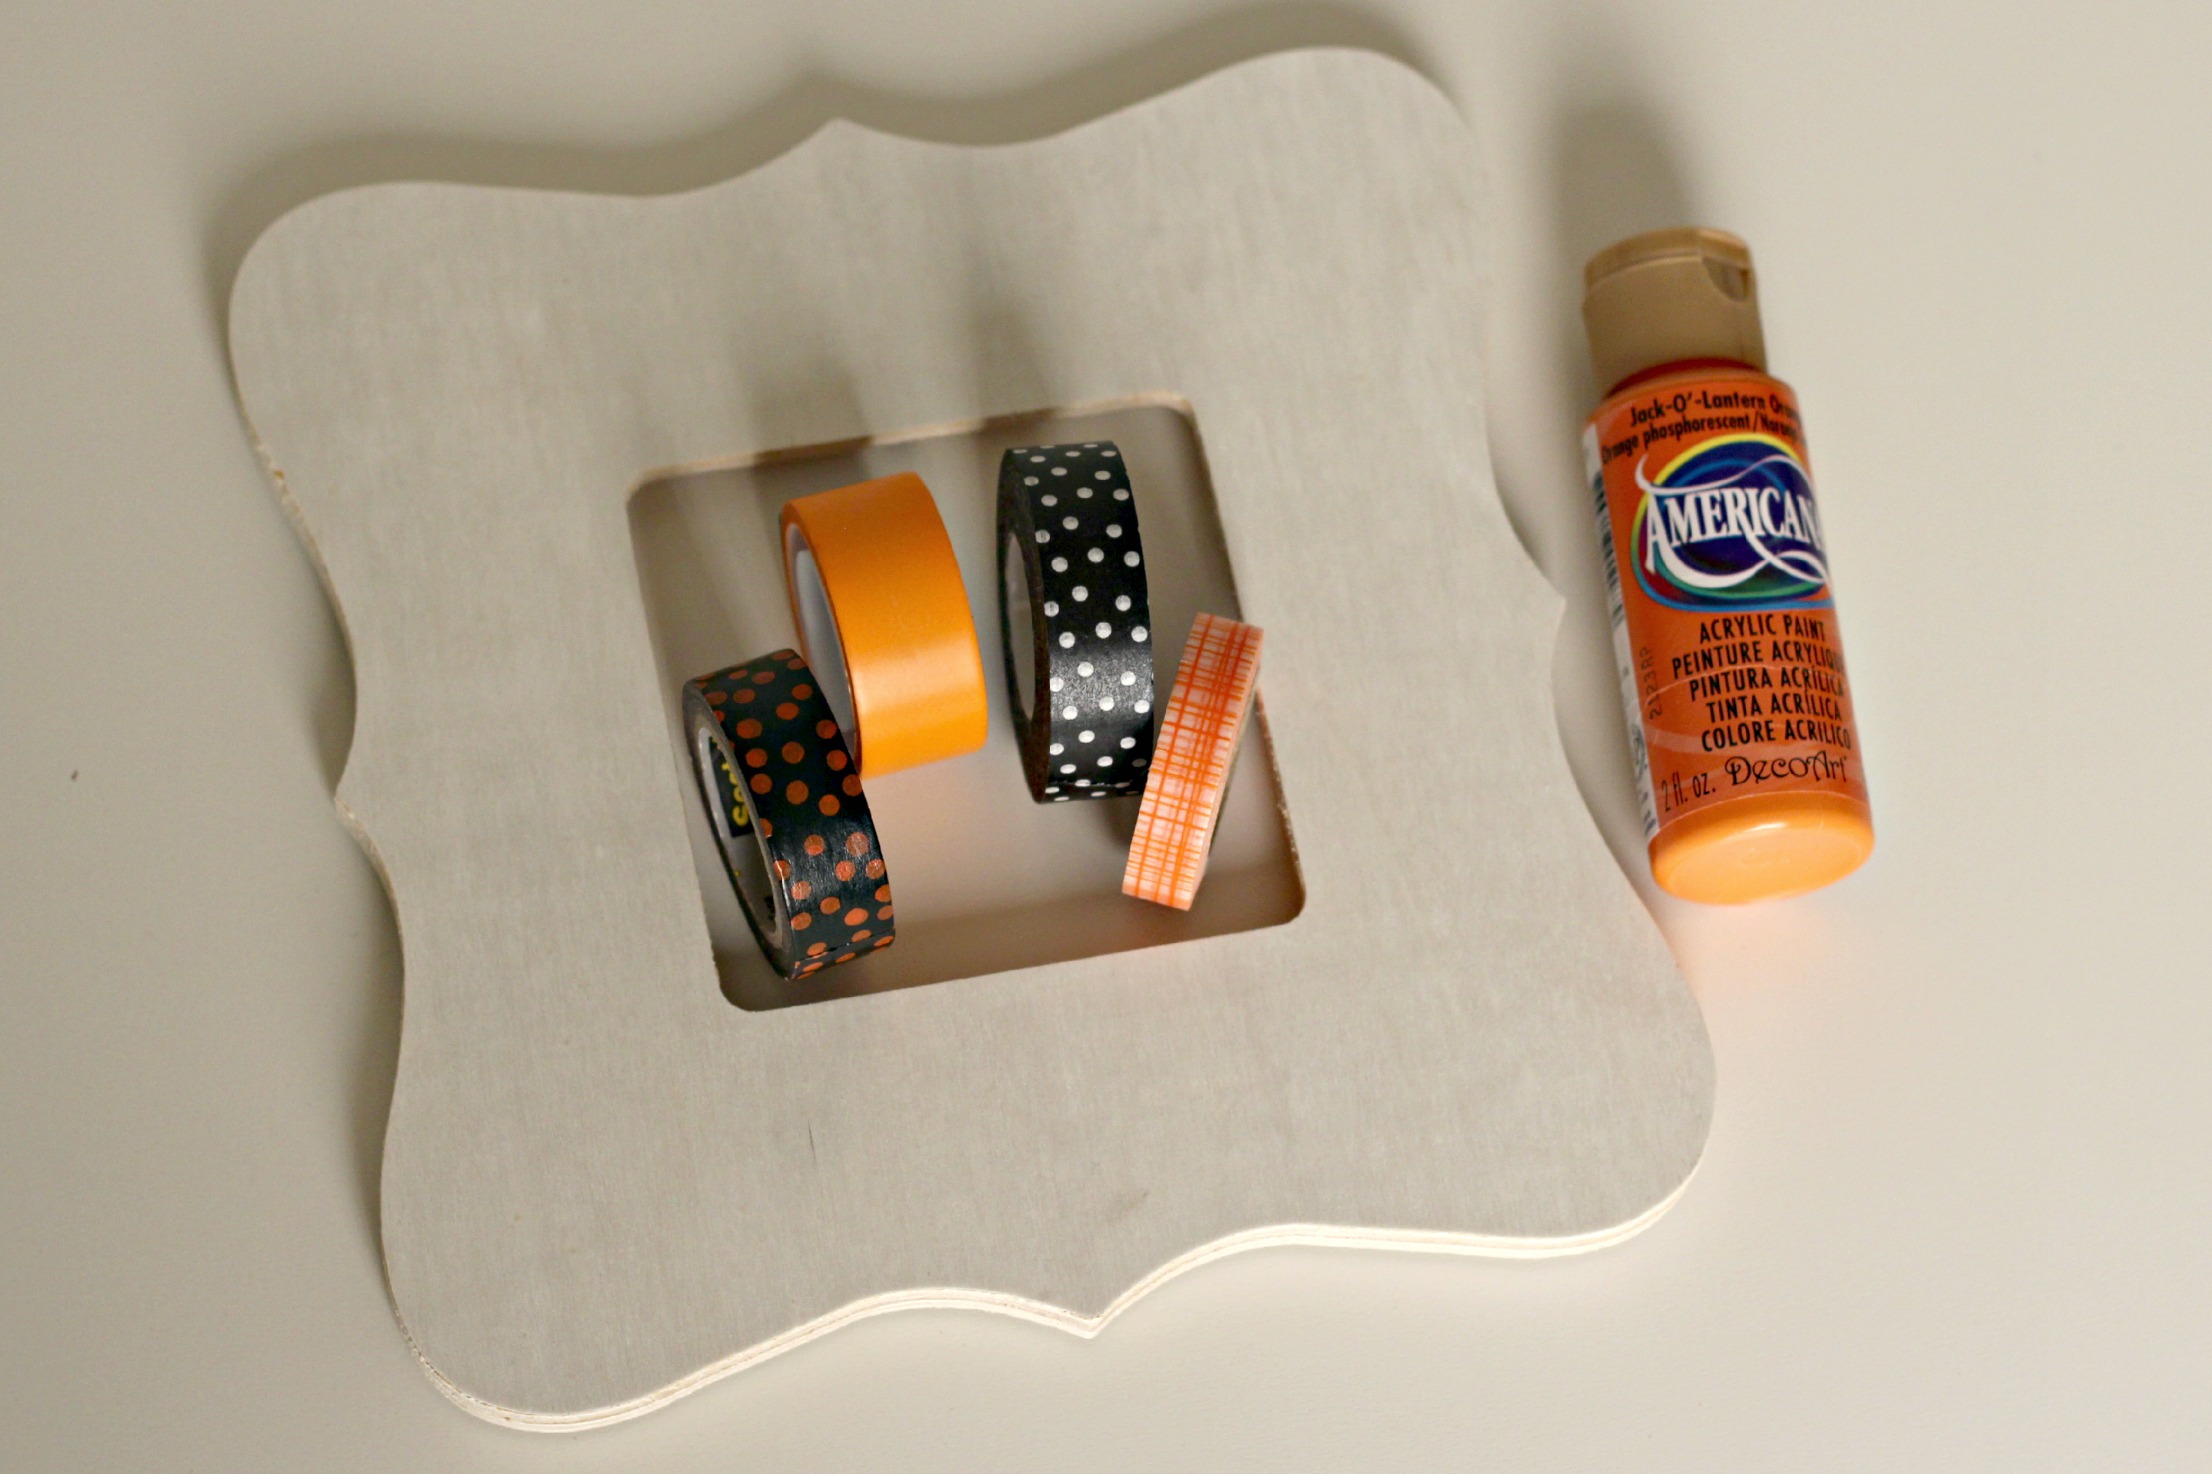
You will need:
Flat unfinished wood frame
Washi tape
Paint
Xacto knife
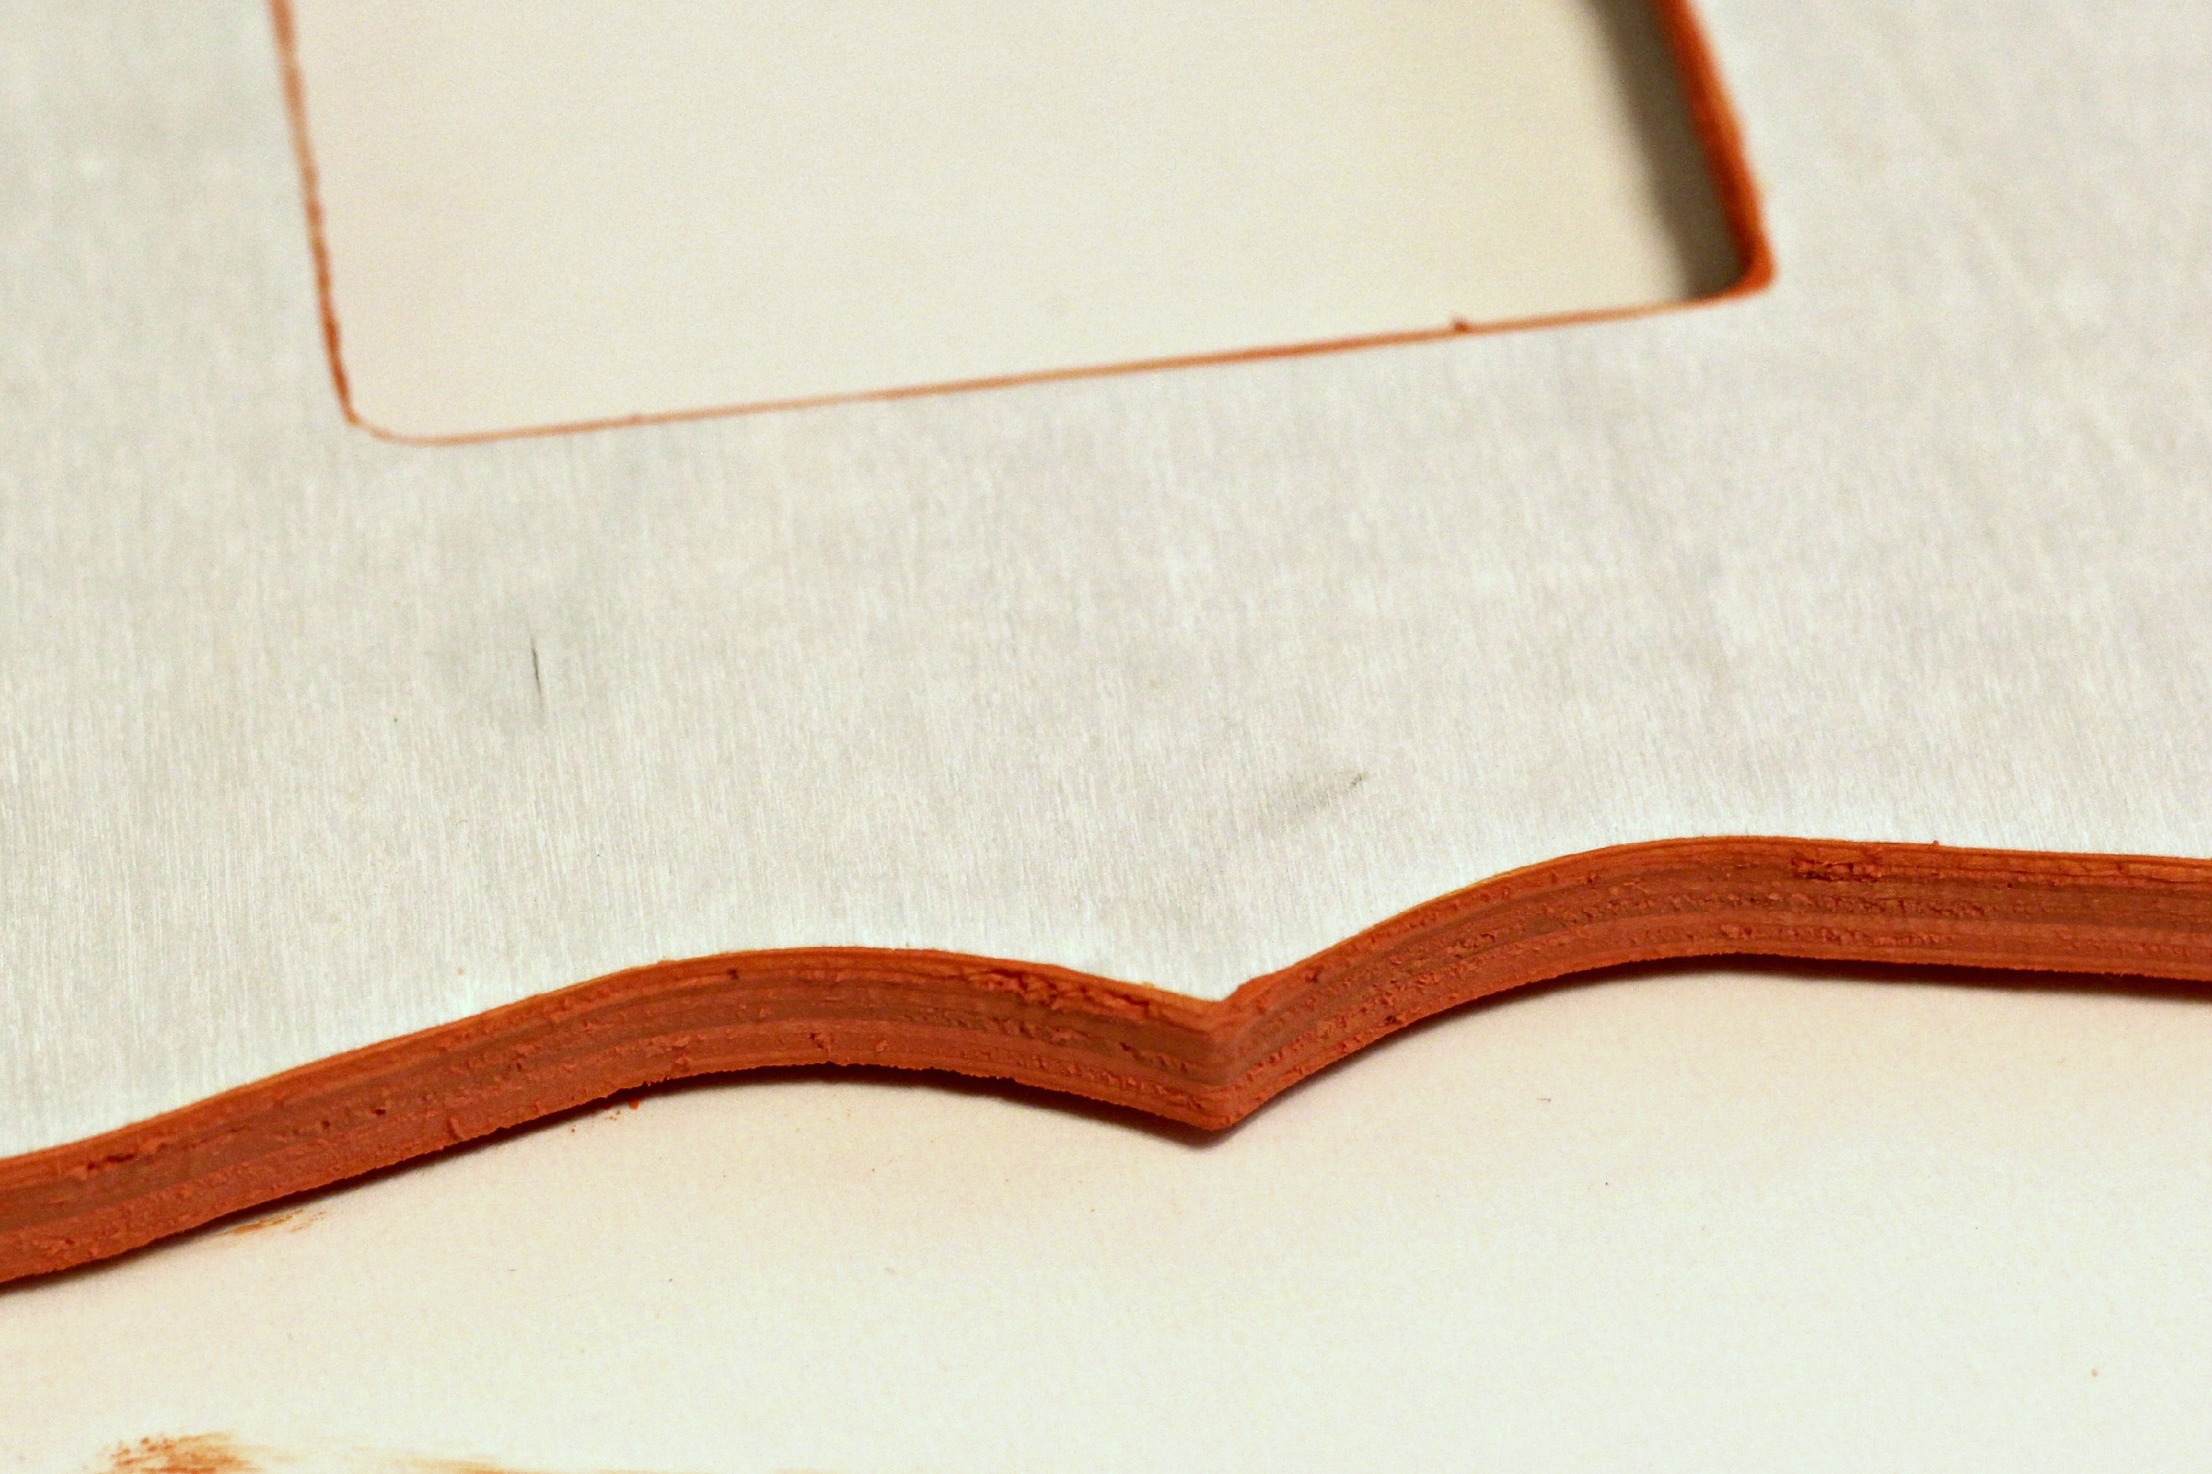
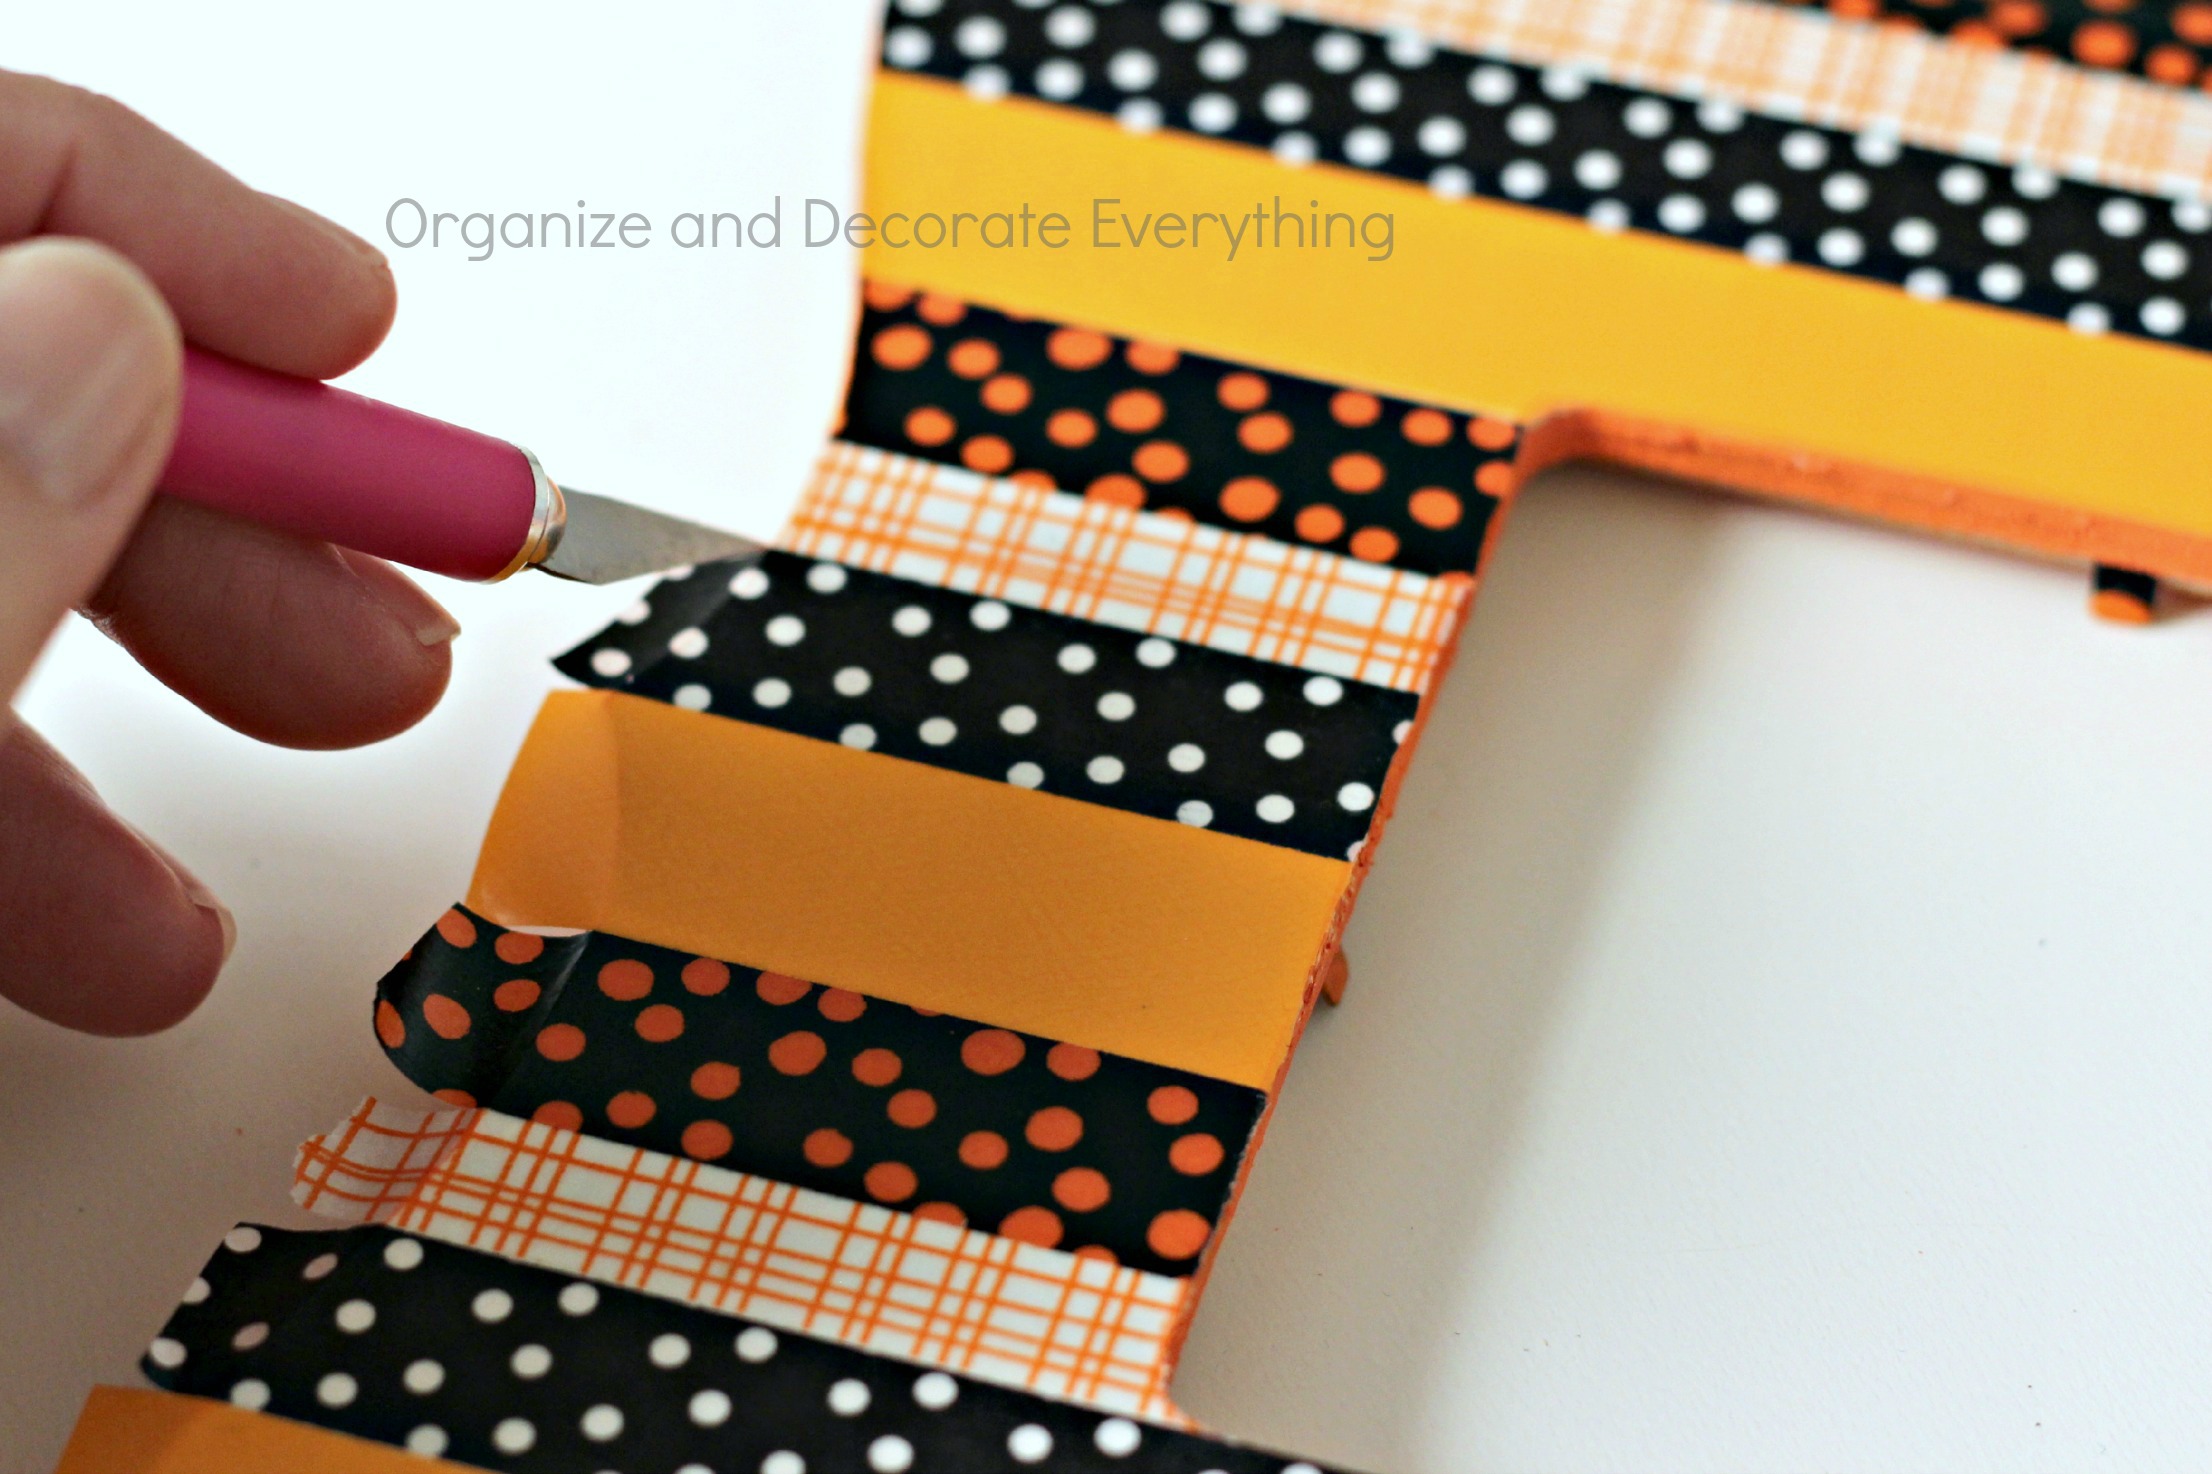
Start by painting the edge and inside of the frame in the color of your choice. No need to paint the whole frame, it’s going to be covered by the washi tape. Let it dry.
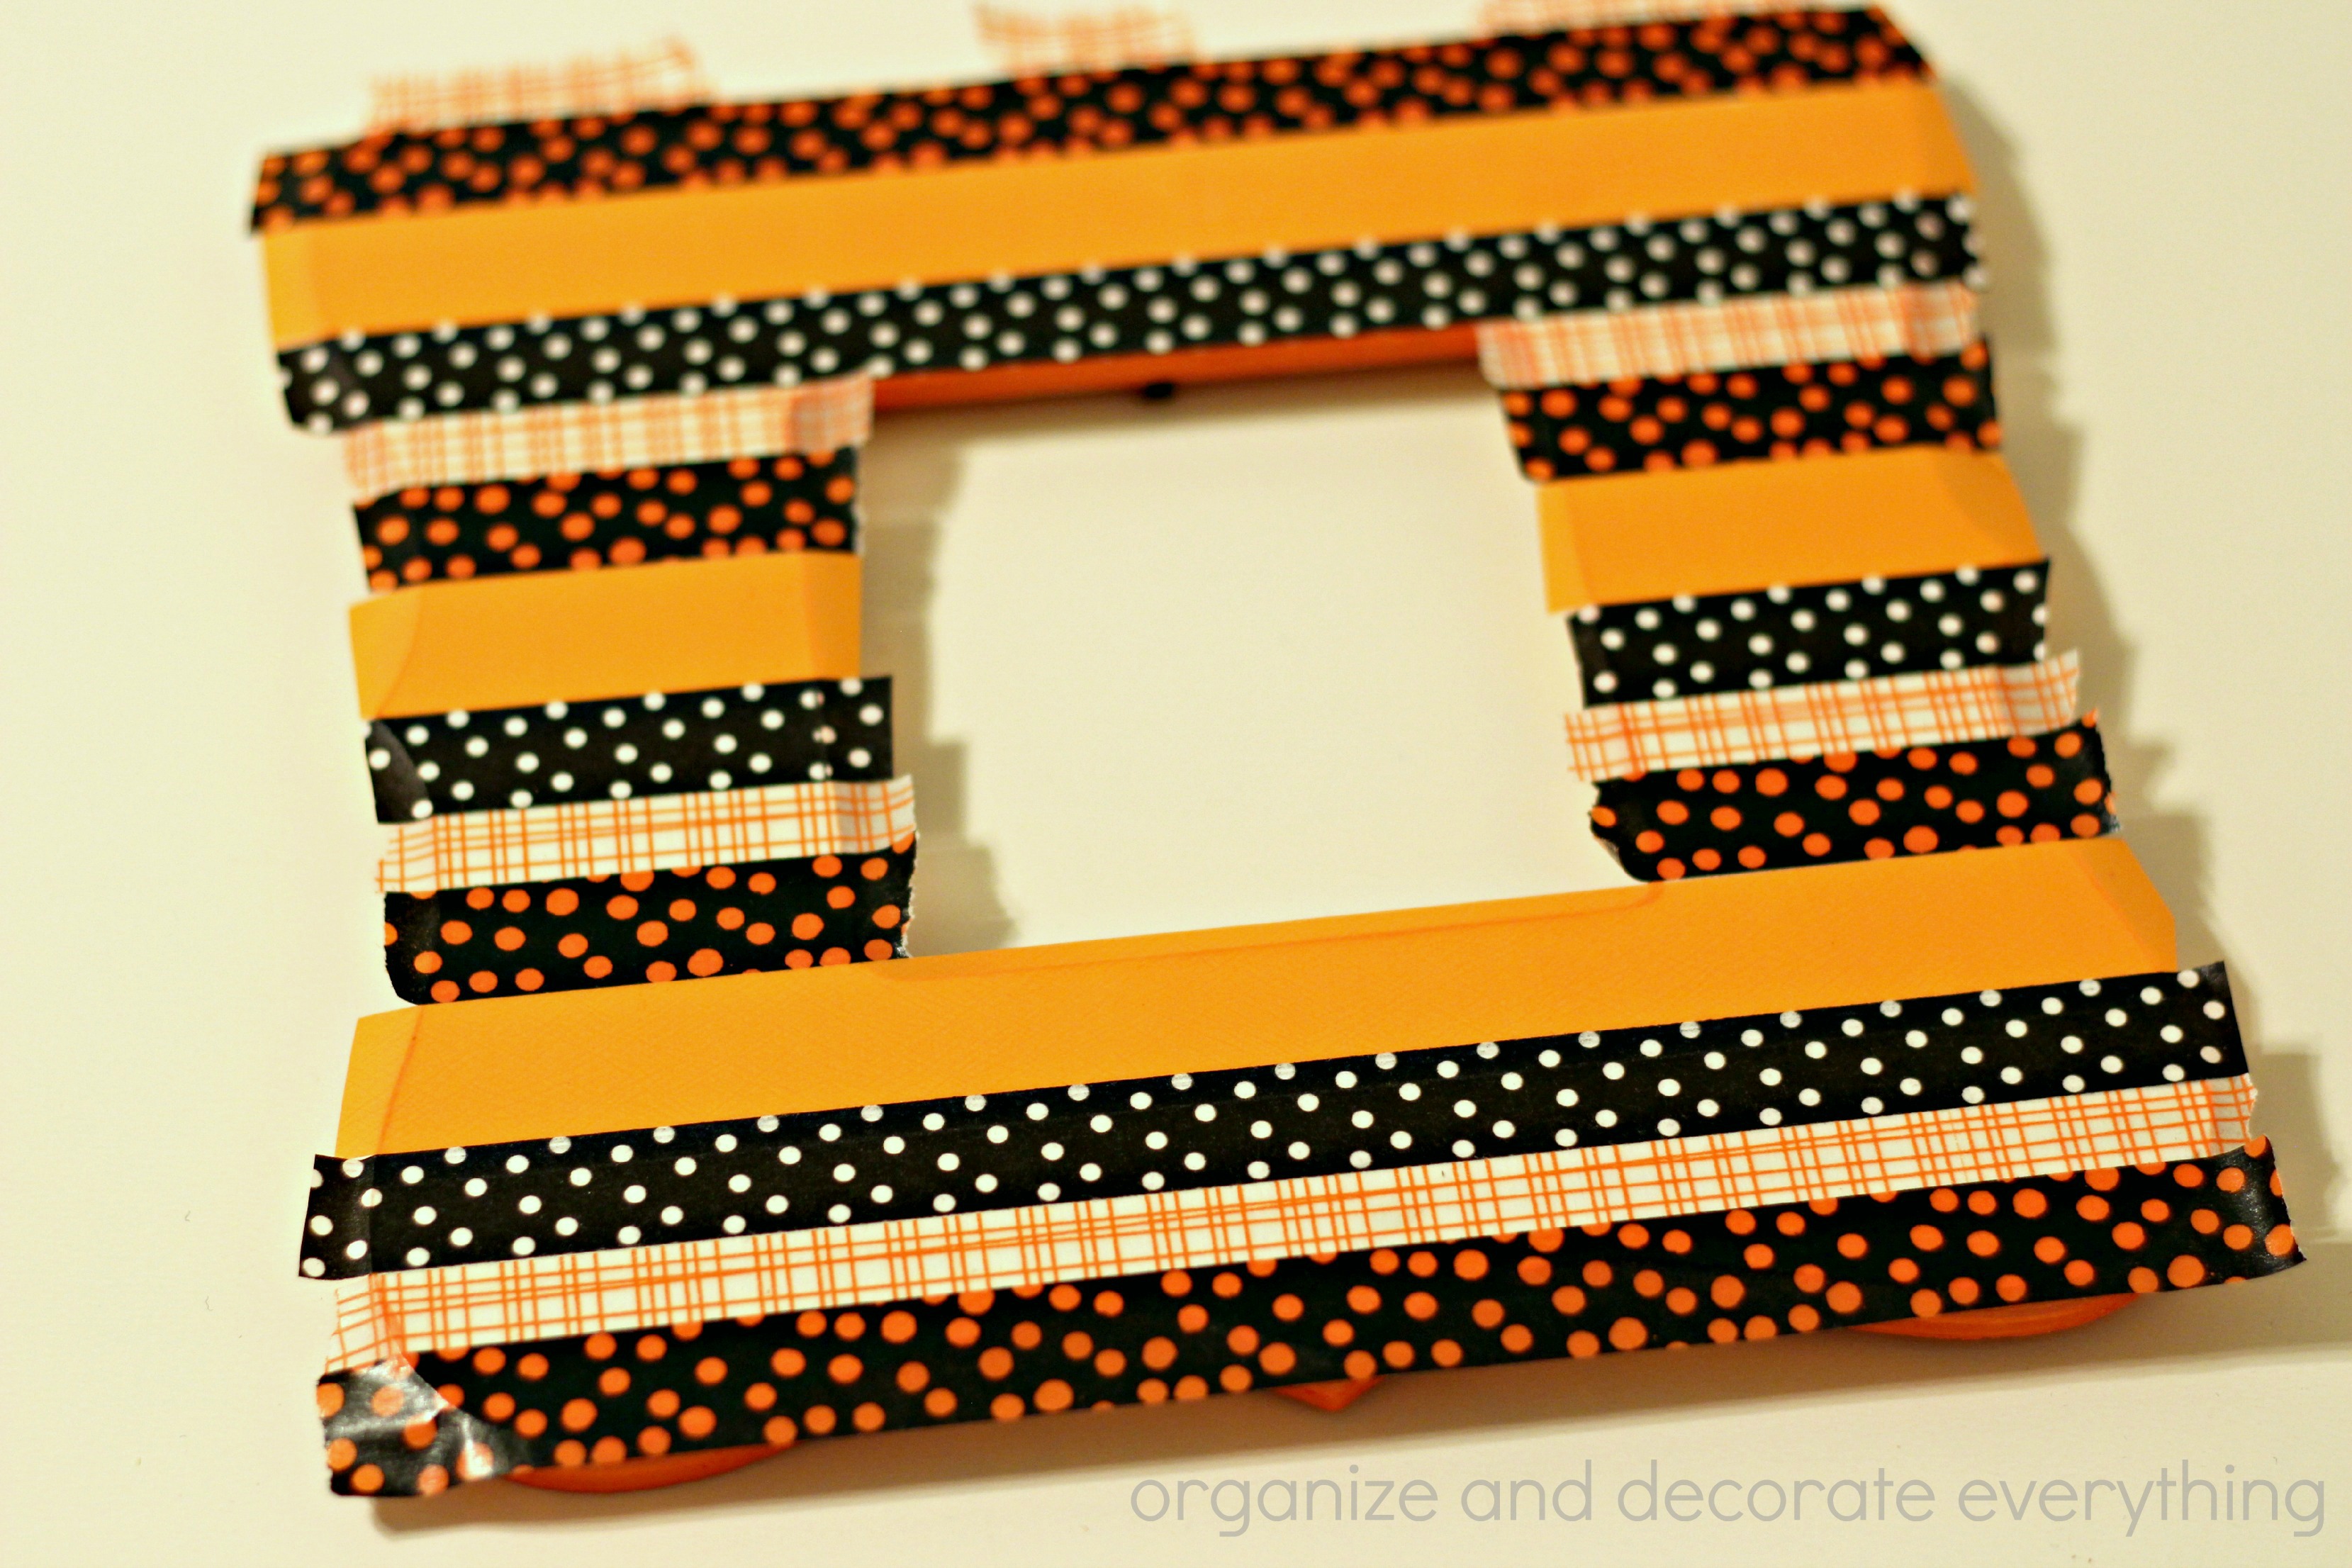
Decide what order you want the washi tape in, start at the top and cover the front of the frame. Make sure the tape is secure especially on the edges.
Use the knife to carefully cut the excess tape from the frame.
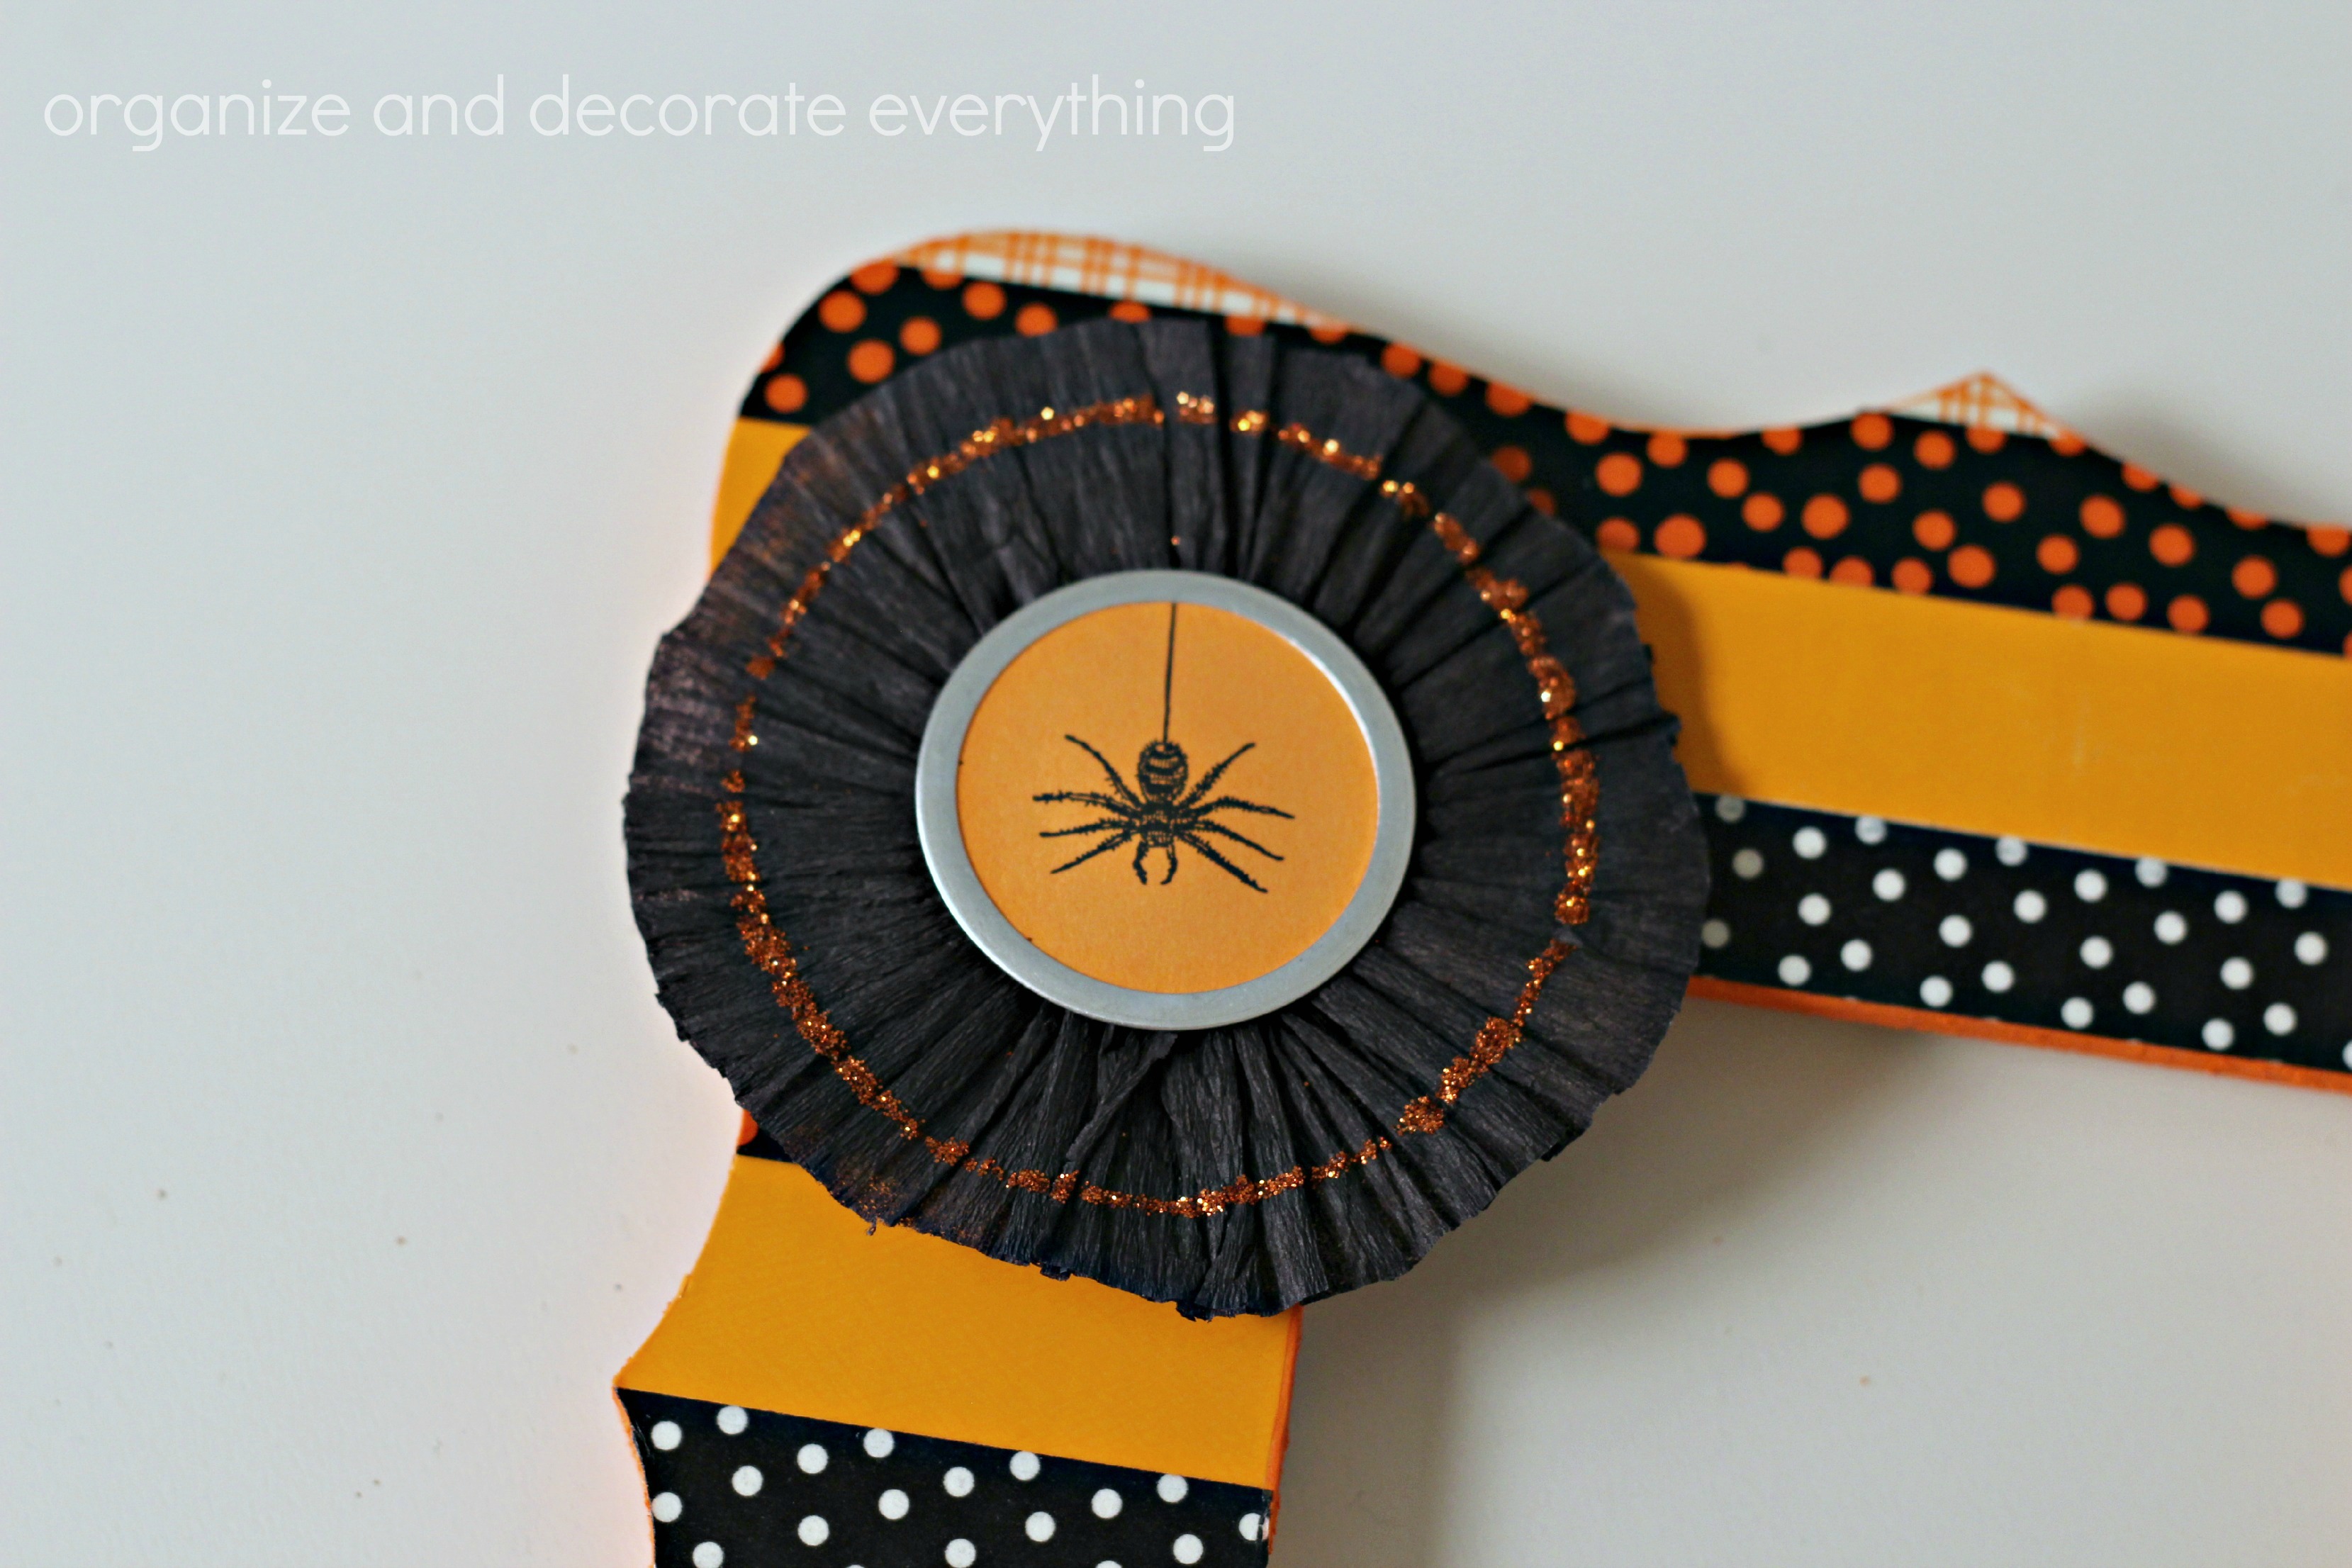
Add any embellishments you like. I had this cute Halloween medallion in my stash so I decided to use it. You could add any Halloween goodies you have hanging around.
Now you can insert a cute Halloween photo to display with your other Halloween decor.
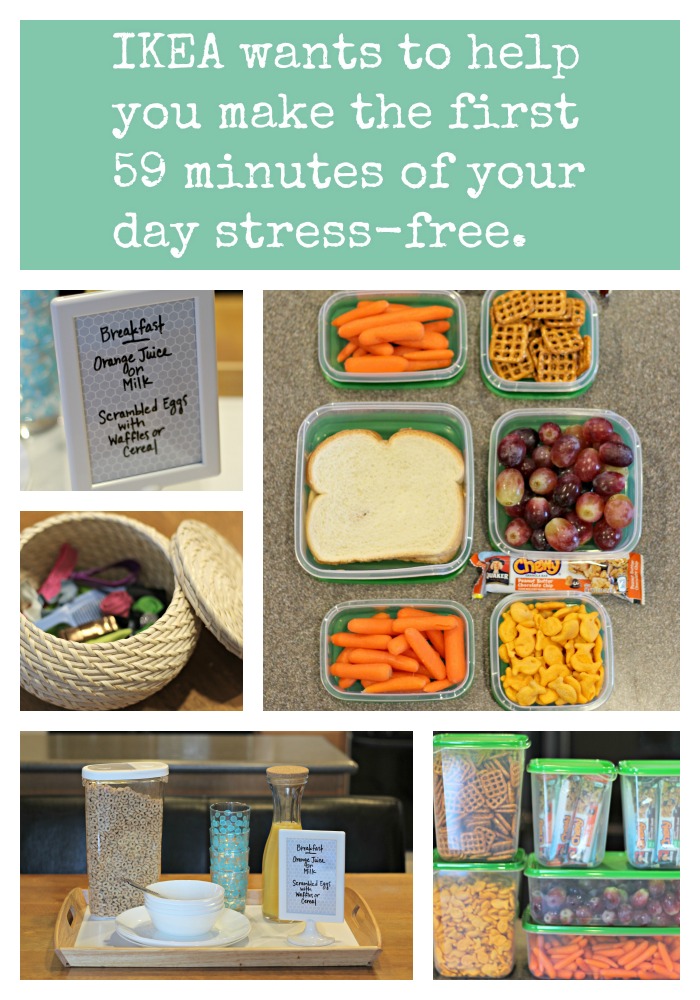
Do you remember this post where I talked about IKEA’s new program called First :59? IKEA wants to help you make the first 59 minutes of your day stress-free. They asked me to identify some challenges my family has in our morning routine. I decided to focus on our kitchen and more importantly breakfast and preparing lunches. The best part of the challenge was taking a trip to IKEA for everything I needed.
Our mornings are a little busy and staggered. I leave at 6:05, my older kids leave at 6:30, I come home at 7:15 and wake my younger one and get him ready for school, hubby leaves for work. I’m not even sure if my older kids eat every morning before they head off to school. We needed to get our mornings under control. Stressful mornings can affect the rest of your day and the last thing my kids and hubby need is more stress in their day.
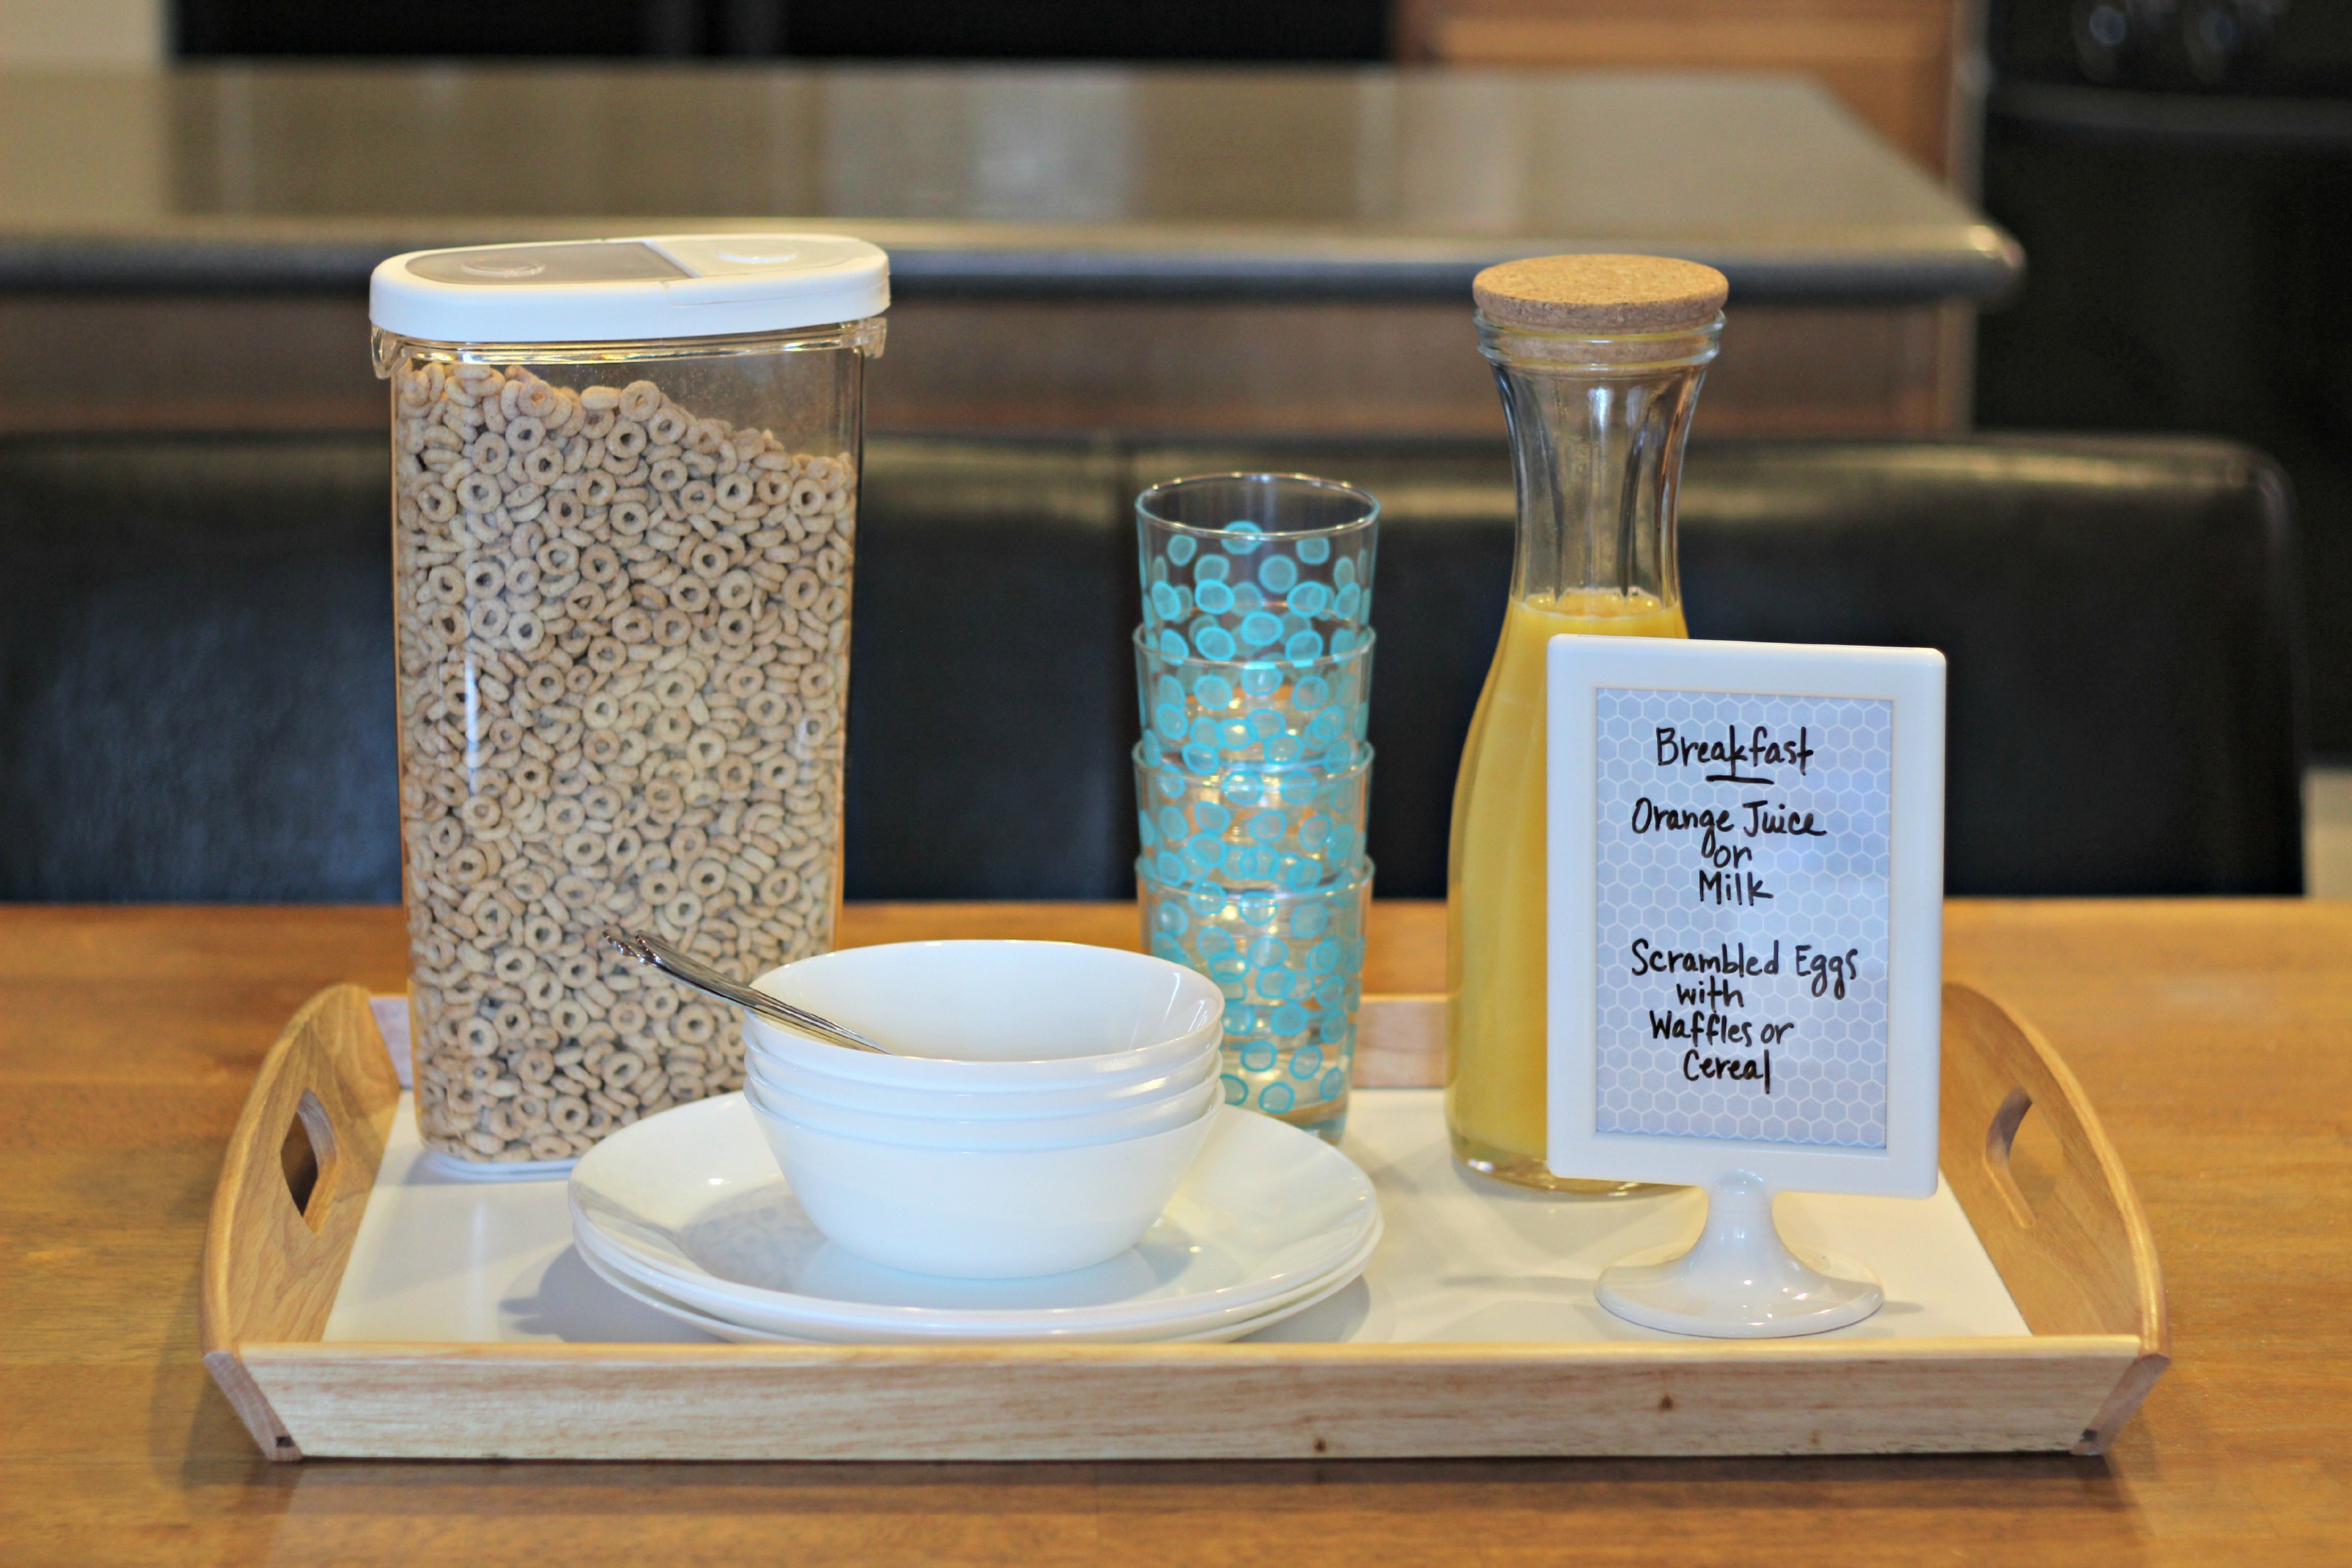
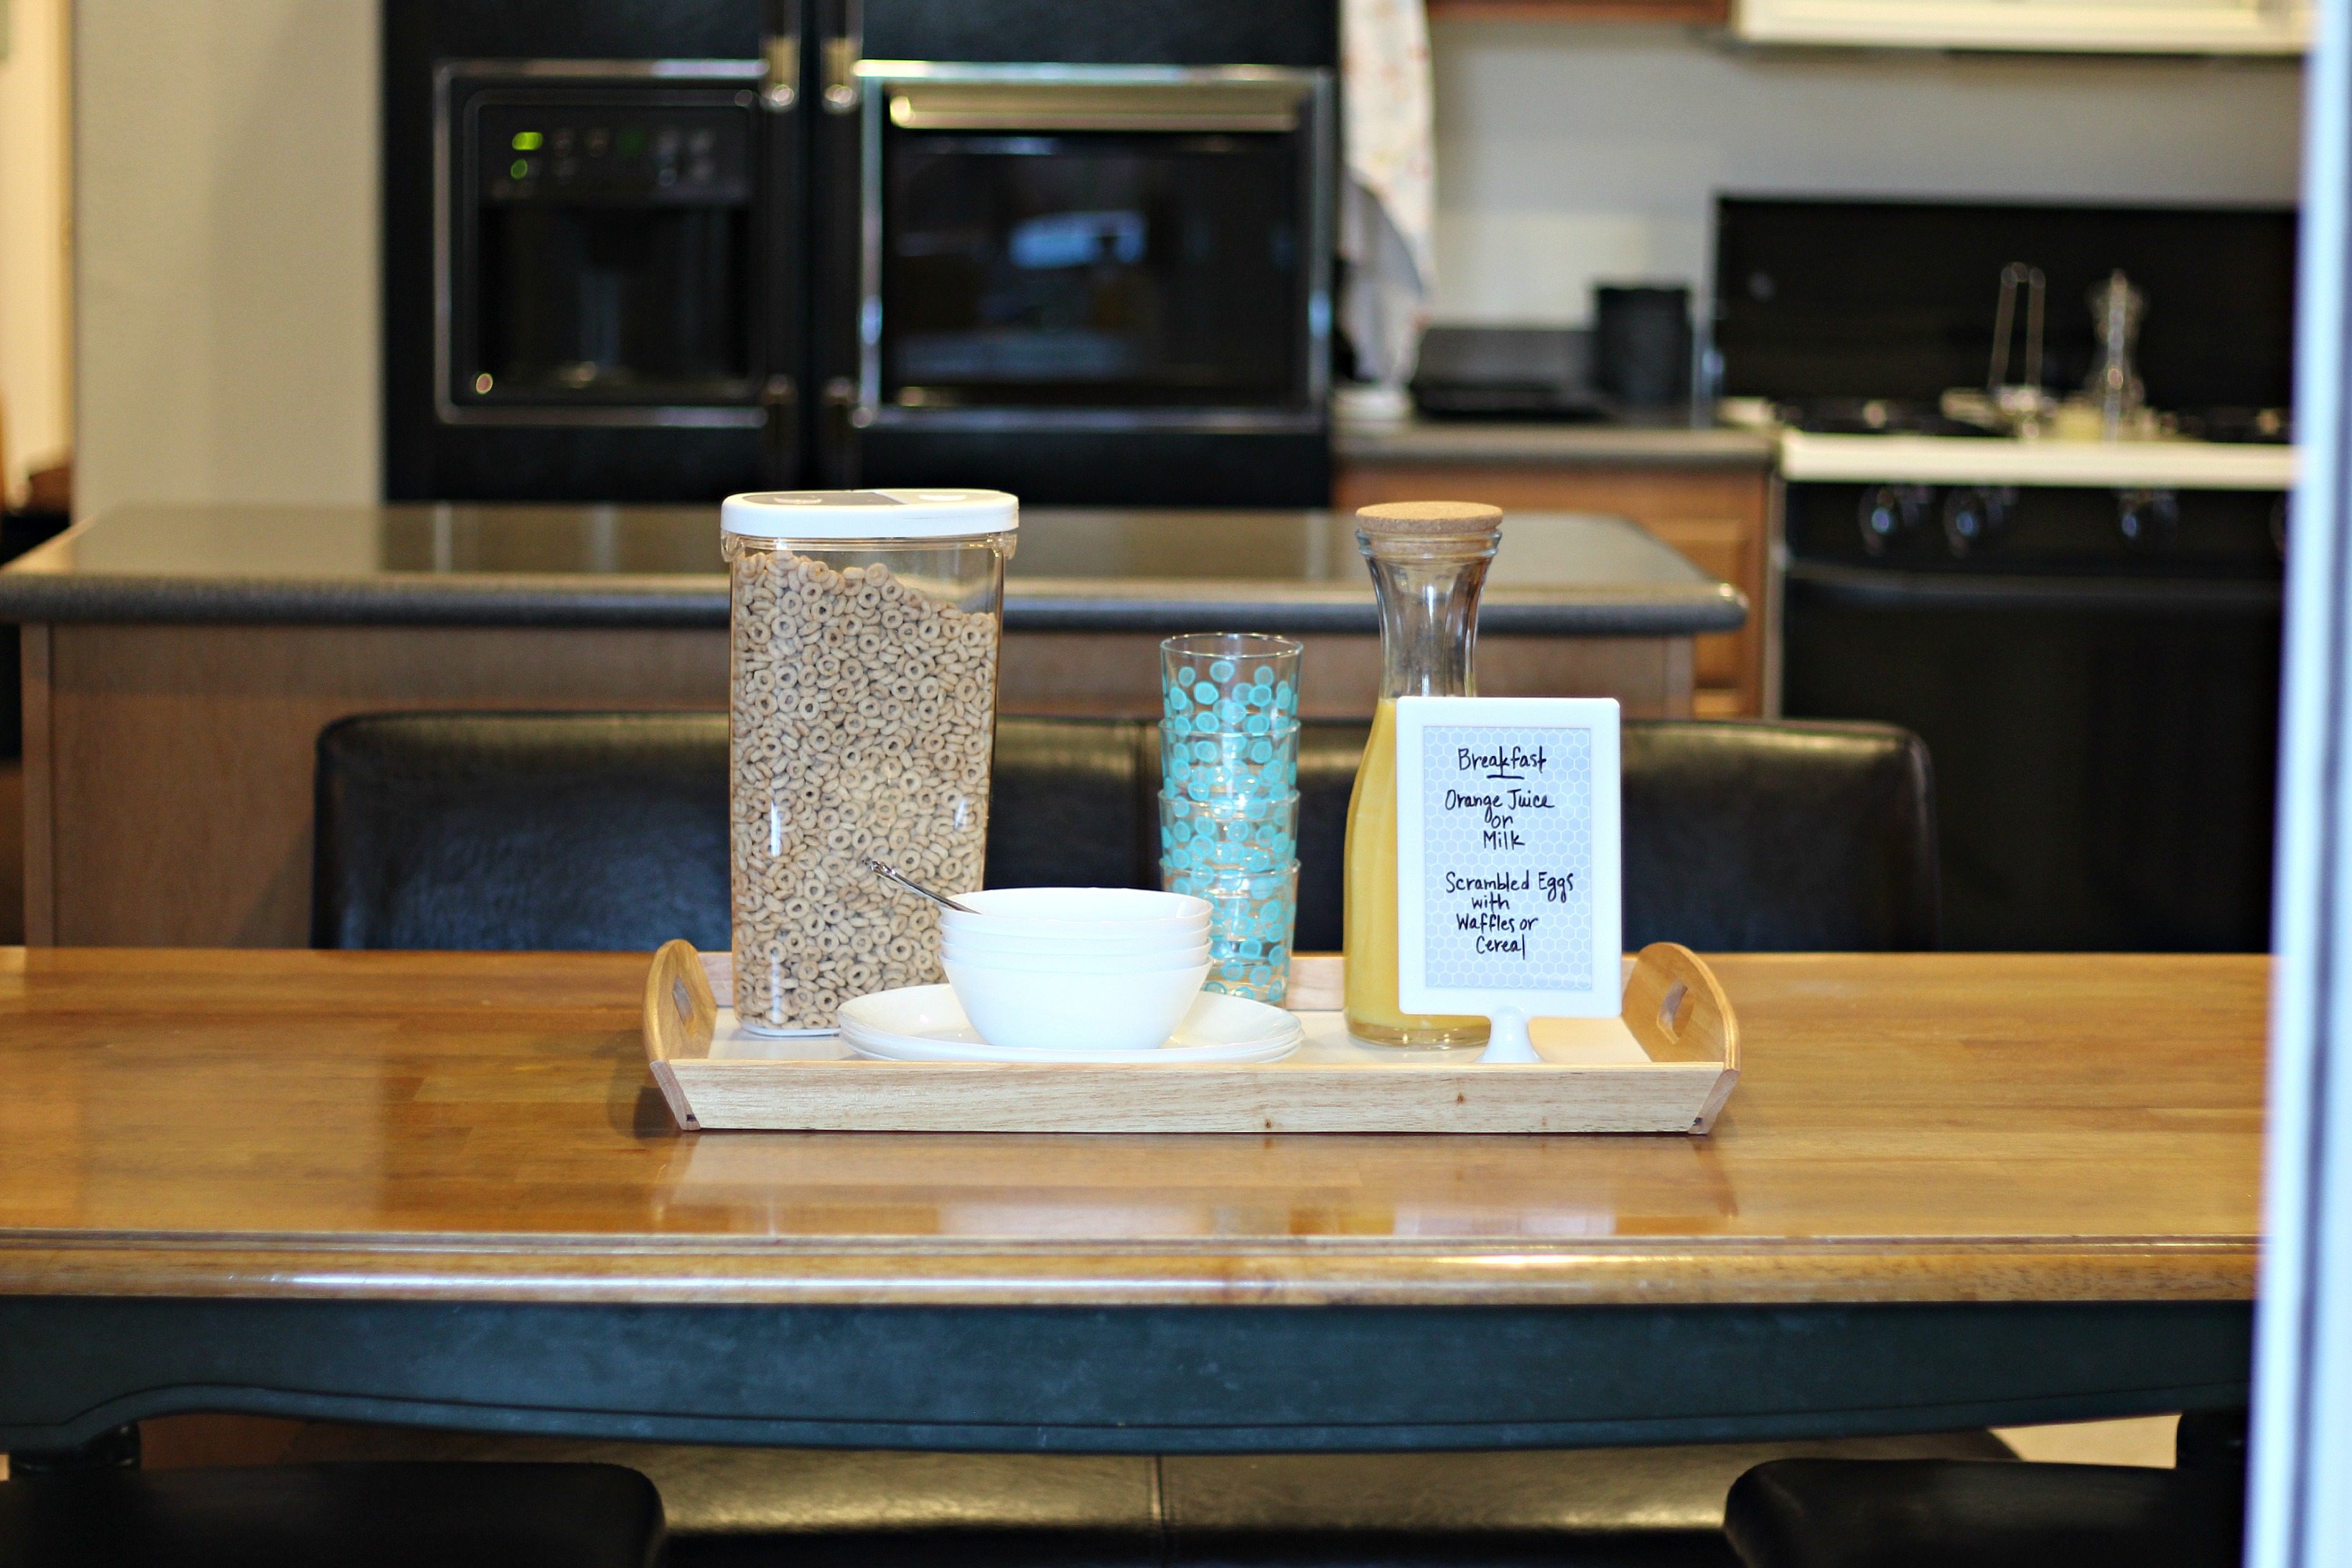
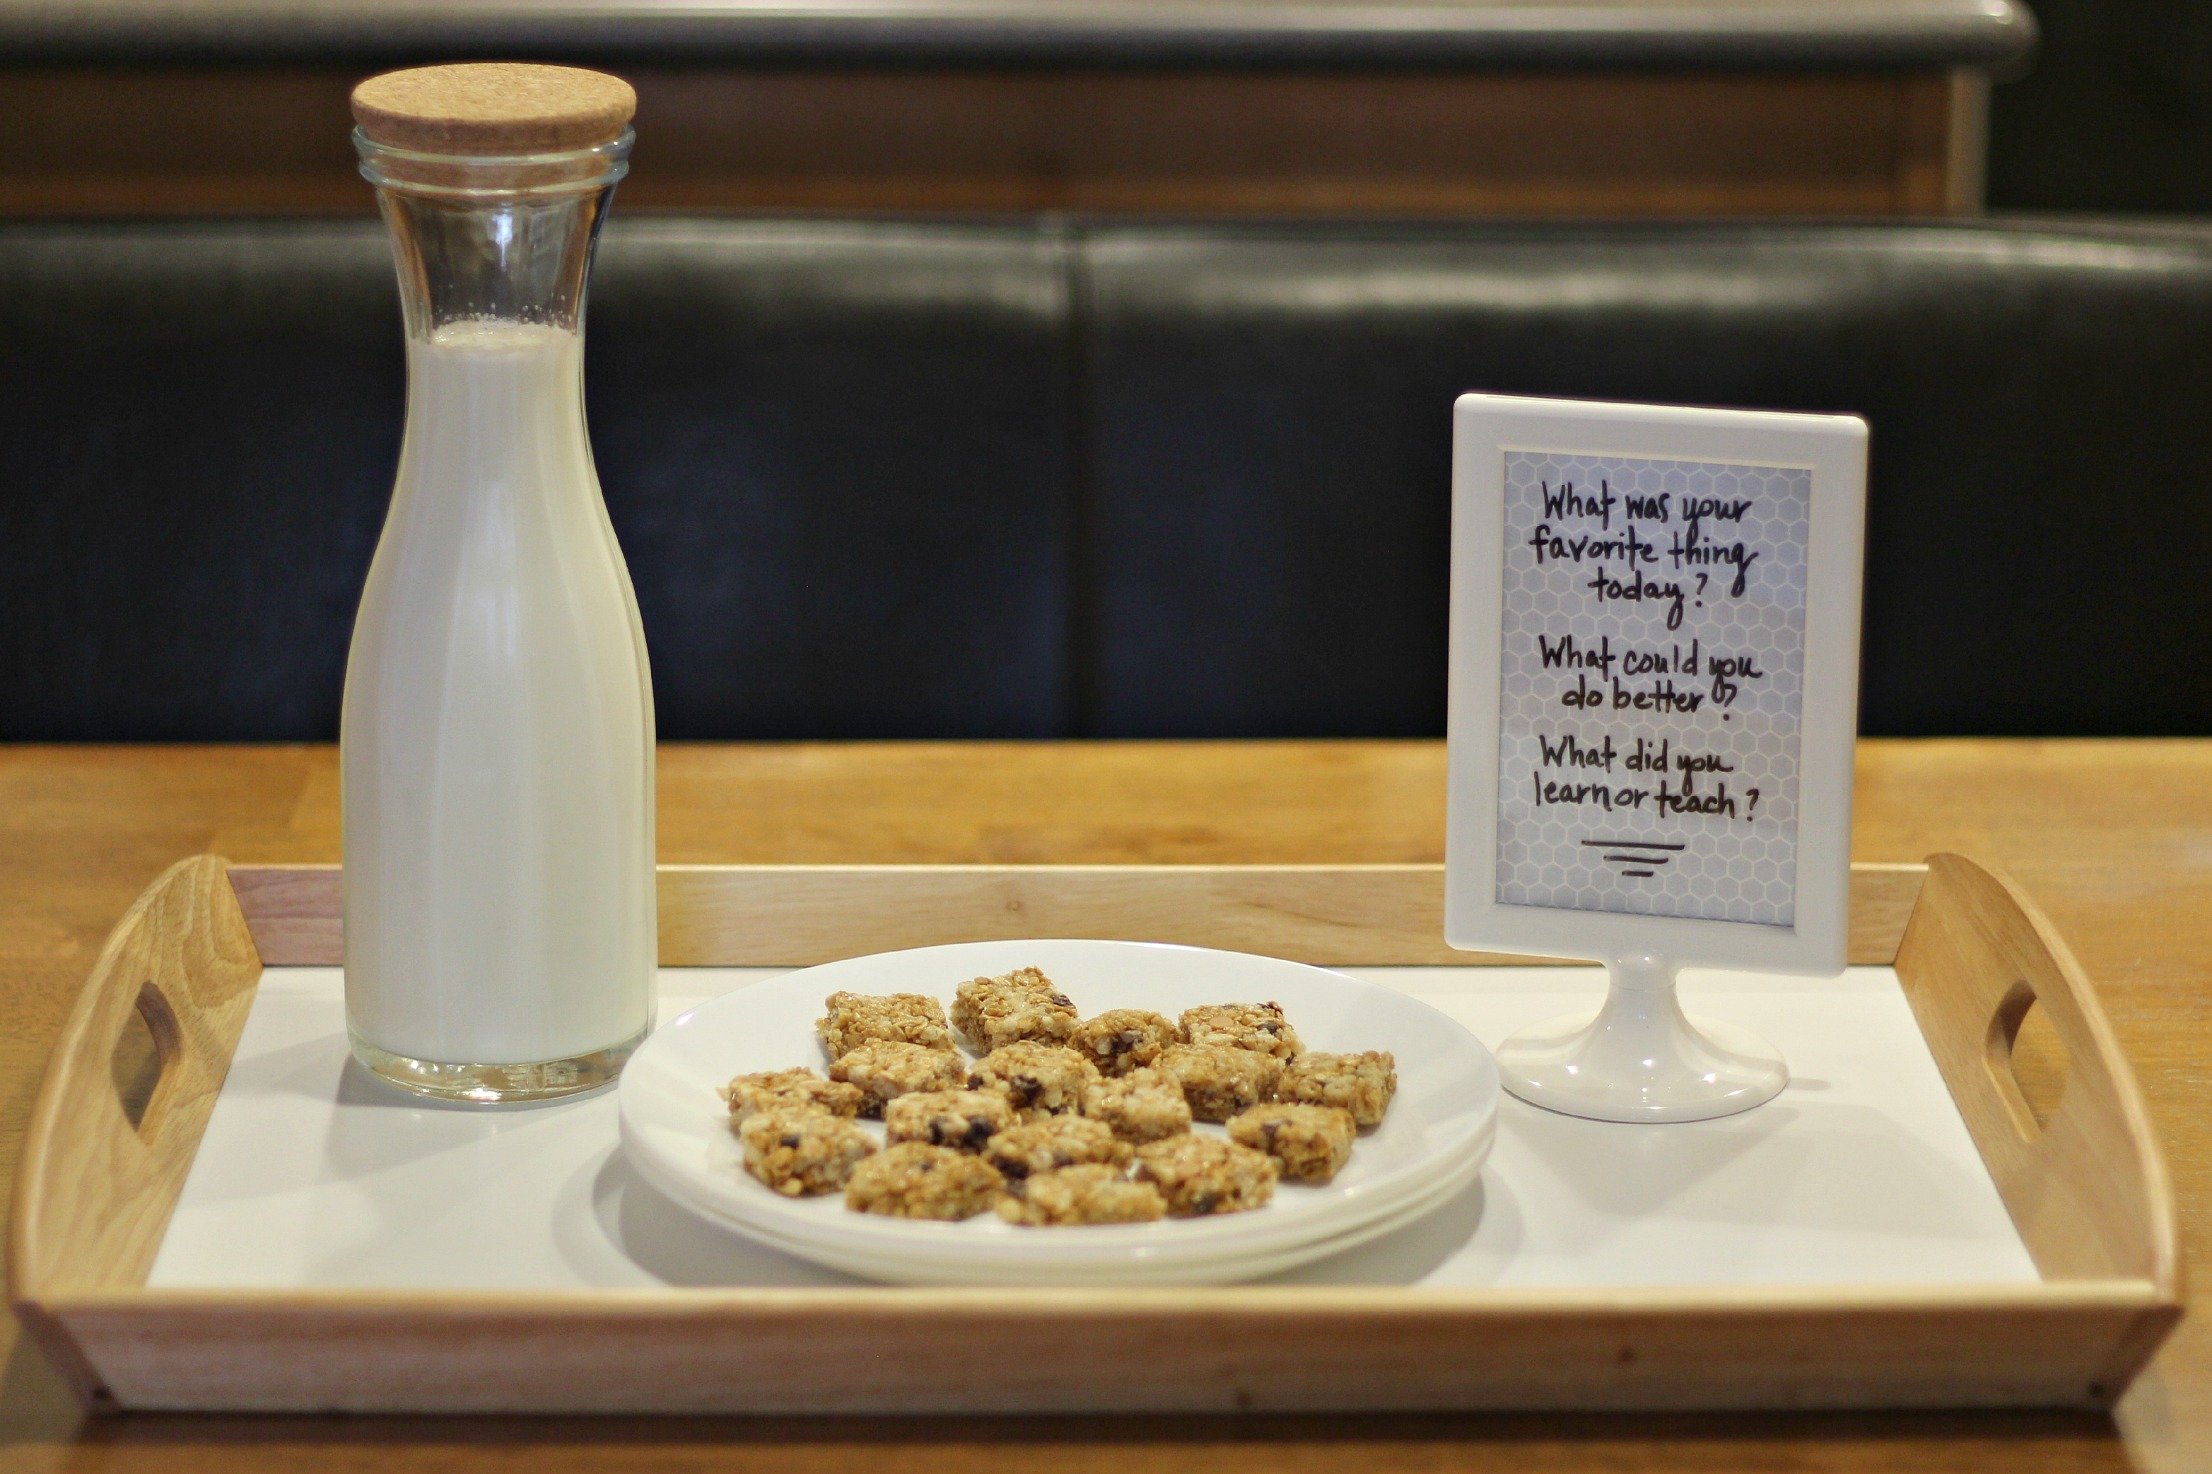
My youngest thrives on routine. I think he takes after me. He likes to know what’s going to happen in his day, what we have planned in the evening, and what he’s going to eat for meals. I came up with a plan to make sure everyone’s eating breakfast and they know what’s available. You know how I love trays. The KLACK tray is the perfect size to hold all our breakfast supplies. I love it’s simple style which makes it easy to fit into every decor.
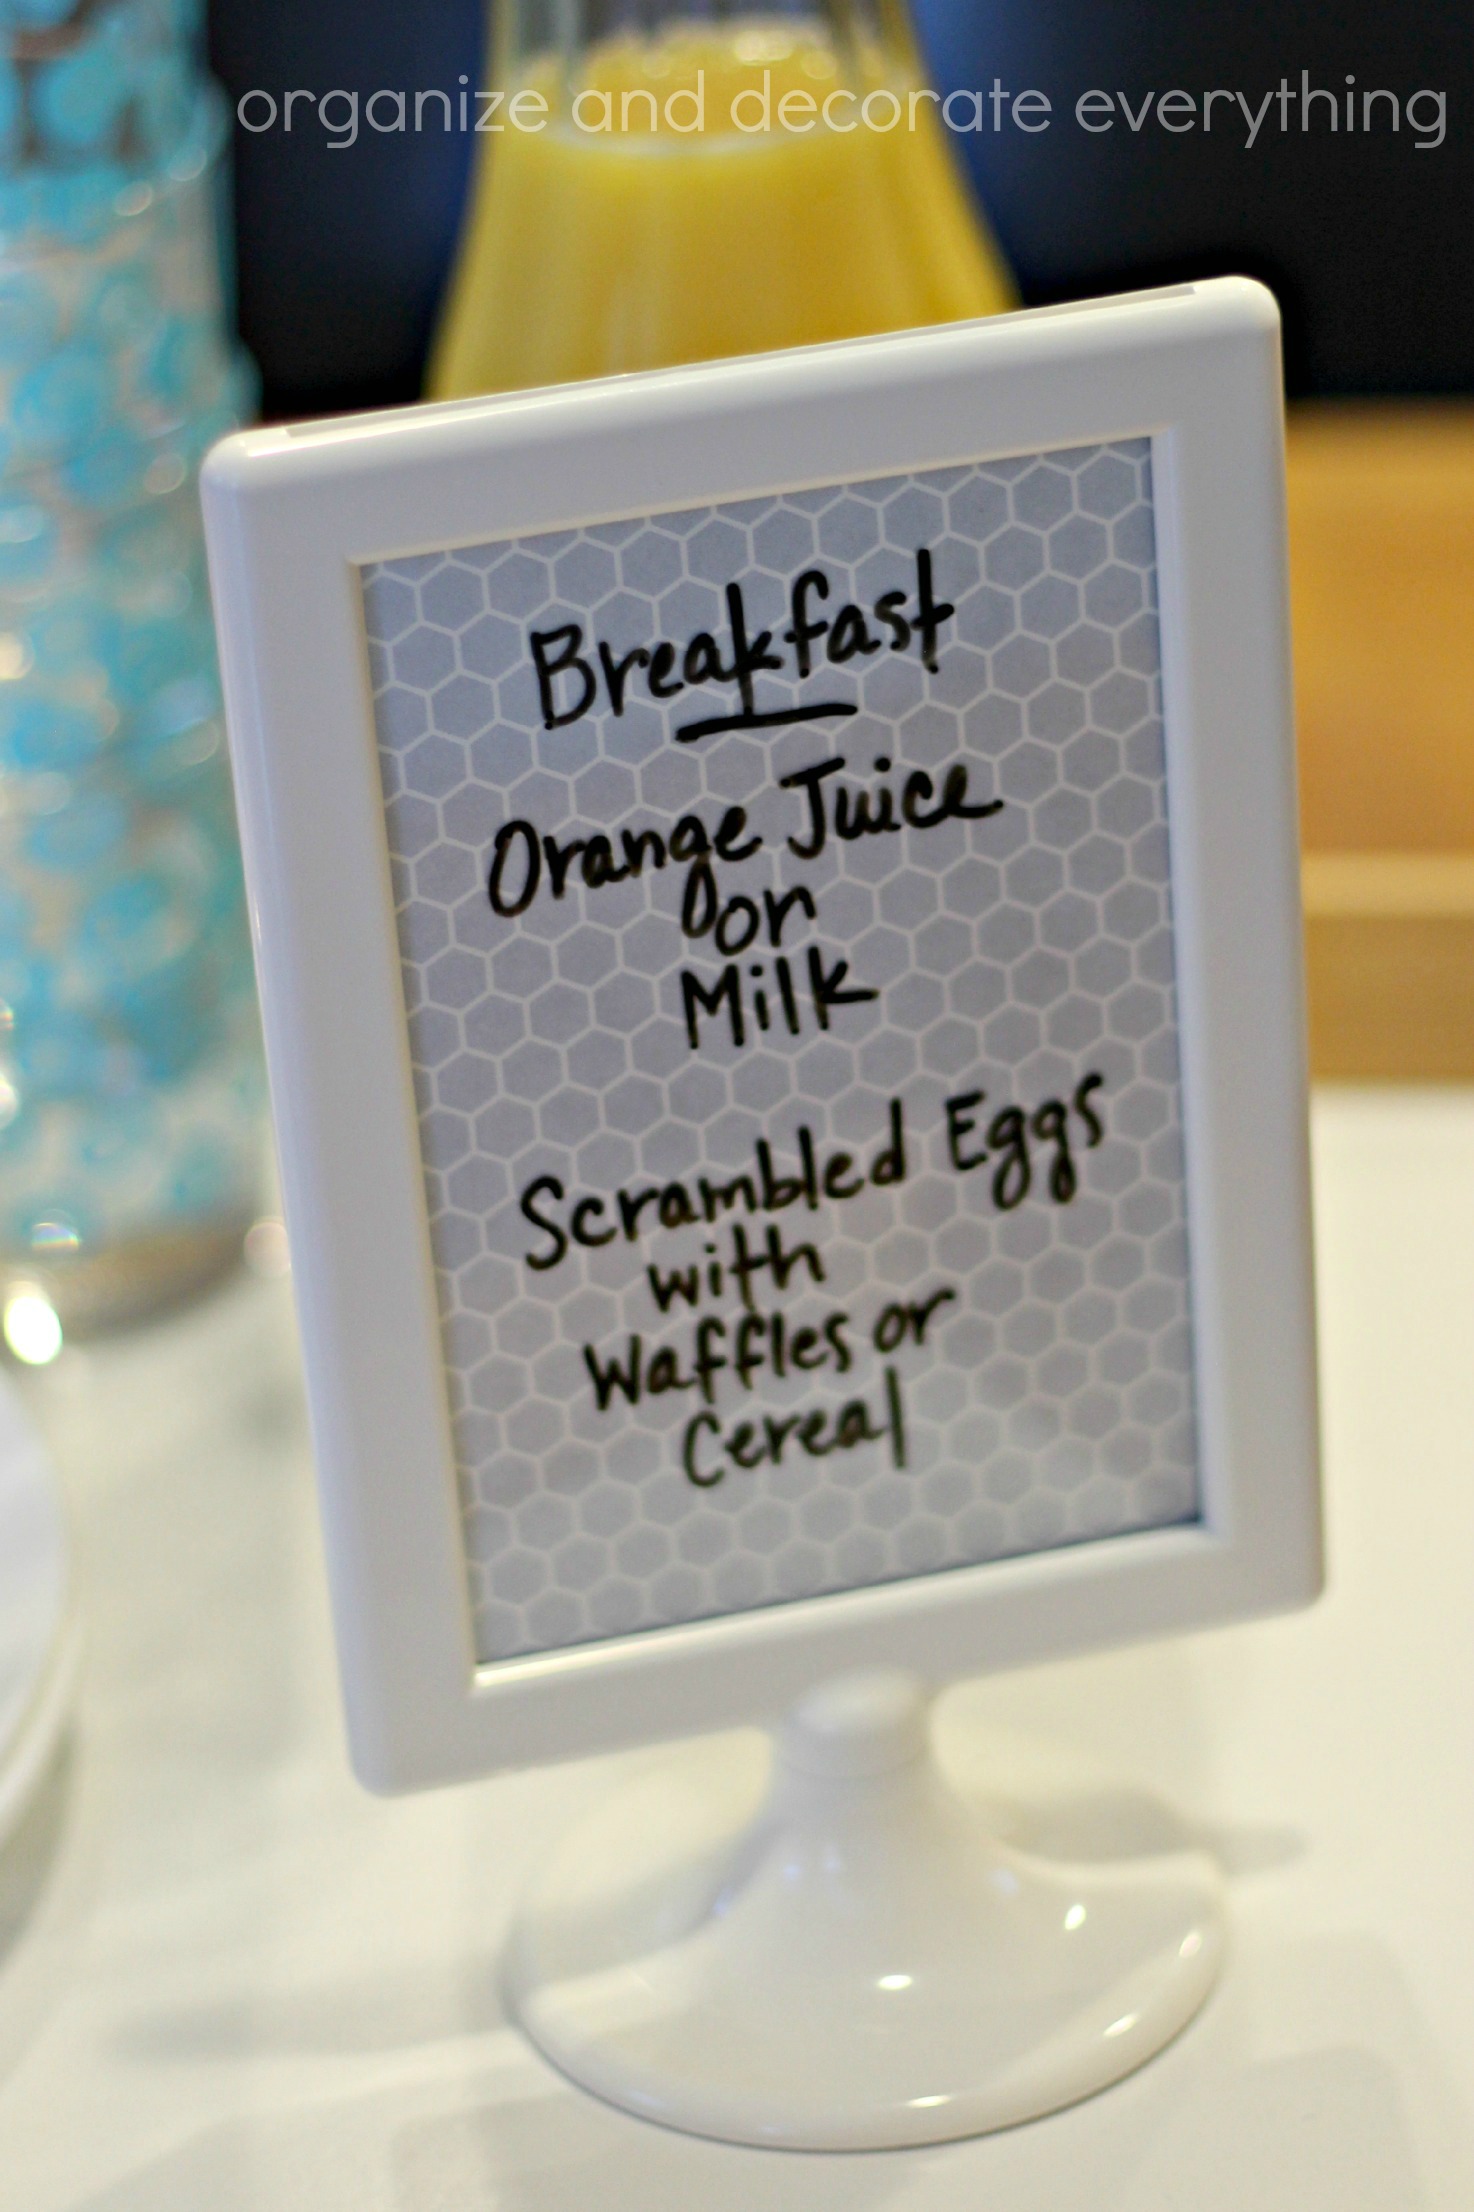
Every evening I have been setting the table for breakfast, no more having to get into 4 different cupboards to get everything out. By making everything easy to get to they are much more likely to eat breakfast. I also created a simple menu using the TOLSBY frame, scrapbook paper, and a dry erase marker. It’s easy to quickly write the breakfast menu. Now they know what’s available and can have a good breakfast before they head off to school.
It’s also a great way to leave little notes in the morning. Anything to make mornings easier and to get a great start to the day.
IKEA has a great selection of dishware, eating utensils, glasses, and food containers to complete your kitchen morning routine. I stuck with white dishware but bought some fun juice glasses. The LONSAM carafe is one of my favorite purchases. It’s small enough for my youngest to pour the juice himself, plus I love the cork top.
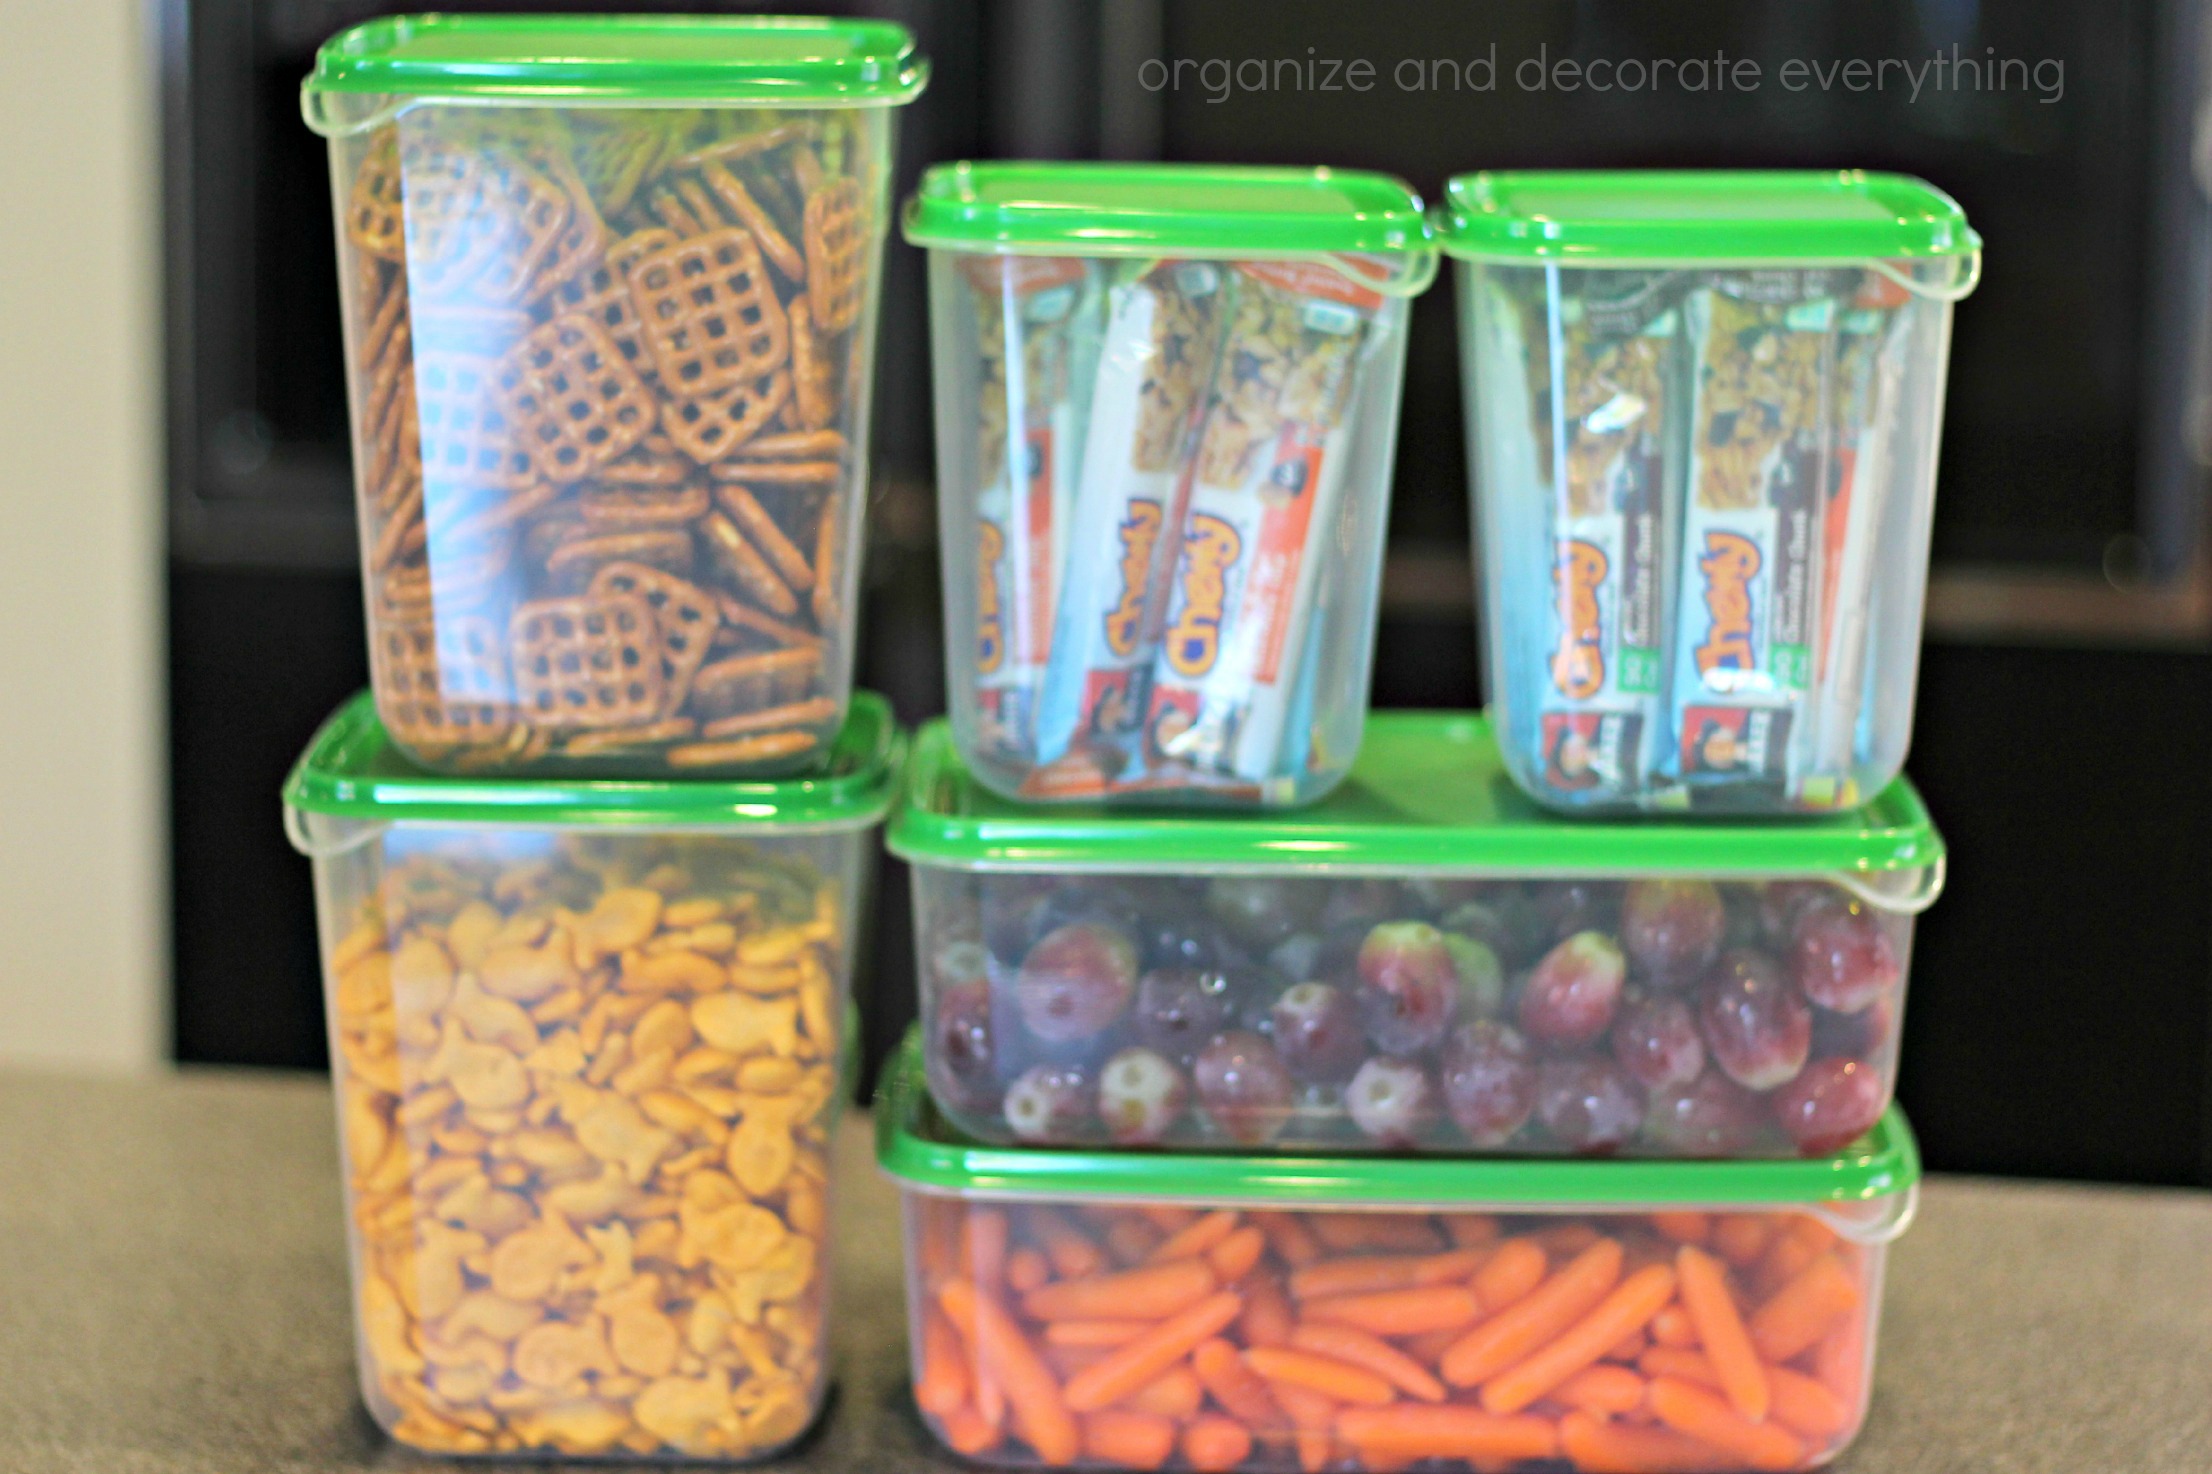
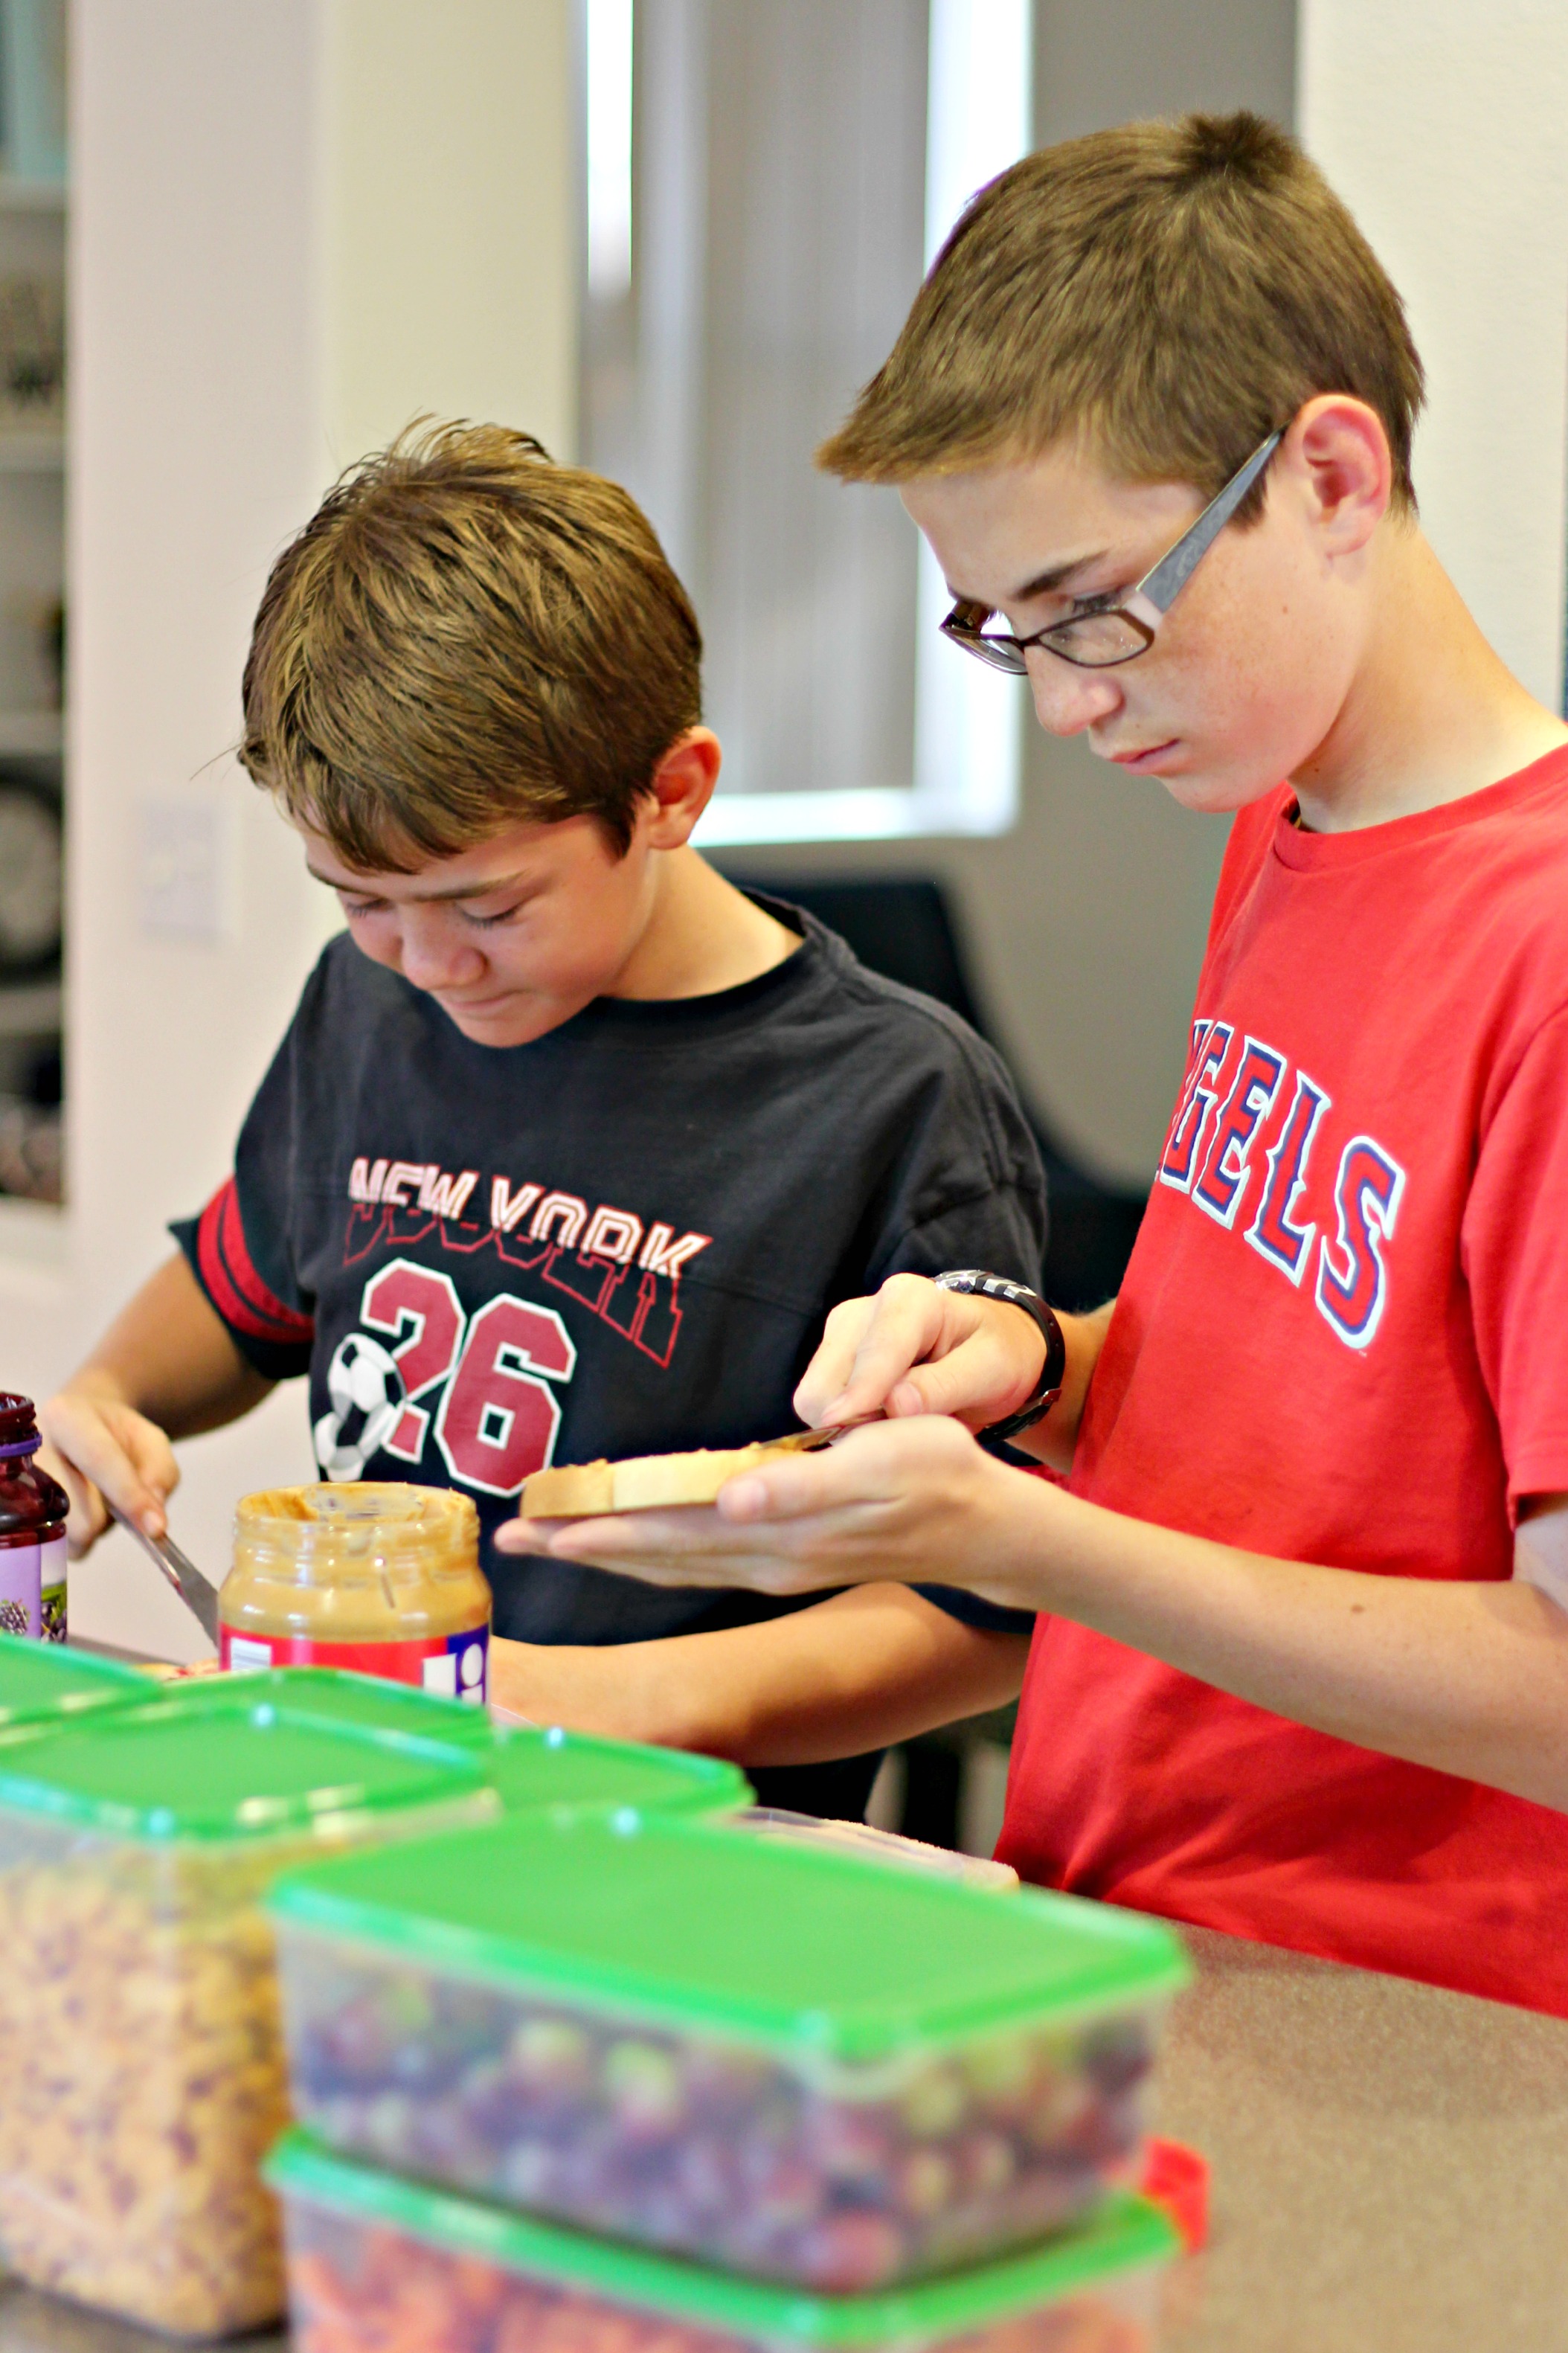
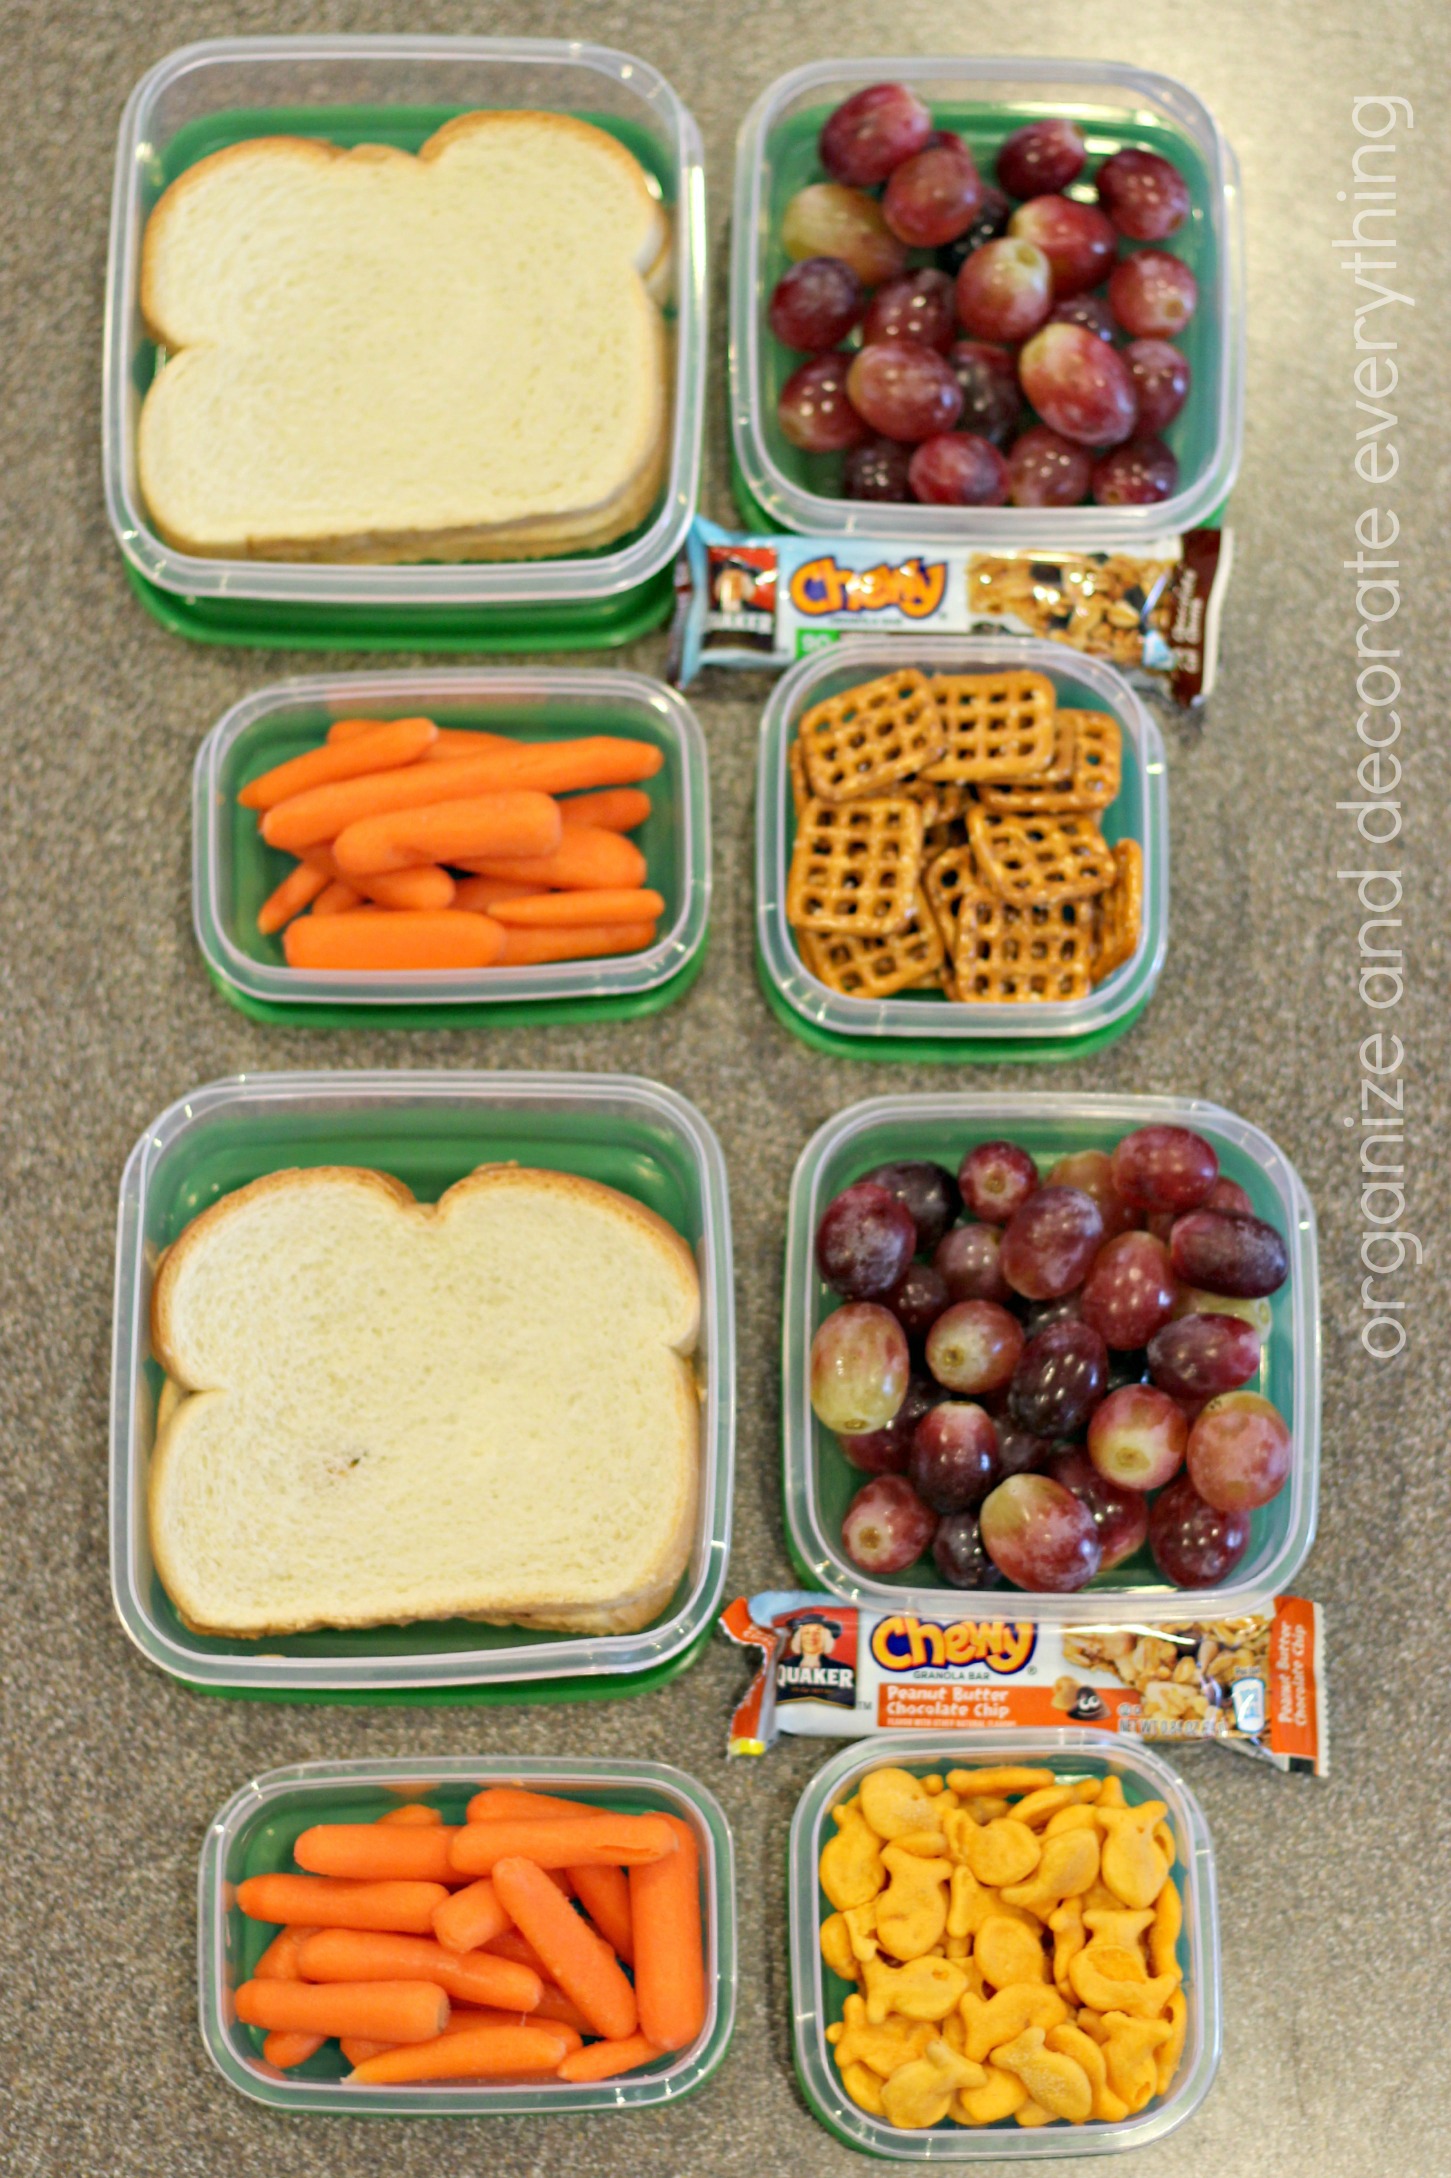
We normally make lunches the night before, it’s just one less thing to add to our morning routine. We try to get as much done the night before as we can, such as: making lunches, picking out clothes, making sure backpacks are loaded, and the breakfast tray is ready. I love these PRUTA containers for packing lunches. The larger containers hold food to prepare the lunches and the smaller ones are perfect for the lunch boxes.
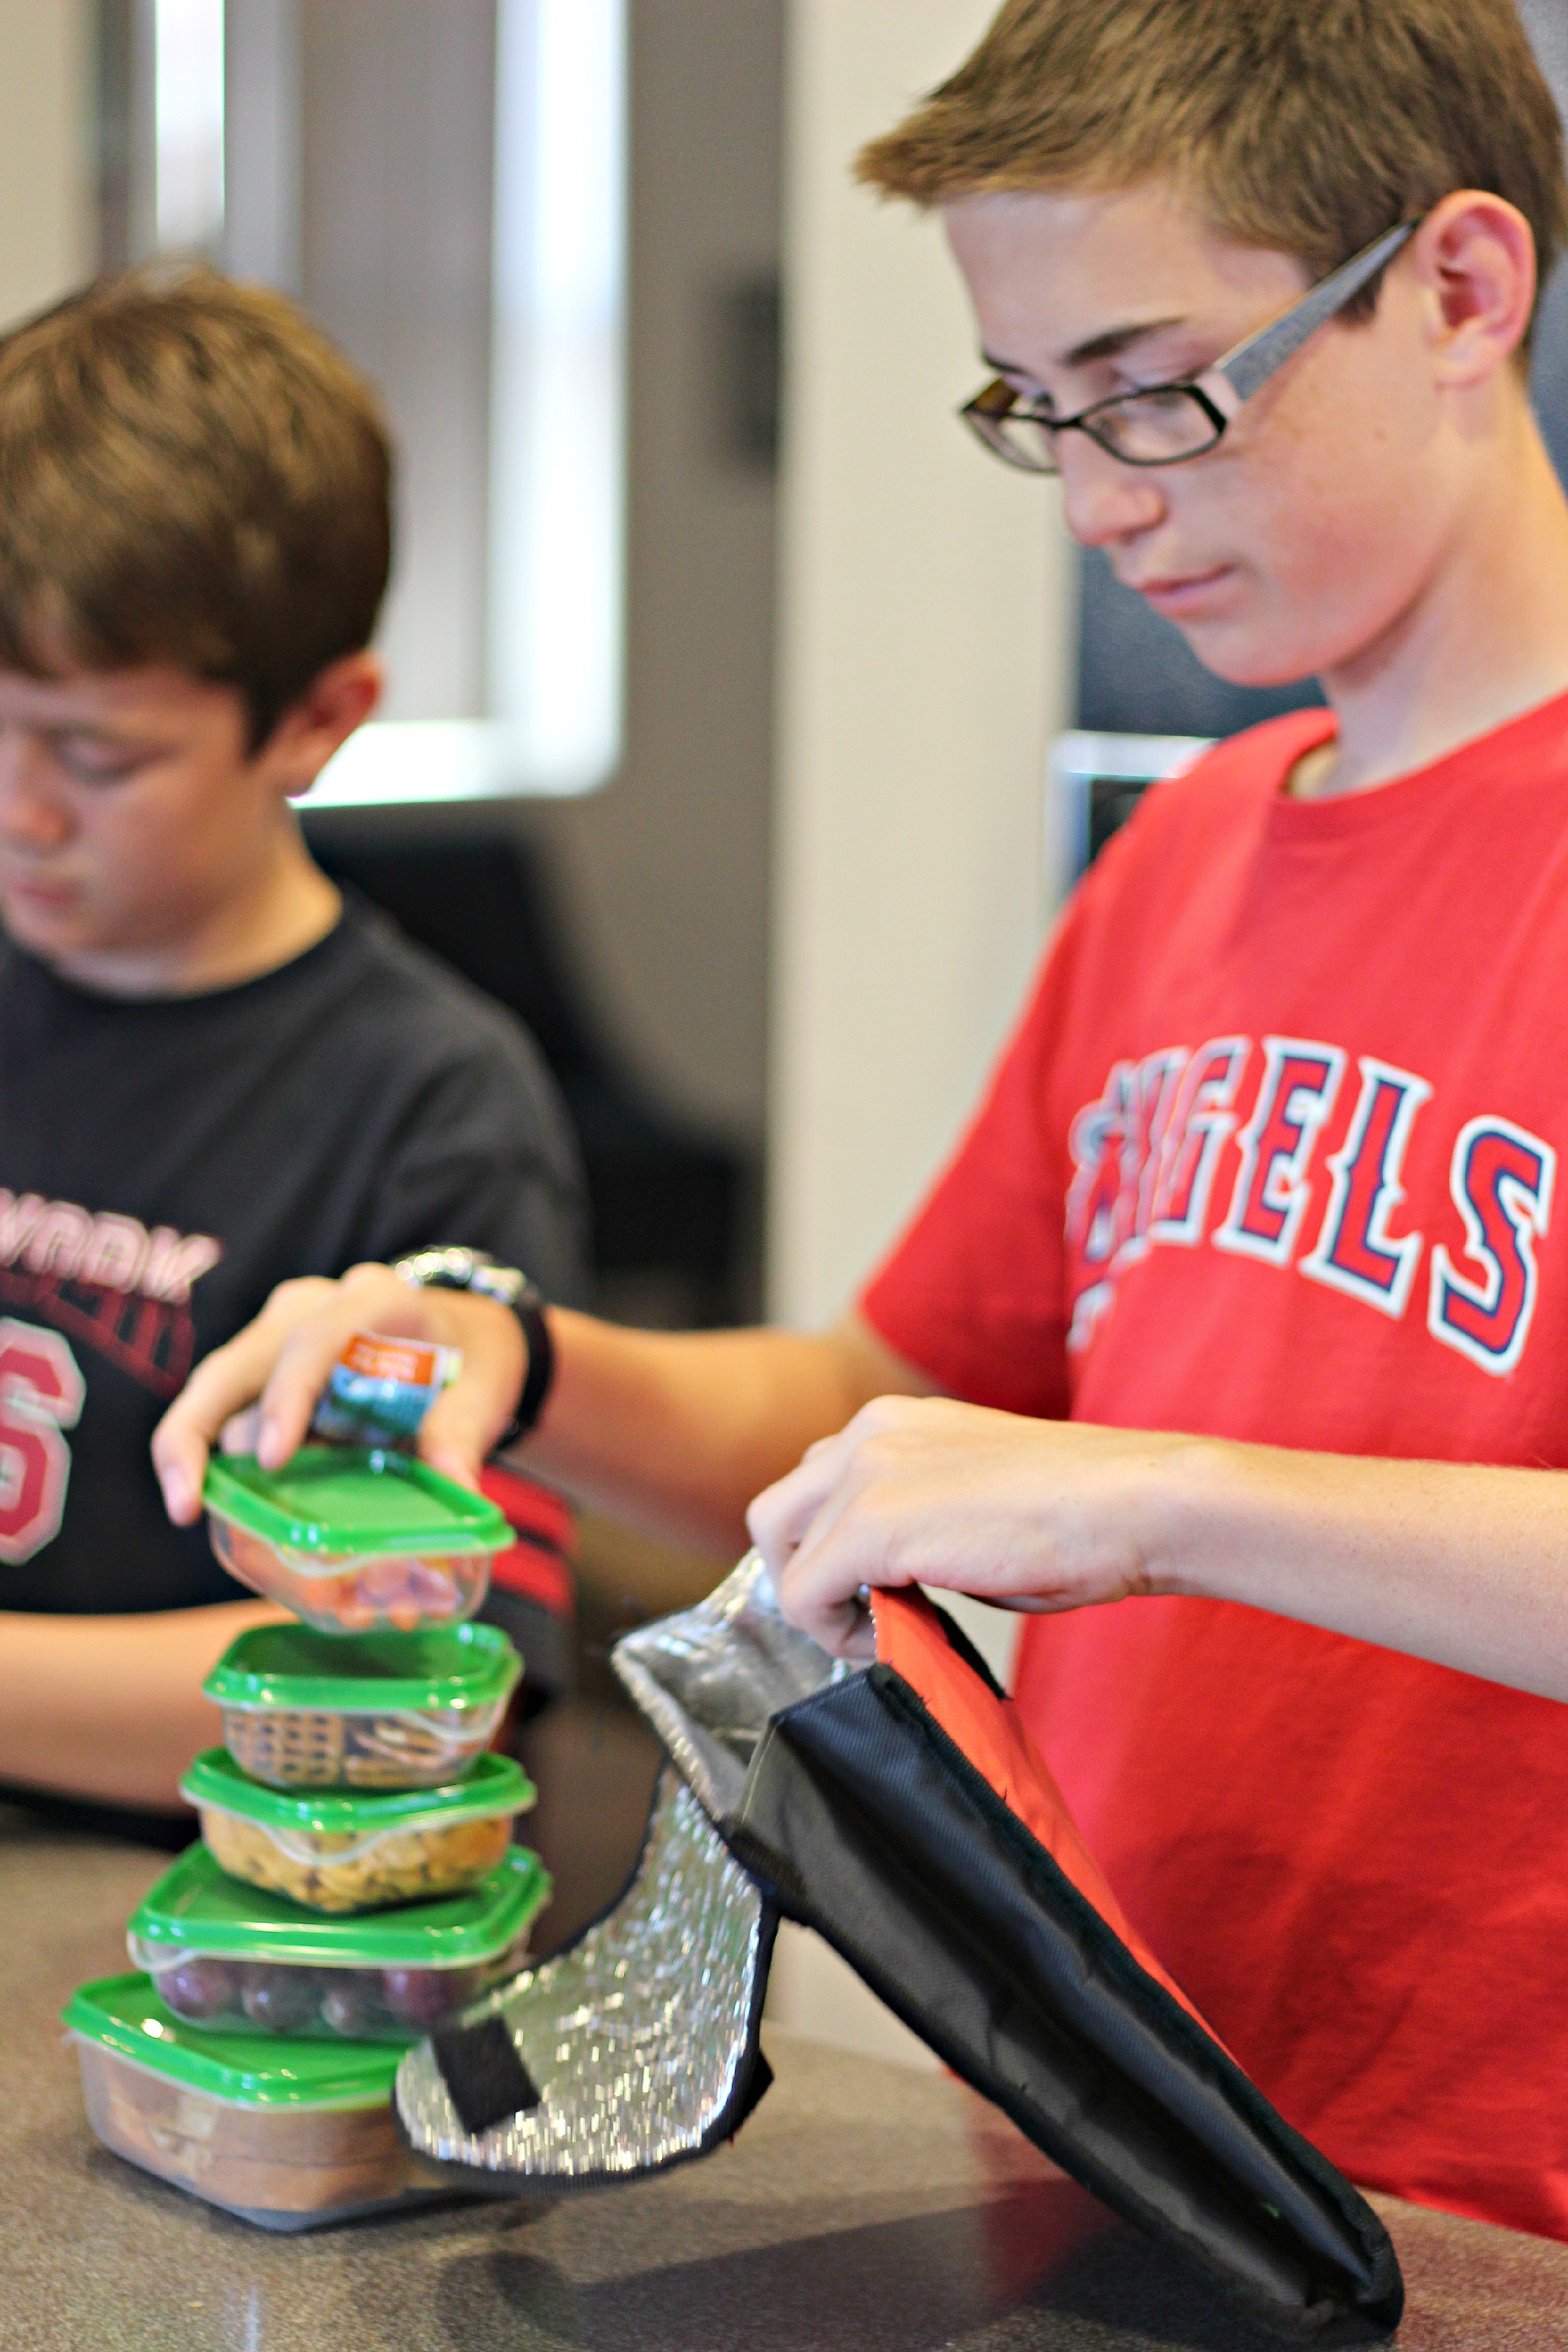
The kids pack their own lunches the night before.
They do a pretty good job, don’t you think?
Apparently it’s also fun to make towers before you pack them in your bags.
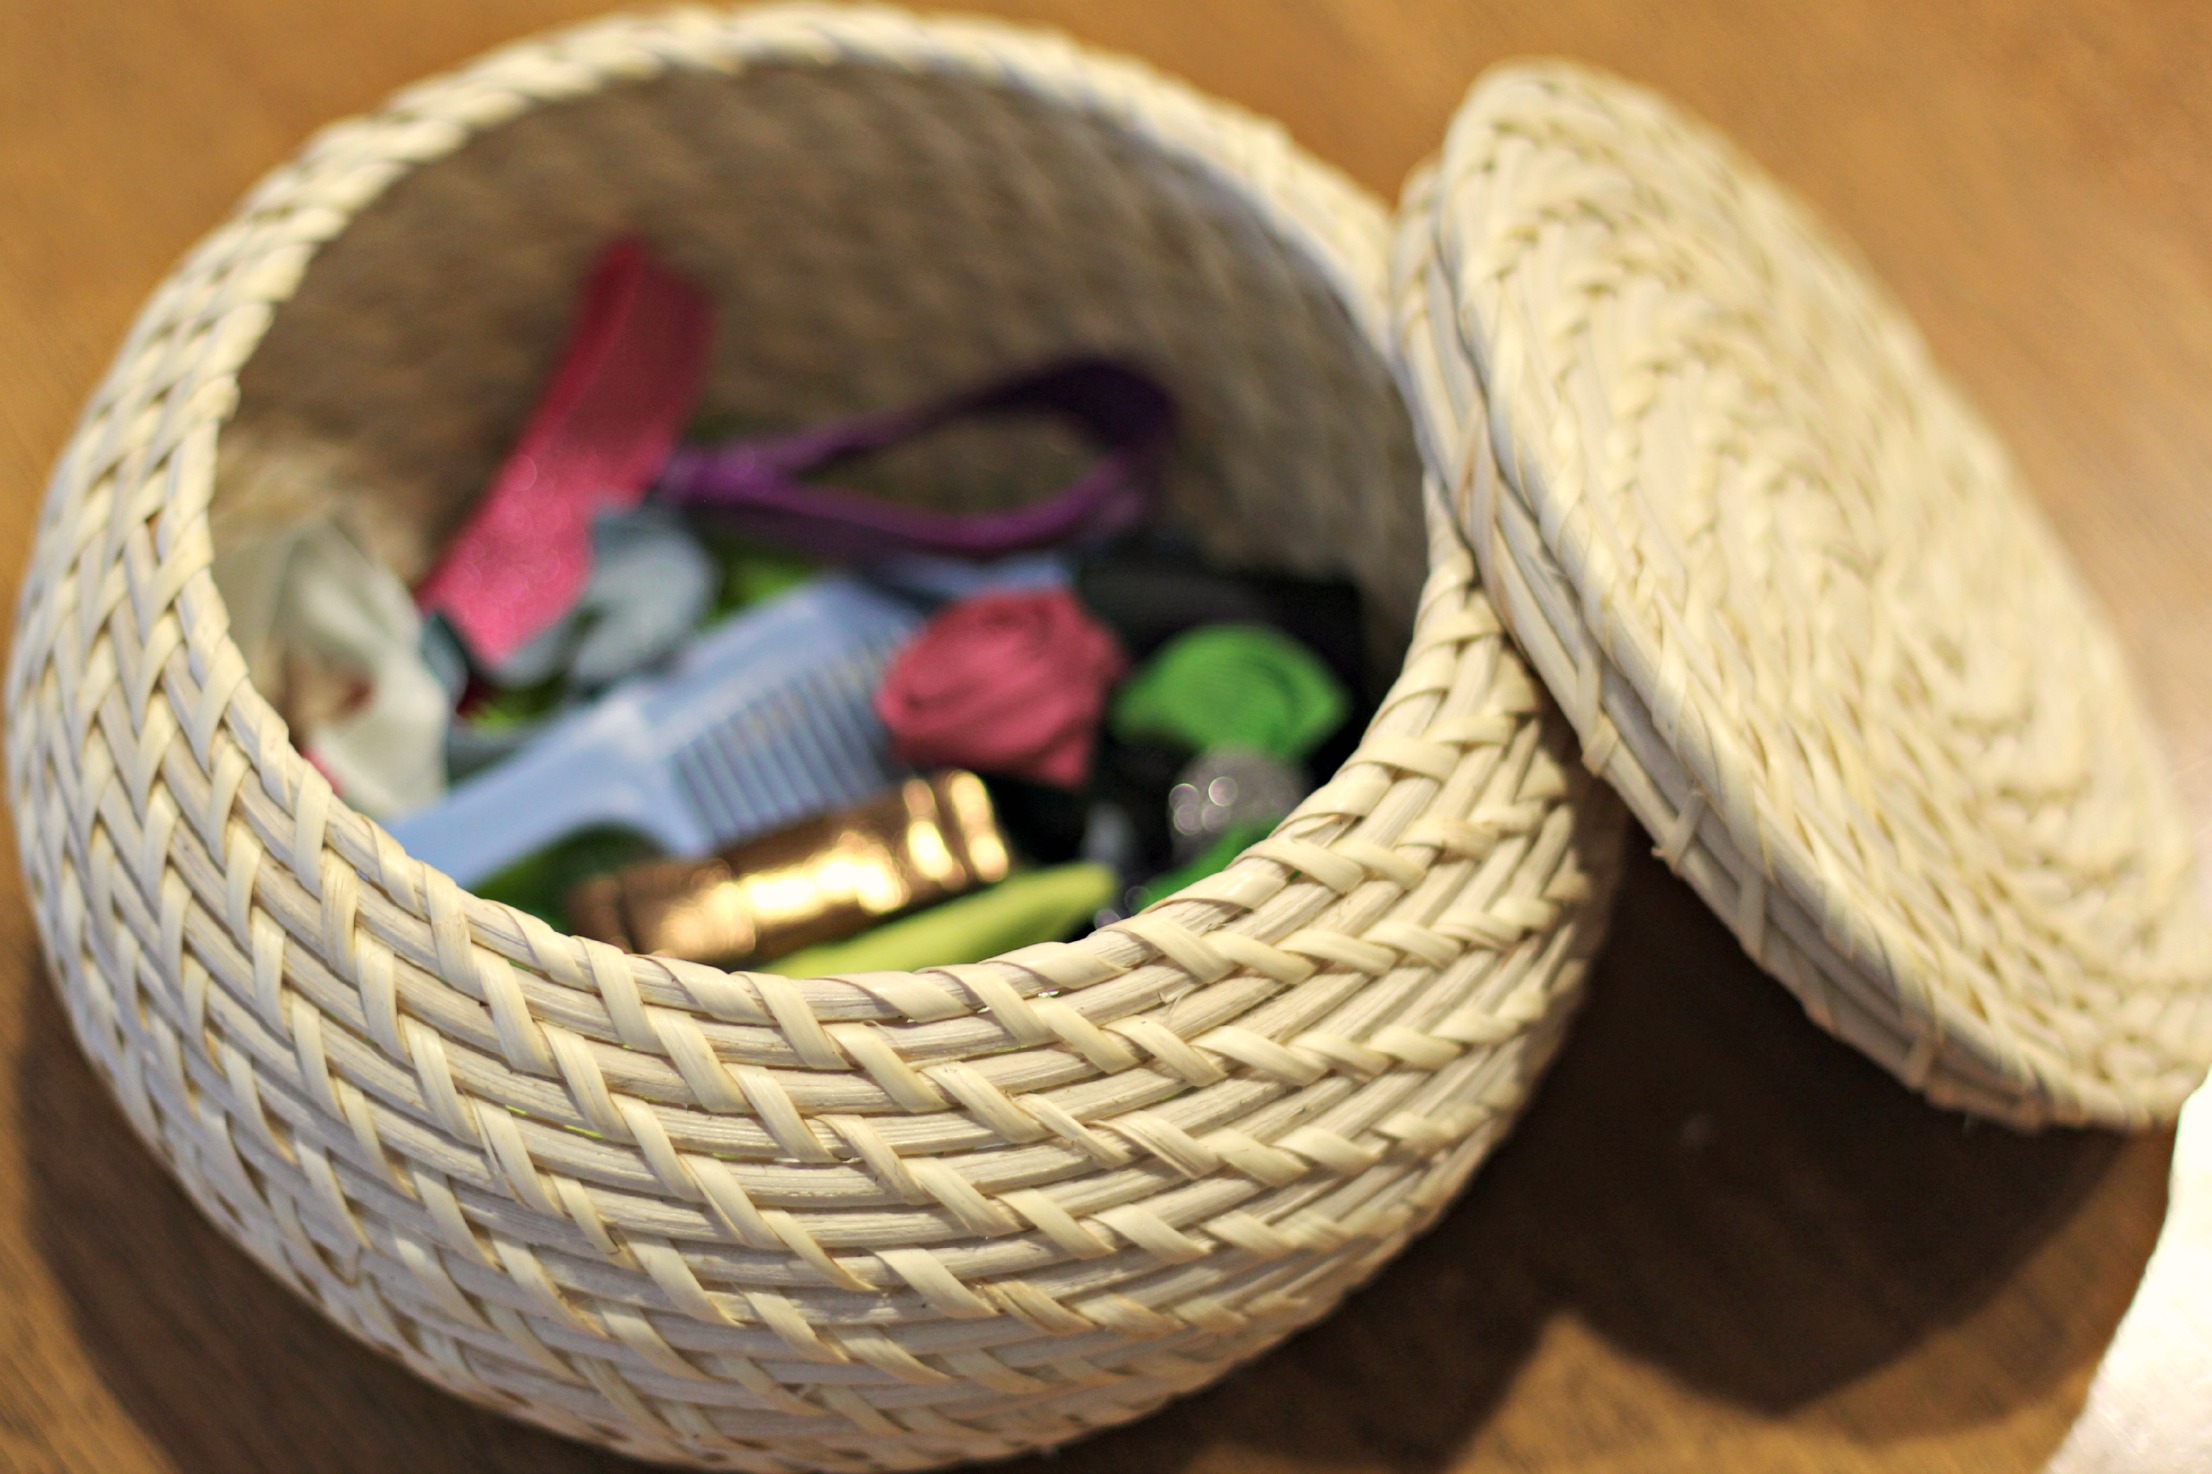
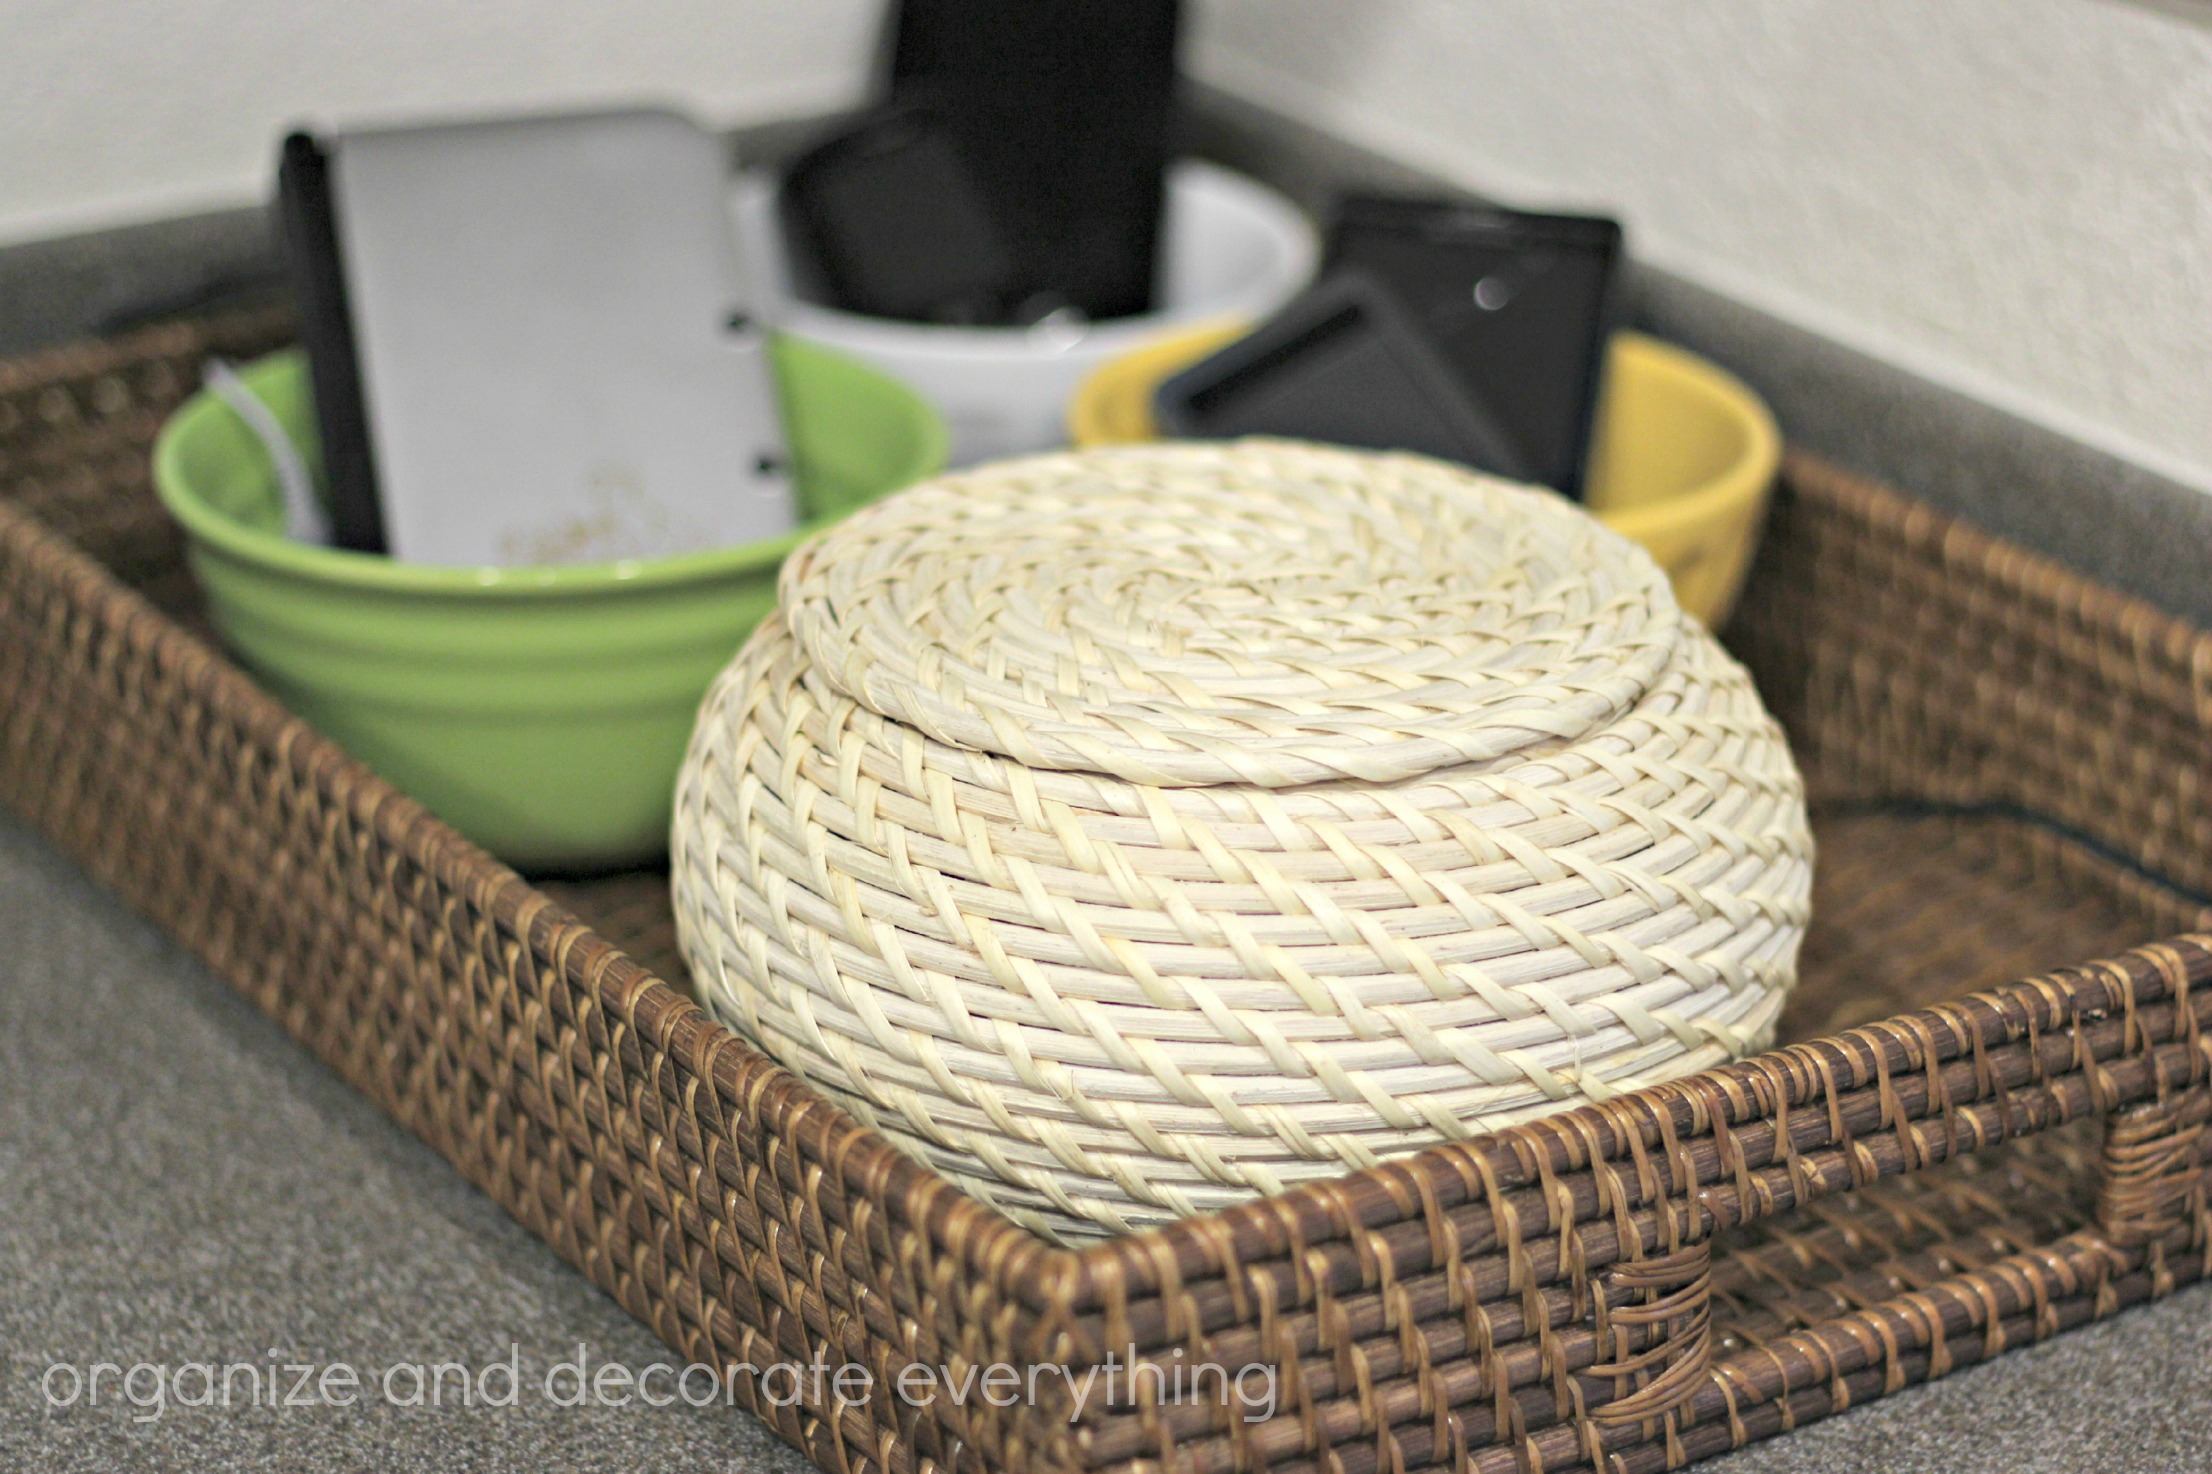
I don’t have this problem anymore but a lot of my friends do so I thought I’d offer them a solution. It was pretty common for me to do my girls hair for the day in the kitchen, but I wanted decorative storage to hide the supplies. This lidded basket was the perfect solution.
It’s decorative and unassuming on the kitchen counter.
I know we’re talking about First :59 here but I also had to share with you how I use the tray after school. It’s perfect to hold after school snacks so the kids know what’s available to eat instead of foraging through the pantry.
I even write questions on the frame to get them talking about their day.
For more inspiration, IKEA has made a dedicated pinterest board to First :59. You can also share your own morning routine suggestions on social media using the hashtag #First59. For more survey findings, panelist tips, product suggestions and more information on the program, visit First59.com. Let’s all get our mornings under control and make the rest of our day even better.