Make this easy No Sew Bolster Pillow in just a few minutes. Choose fabrics that match your home decor so you can change the look when you want.
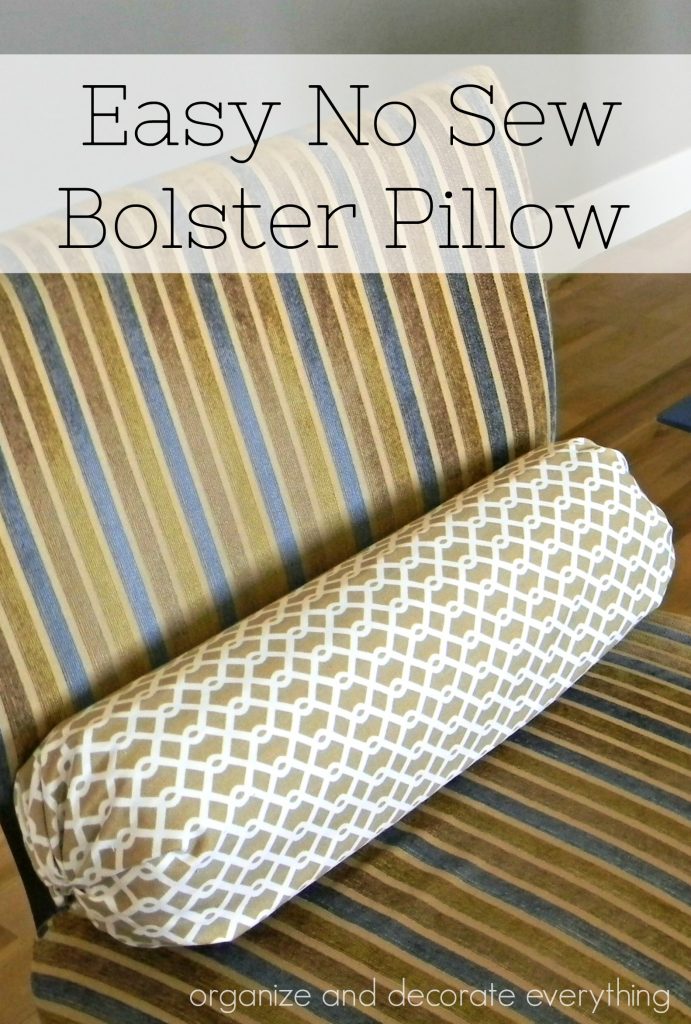
Most of us like changing our home decor from season to season or year to year but it can be costly and time consuming. I like to think of ways to save money but still be able to redecorate as often and as easily as I like. Pillows can make a big impact for a small cost especially if you get the fabric for a good price. This no sew bolster pillow is quick and easy to make with little cost.
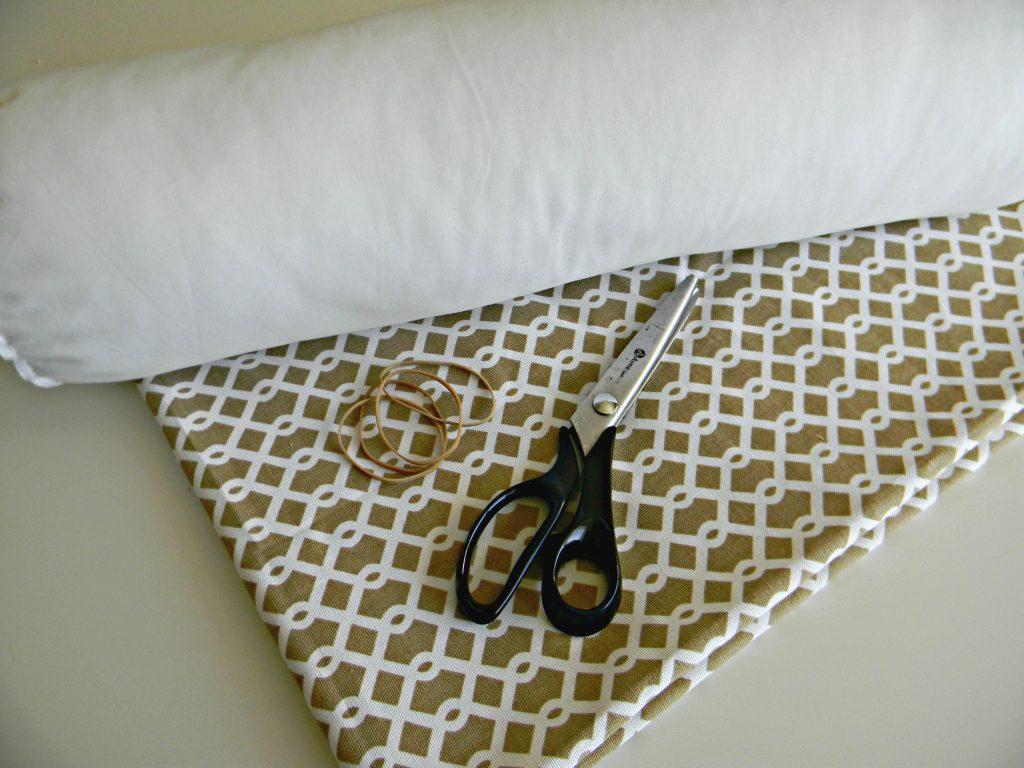
Supplies for No Sew Bolster Pillow:
fabric
elastic bands
pillow form (mine is about 16″)
pinking shears
You will need 2 pillow forms, one yard of fabric, and 4 elastic bands to make 2 pillows. I did a no sewing, gluing, or ironing version on these pillows. But if you would like a more finished look you could sew or use stitch witchery on the folded edge.
Since you start with one yard of fabric for both pillows you will need to cut the fabric in half. Place the form on the fabric to make sure you’re cutting it in the right direction. Use pinking shears to cut the fabric to prevent fraying. Leave 2-4″ of fabric on each side and about 4″ of extra fabric to go around the pillow form. Use these as general measurements depending on the size of pillow form you’re using. You might need to cut a few more inches off the fabric if the pillow seems to bulky on the ends.
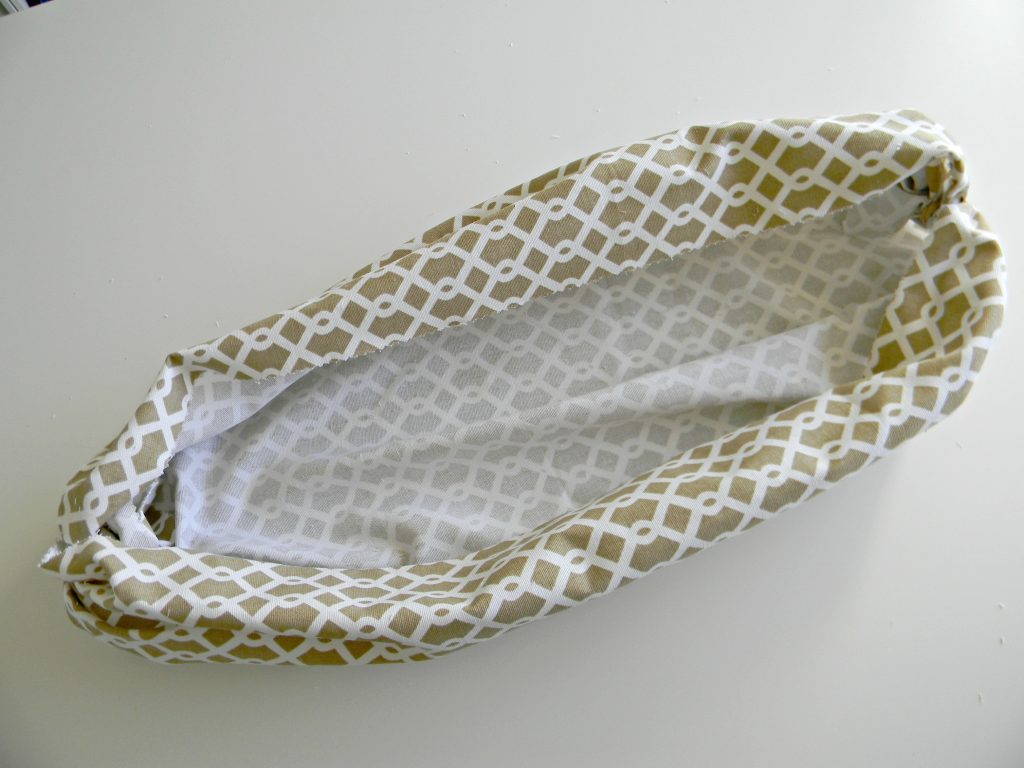
Start with the fabric wrong side up and gather one end of the fabric about 2″ from the end then wrap with an elastic band. Make sure the ends overlap a little, at least 1/2″.
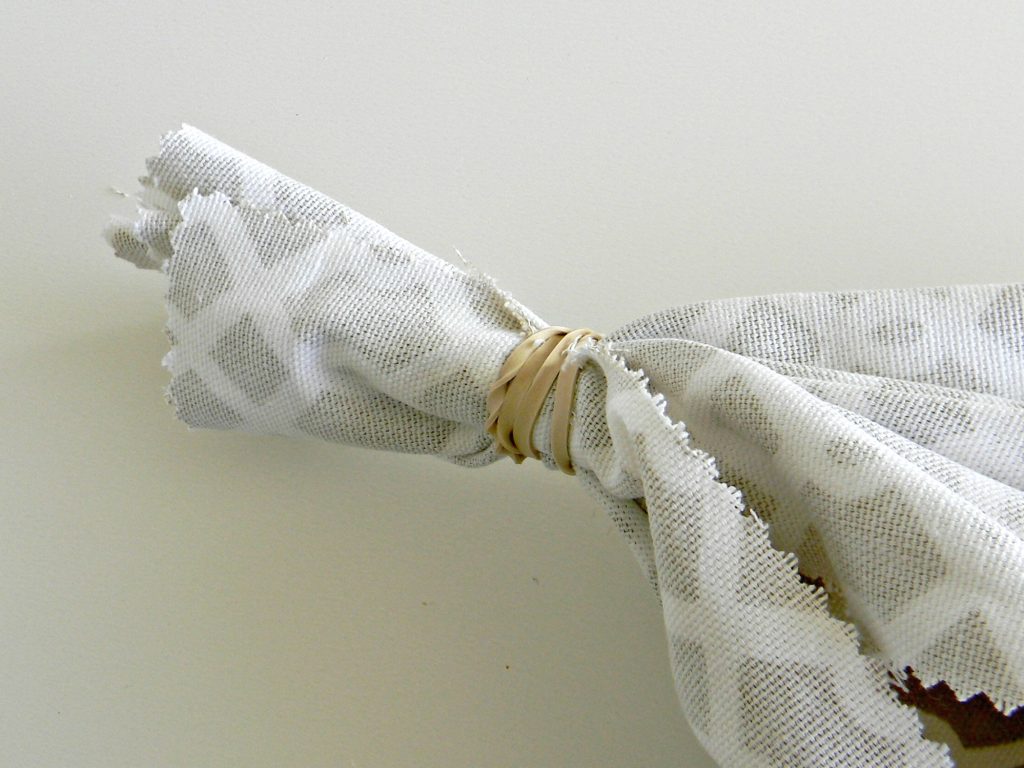
Do the same to the other end so your fabric looks like the photo below. Now would be a good time to measure the pillow form again to make sure it will fit in the center. It’s better to be a little tight length wise than loose.
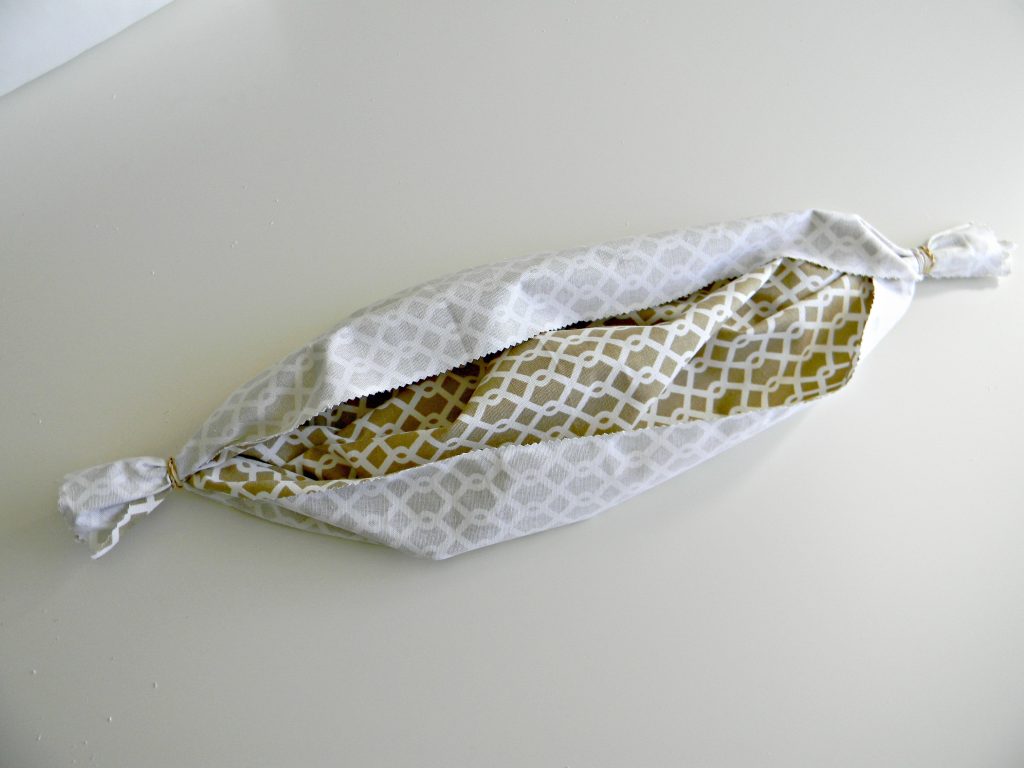
Fan out both ends so it looks something like this. This will help the pillow lay better once it’s turned right side out.
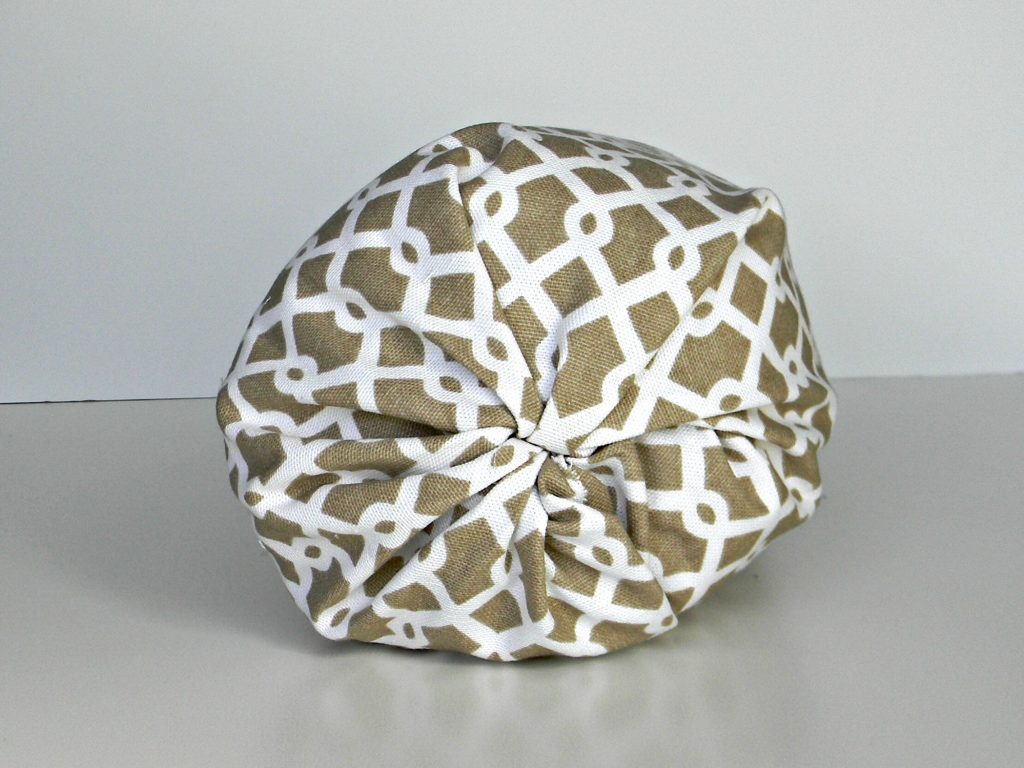
Turn it right side out and place the form inside. Make adjustments to the elastics if you need too. And now it should look like this.
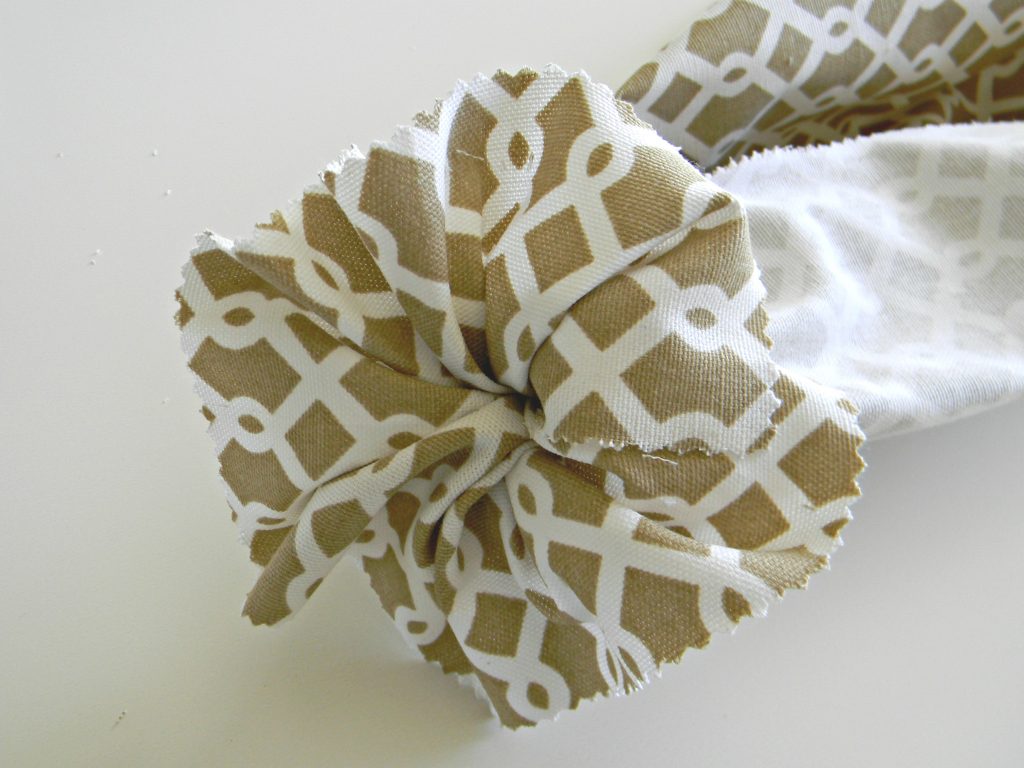
Pull the fabric around the pillow form spacing the fabric evenly. Turn the unfinished end under about an inch and it will overlap the other end by about 2″. I used a heavy fabric so it stays in place really well. If you are having a problem with it staying closed you could use a little fabric glue on the folded piece. Or even a small piece of velcro.
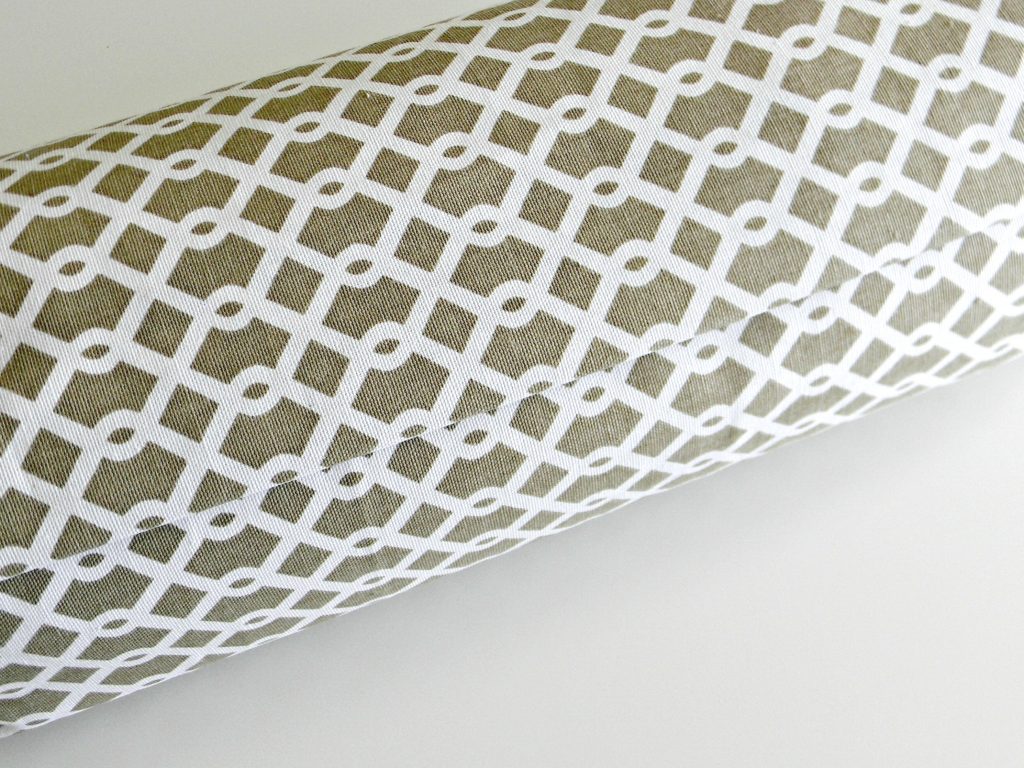
The pillow end should look like this. Wasn’t that easy? You can whip these out in no time. The more you make the easier it becomes.
The fabric can be easily changed with the seasons or if you’re just ready for something different.
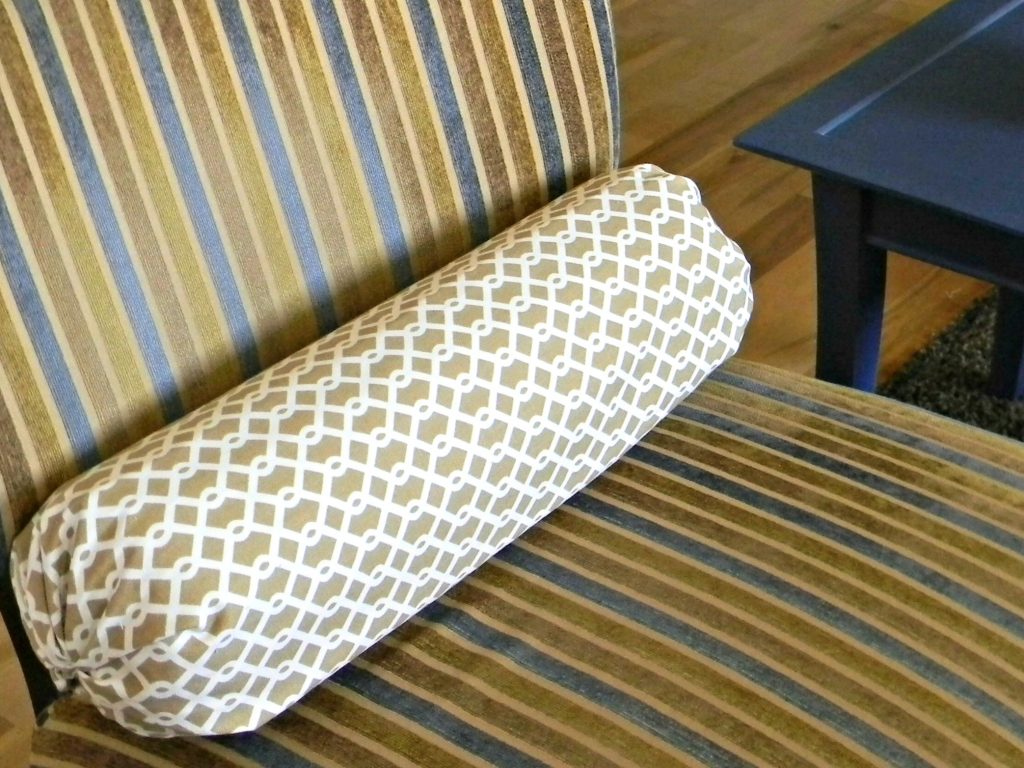
Enjoy making your pillows and decorating your home.
Pin it for Later: No Sew Bolster Pillow
You might also like these posts: