
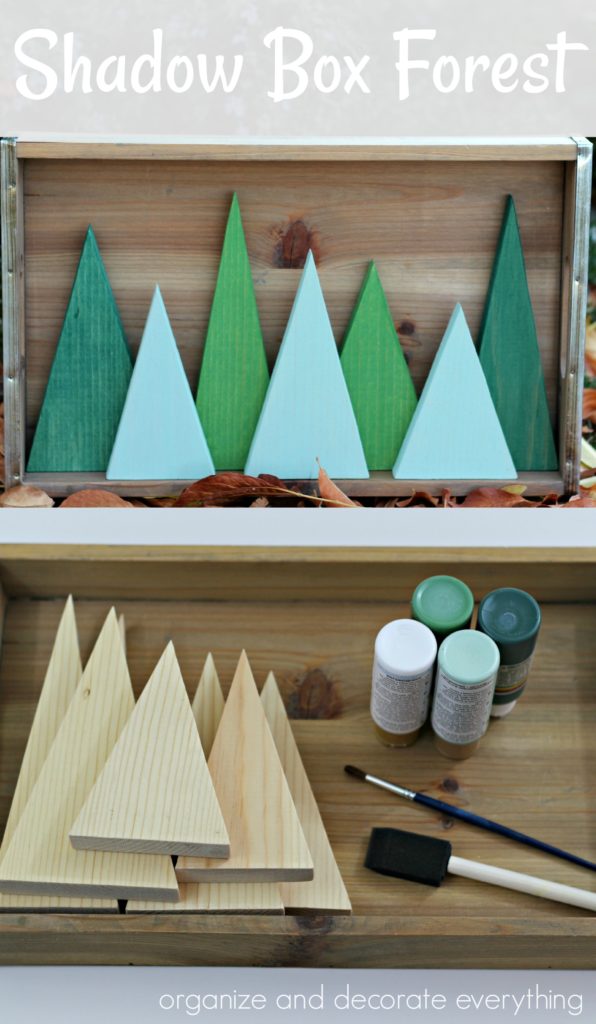
I love making decorations for holidays and seasons that can be interchanged, so I came up with this simple Shadow Box Forest for Christmas and Winter. It’s a great project to ease yourself into using power tools.

Shadow Box Forest
If you follow me at all you know that my style has gotten rather simplistic. I created a forest that was simple with clean lines to add to my already existing Winter and Christmas decor. Follow the directions below if you would like to make your own forest.

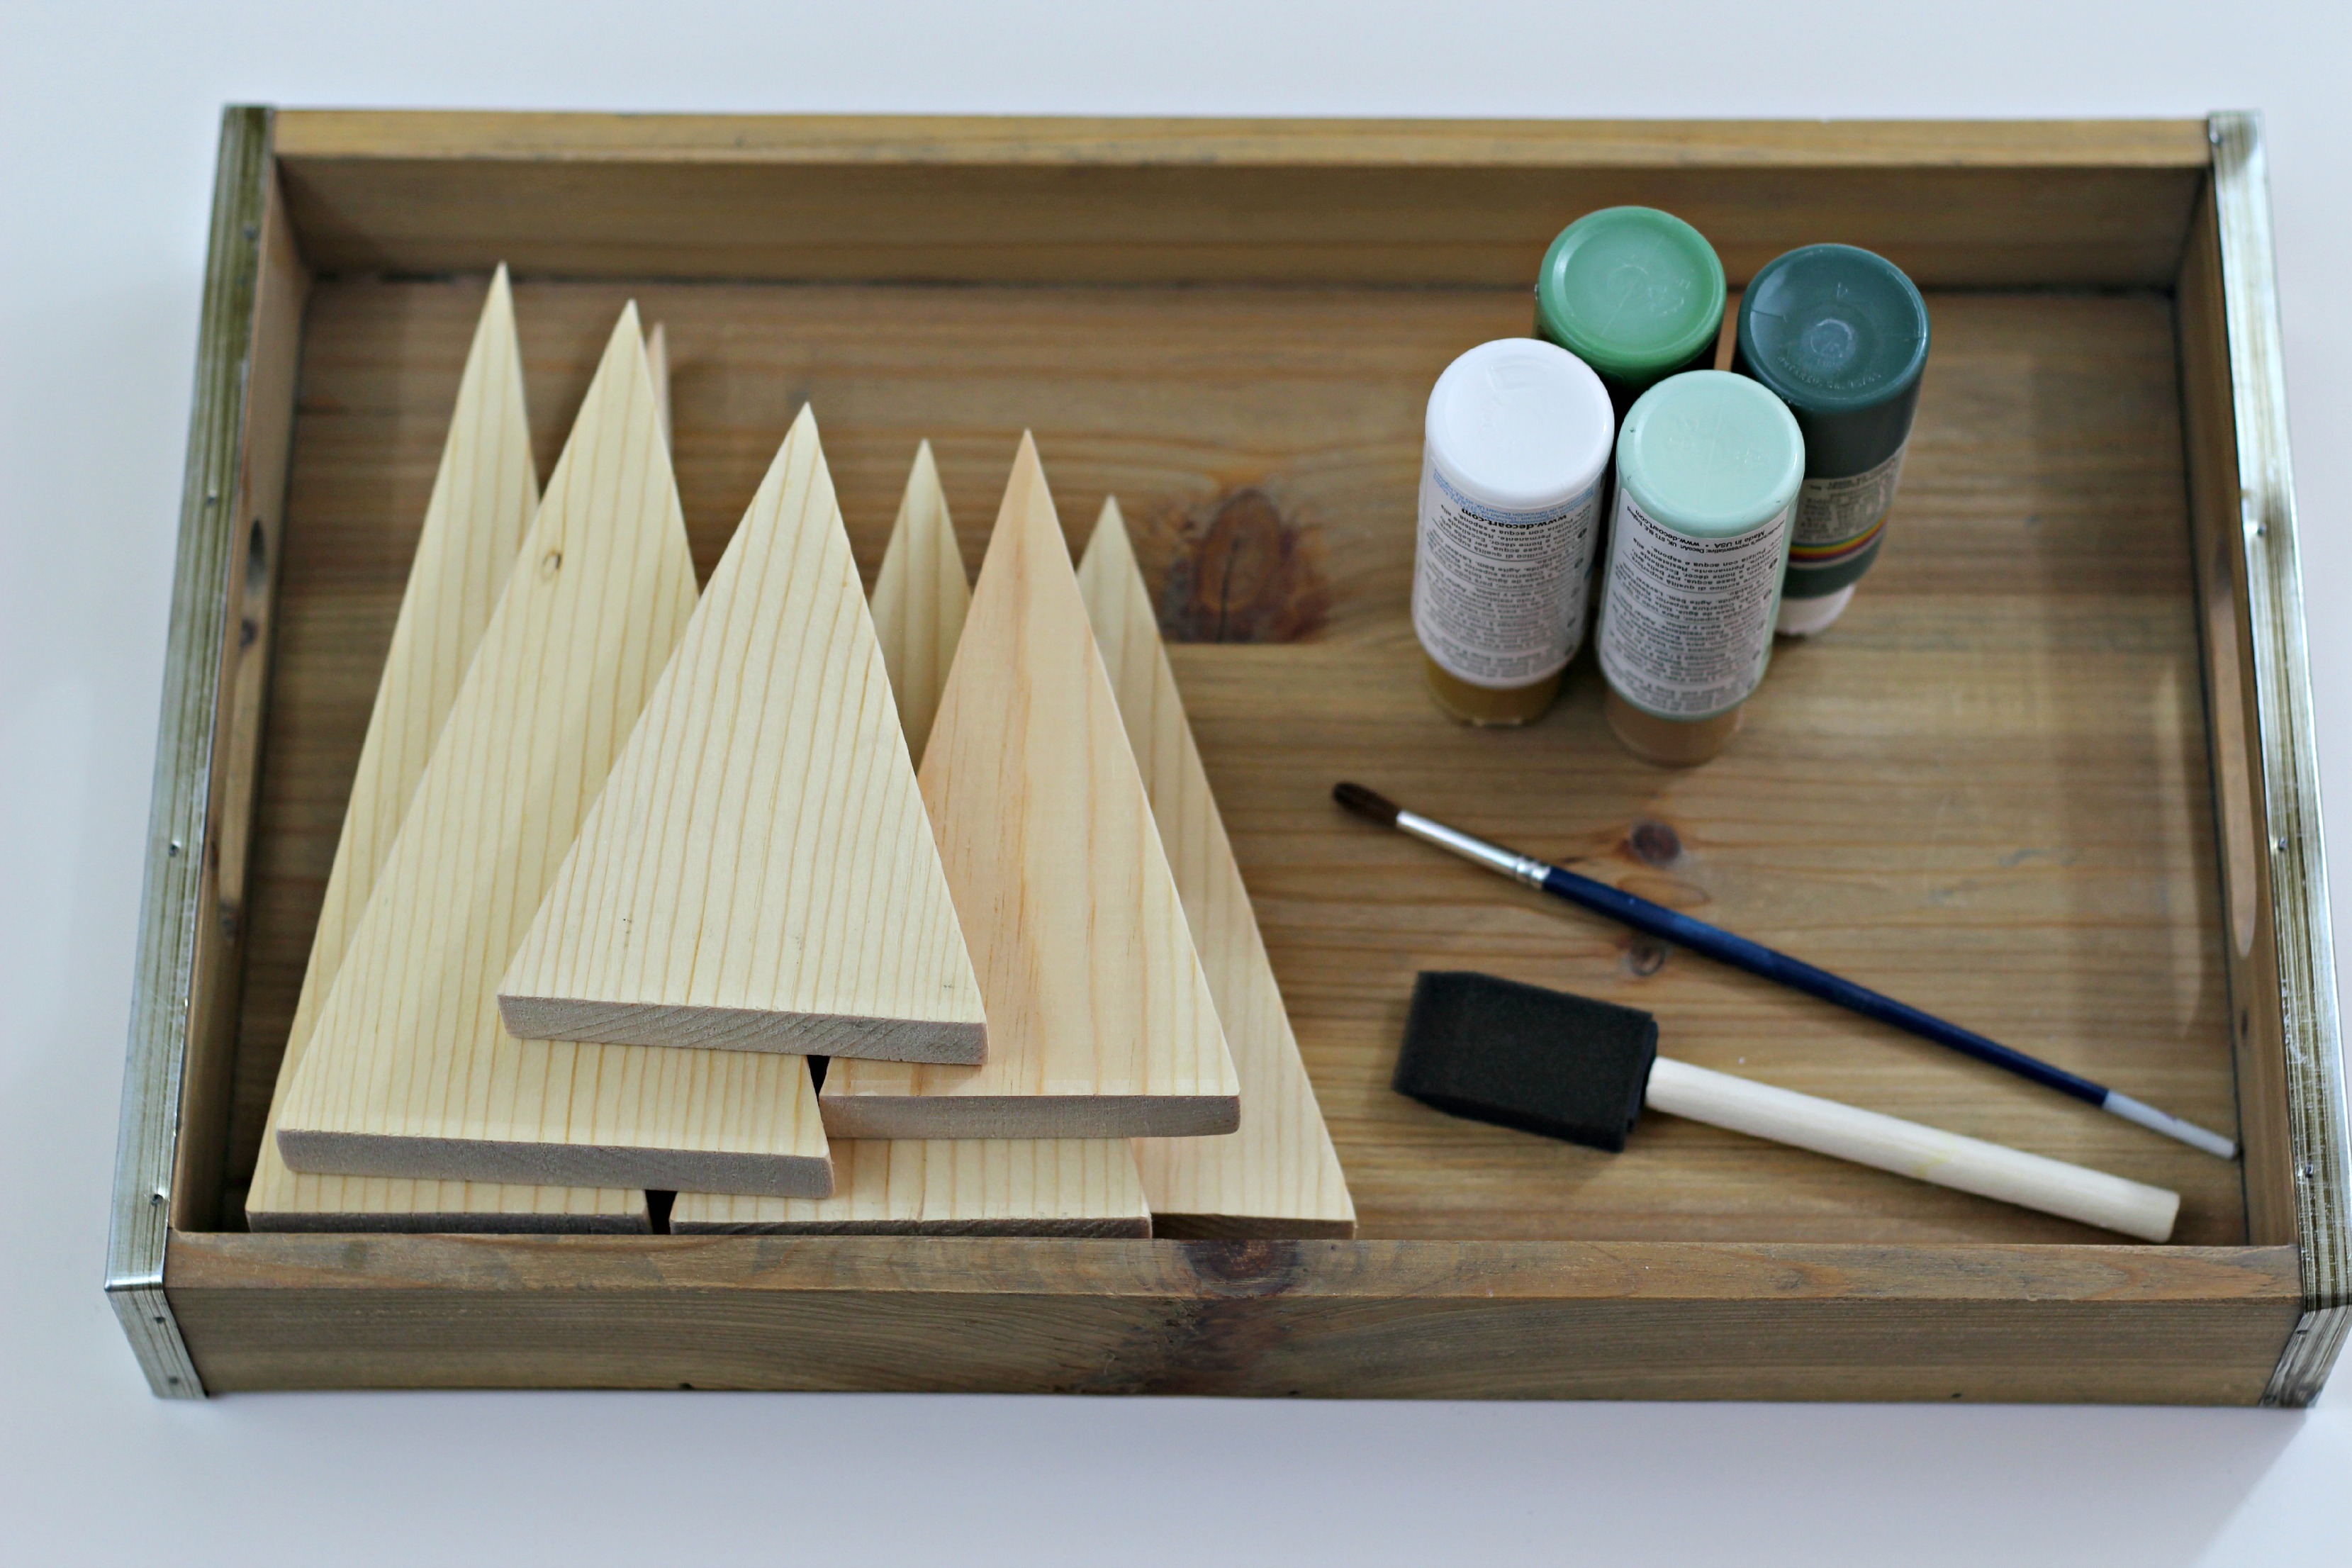
Here’s what you need to make the forest:
Tray or piece of wood
Triangle trees
Green paint (at least 3 different shades)
White paint (optional)
Sponge brushes
Paint brush (optional)
Wood glue (optional)
Start by measuring the triangles to make the trees. I made all of mine different sizes, some are tall and skinny and some short and fat. The tallest is 7 1/2″ and the widest is 4 1/2″. Do what will work for your space or what looks good to you. You can use scrap pieces of wood for this project.

I was so excited to use my new BladeRunner x2 for this project. I would normally use my miter saw but this was so much quicker and easier. If you don’t have a table saw, a miter box and saw will work but it will take longer.
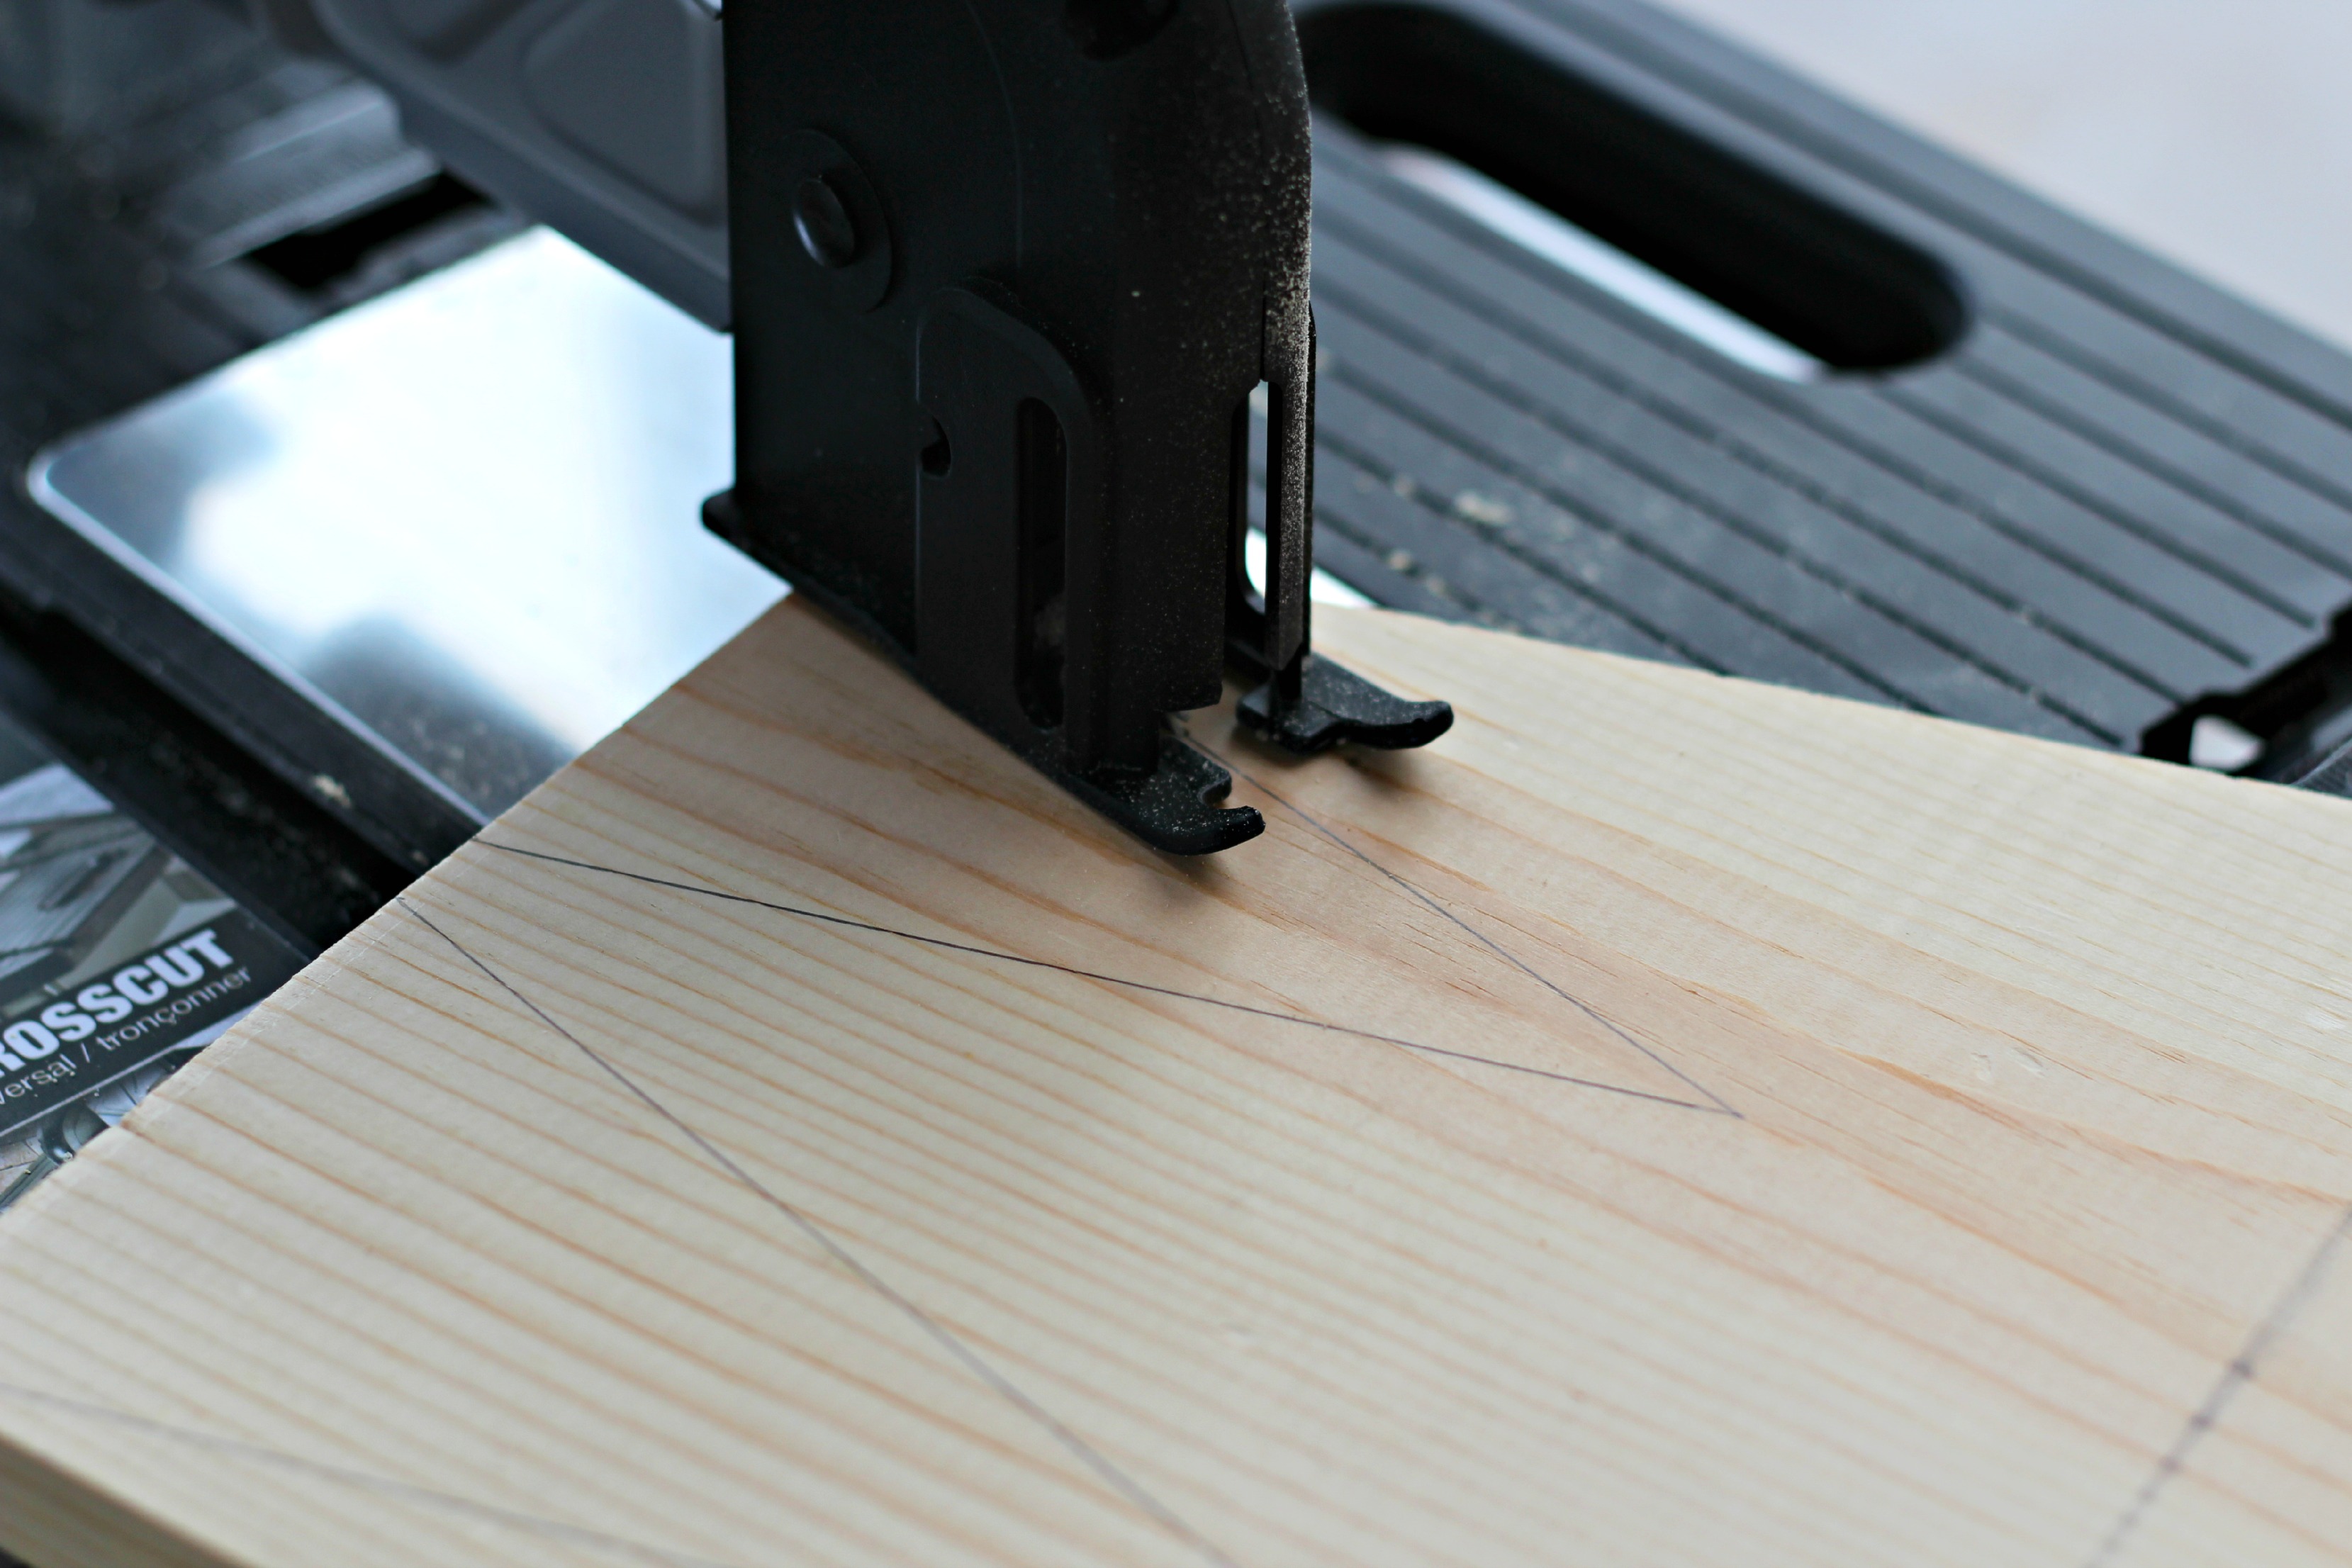
I attached the shop vac to the saw to catch the saw dust. It worked like magic to keep the dust away from the blade so I could see my lines and it was really easy to attach.

I started with something simple since I’m not really skilled with a saw but this project was so easy that I can’t wait to try more difficult projects. It will be fun to try my hand at making home decor, crafts and gifts.

Since I have a large collection of trays I used one of them for the shadow box. You can use any tray or simply use a flat piece of wood to hold the trees. If you use a piece of wood you will need to use wood glue to secure them in place. With a tray you can just set them in place or glue them if you like.

Cut out 7 trees and arrange them in the tray the way you like. Once I knew where I wanted the trees I numbered them on the back, then lightly sanded them.

Now it’s time to paint. If you want the wood grain to show through dilute the paint with water using a 1:1 ratio. If you prefer more color don’t dilute the paint.

Lightly paint each tree with only one coat of paint to see the wood grain. It is more like a colored stain.

I used paint I already had so that’s how I ended up with these colors. I might make more trees of all different colors for other places in the house. At this point you could add white dots using the bottom of a paint brush to represent snow. I decided not to because I like how simple these are.
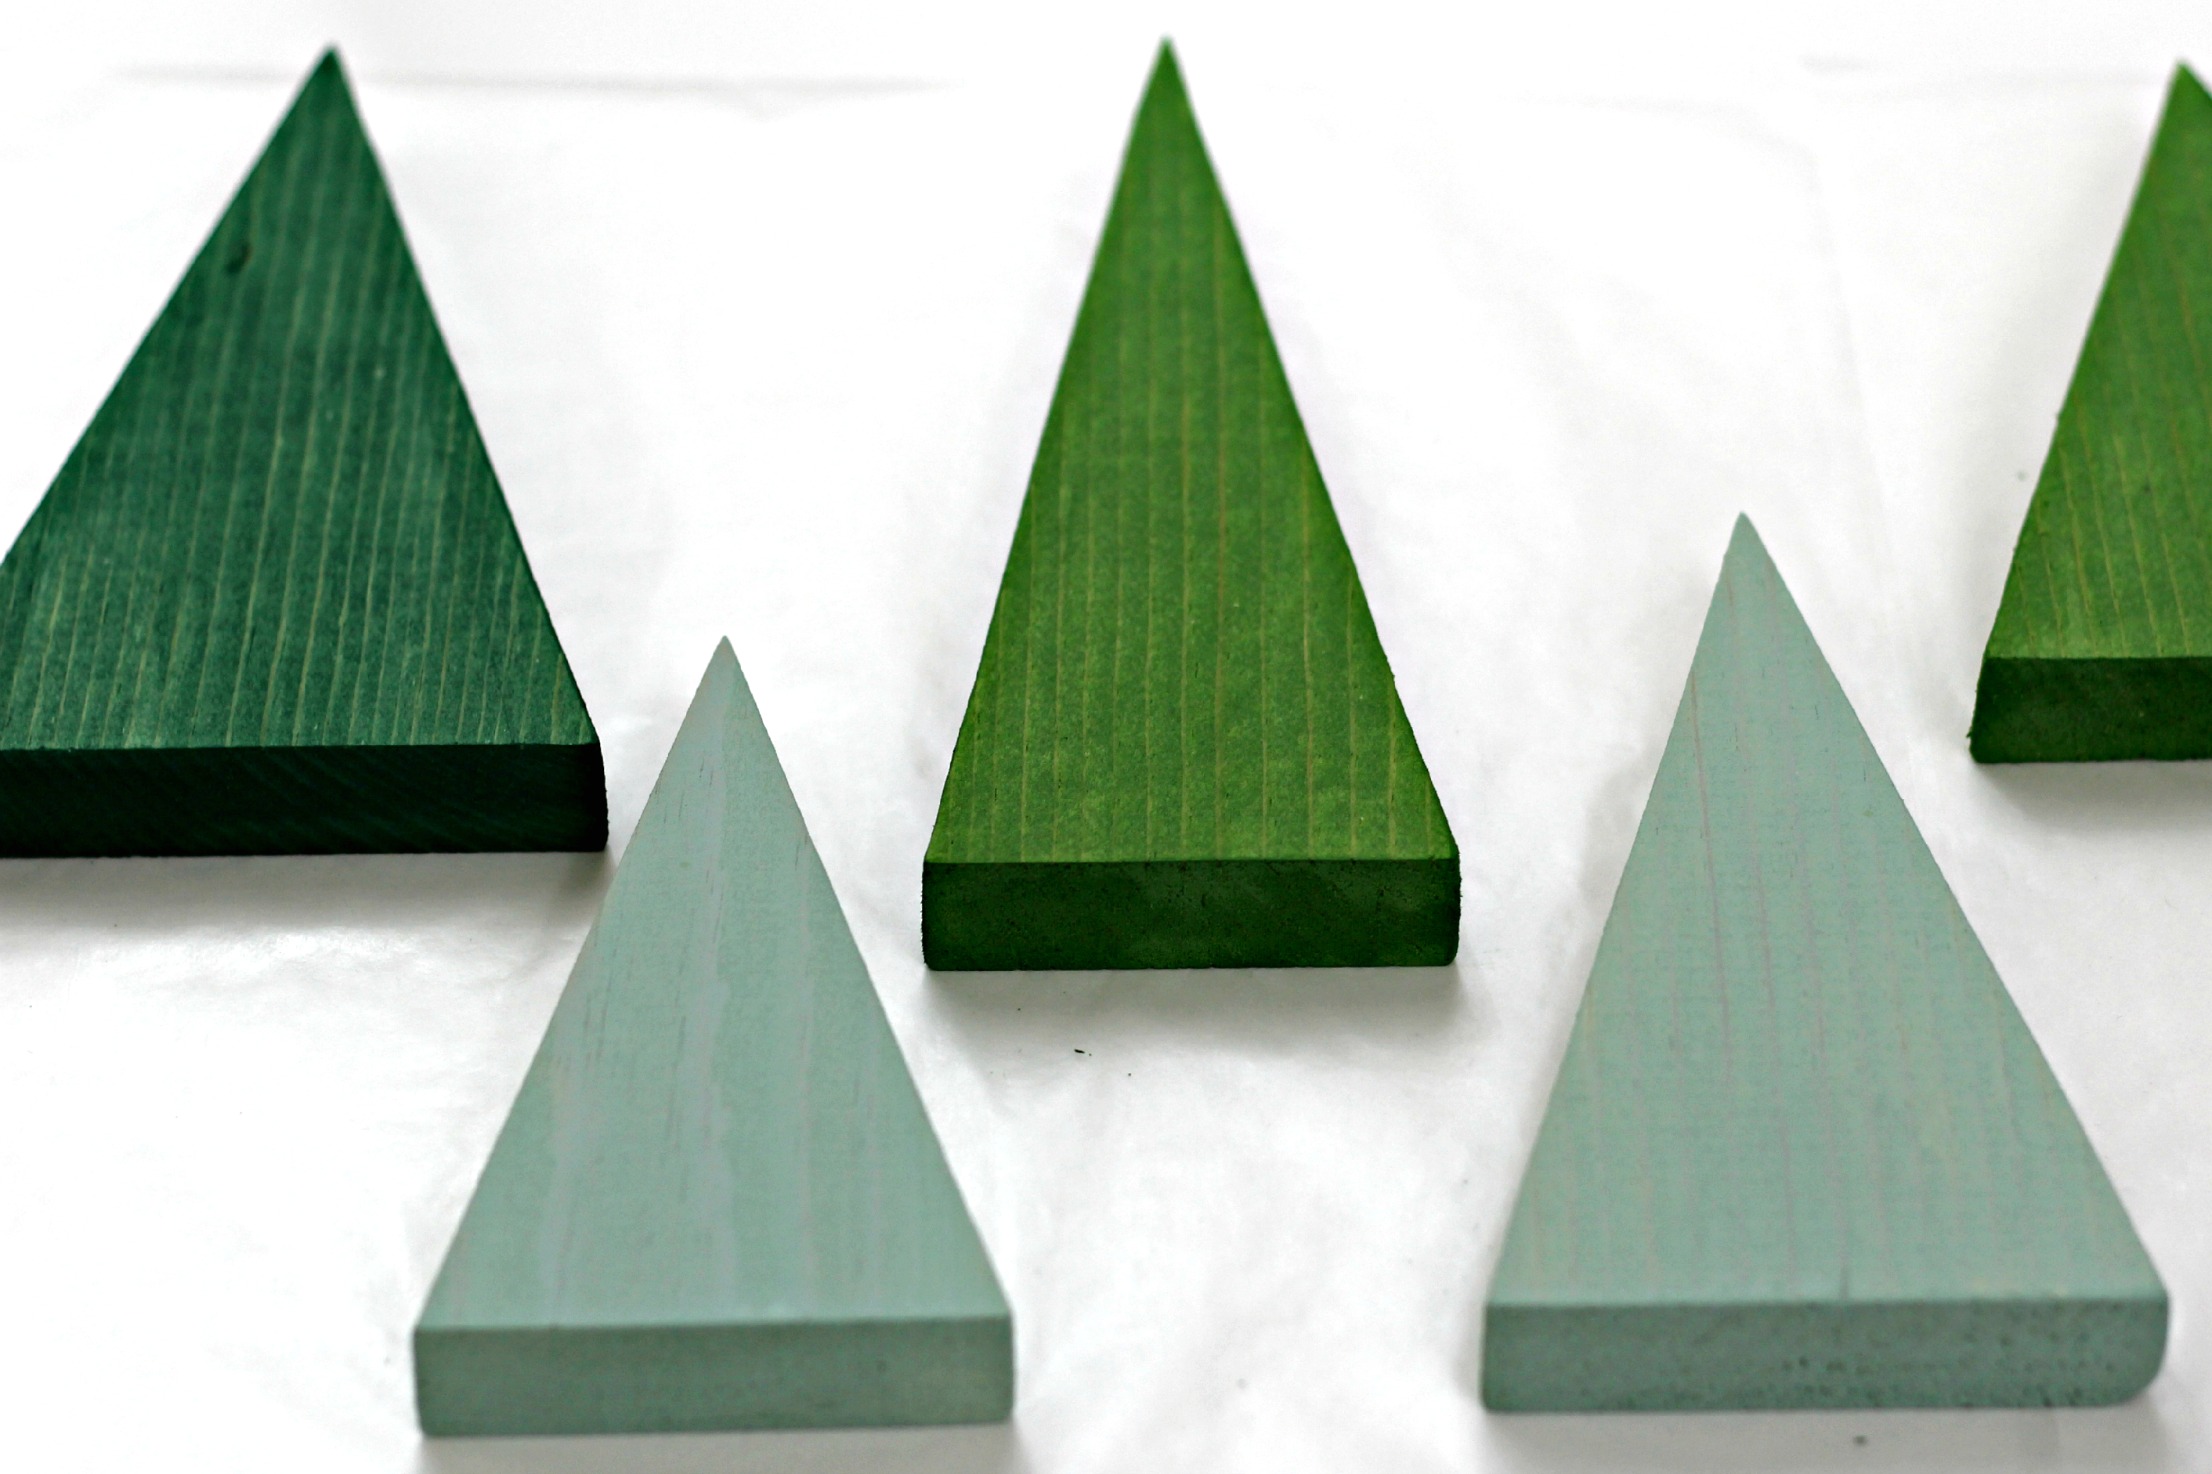
You could also add some glitter to add a little sparkle if you like. It’s such a simple project but I love the impact of all the trees together.

What do you think? Are you going to try this simple project?
Pin it for later: Shadow Box Forest
You might also like these posts:
Scrabble Tile Christmas Tree
Natural Christmas Wreath


