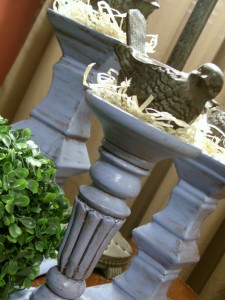
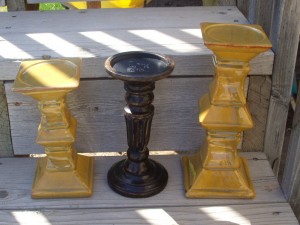
I have a love for candlesticks, but a lot of the times I don’t even have candles on them. They make a perfect stand to display interesting objects and add height to an area. I’ve had these 2 mustard colored candlesticks for years and I bought the wood one a few months ago at Ross for about $1.
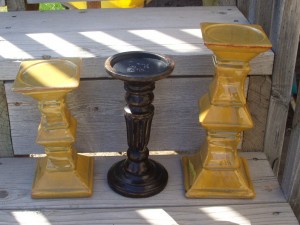
They don’t look like they go well together, but just wait and see what a little spray paint can do. First I primed them. Then I painted them with American Accents Iris Blue. When they were outside in the sunshine I loved the color, but when I brought them in the house they were way to bright for me.
Now, at this time I had to leave for a couple hours for an activity at Church. I thought I had taken pictures of the too bright blue candlesticks, but apparently I hadn’t. Just know, they were bright and would not have fit anywhere in my house except for my daughter’s room.
The wood candlestick had some of the wood still showing through in the grooves and I really liked the look. So, I got out the Burnt Umber paint (that everyone uses), thinned it with water then brushed it on the wood candlestick. I had already wiped it off the center of the candlestick here.
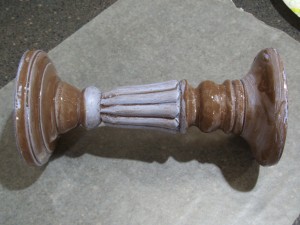
This area needed to have a bit more paint added.
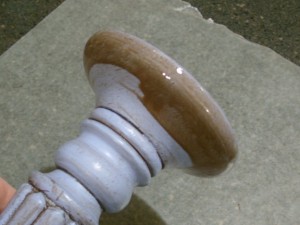
Here you can see a slight difference in the 2 candlesticks. I brushed on more brown after this picture. It’s hard for me to take pictures when I paint, especially if I’m worried about wiping it off.
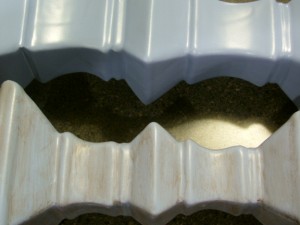
Then I made some little nests
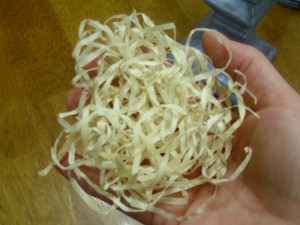
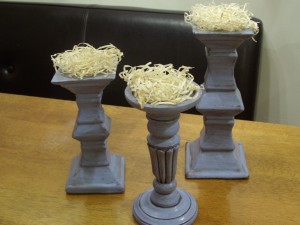
And placed them on top of the candlesticks.
I was going to paint the Dollar Store birds, but after seeing them on the candlesticks I decided to keep them the way they were.
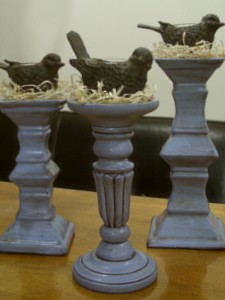
So Cute! Don’t you think?
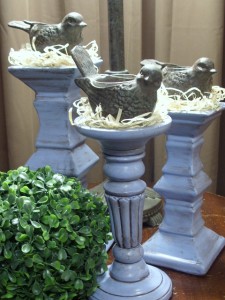
I think they look great now. I can’t wait to decorate them for summer. Wouldn’t they look amazing with some big shells on top or a glass candleholder filled with shells or sea glass?
Mismatched Before:
Amazing After:
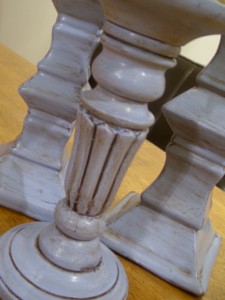
Total Cost: $0 at this time. I already had everything!


Ohhhh, those are lovely! Isn’t it amazing what a little paint will do. I need to go find me some chunky candlesticks!
Those are just beautiful. It gives me a great idea for my entryway!
Love those!! Great makeover!!
Leanne,
Love those candlesticks, but when you put the nest and bird, darling. I love how you antiqued them.
Brooke
Great job. I love the antiquing application.
What a great size these are, Leanne! I’ve got candlesticks like these on my mental “look-out for list” when I go to Goodwill.
Stunning! I am featuring these at somedaycrafts.blogspot.com
They look great! I think the birds look perfect. I love what spray paint can do.
Awesome candlestick revamp! And I love the color you chose…very shabby chic! I just realized I missed your organization party…so sorry! I’ll be there next time!
Jane Finding Fabulous
Great job. I love candle sticks.
Thanks for joining Get Your Craft on Thursday. Please join me next week for another great party!
Hi Leanne, these are great! I love em!
You did a wonderful job! I love the color that they are now. And how cute with the birds sitting on top!
XOOX
Jen
I am sitting here just amazed at what a difference a little paint made to the candlesticks. They are gorgeous and look like you spent a fortune!
They look great! I just repainted some, too. I wouldnt have thought about putting the birds on! Although I did add a little milk glass piece on top of one of them, instead of a candle.
Cute cute! ….I wish i could find me a couple ugly candlesticks to vamp up!
You talented ladies amaze me. The candlesticks are absolutely charming! Perfect for summertime. They have a very beach-like feel.
Love the color you chose – looks gorgeous! I’m like you – I have a million candle holders but with two toddlers, I can’t remember the last time I actually lit a candle!
Jeanine
They look great! I’ve done the same thing twice now and love birds perched on top of candle sticks!
Nancy
Those look fantastic! You did a really great job remodeling that.
These look fabulous! Love the addition of little birdies and nests – simply gorgeous!
Great transformation of those candlestick holders!!
These this look great! I had a candlestick that looks just like these, until my one year old got to it…
Simply adorable.
The birds in a nest on top of the candlesticks are so darn cute!
i LOVE this transformation!!!!!!!
Wonderful!!!
Hugs, Lana
Thanks for linking up to Shop The House Sunday! I love those “chunky monkey” candlesticks! I really like putting other objects other than candles on candlesticks. It looks really great!
Very clever…I like the varying heights and styles you used…they look so unique!
The birds fit perfectly and look great. Thanks for sharing with Made it Monday! Jules
Love these & love the $0 price! I’ve got to try that finishing technique. Thanks for linking up to Craftastic Monday!
They look so cute! What did you use for your bird nests?
What a great transformation! They look so cute.
🙂 Michelle
I love the color they are. They all look great and go together so well. Thanks for sharing at ‘Look at me, I’m SO Crafty!’ at Fun to Craft.
Goodness, those little nest candlesticks are so sweet!
I love it when you join parties because I always know that I will love your projects. You have such great ideas.
I bought some candlesticks at a yard sale this weekend and I can’t wait to give them your “treatment”.
Thanks for the great ideas, I really enjoy reading your blog.
Very pretty redo. They look great with the little birds and nests.
Partying with you tonight. Stop by for a visit.
Thanks so much for stopping by and linking up to the Sunday Showcase. These are fabulous! Great color! I greatly appreciate it! Hope you enjoy your week! ~ Stephanie Lynn
Love your candlestick-nots. You are right, they are the perfect way to display alot of other things, and your birds and nests are too cute.
They are beautiful…and you are right a great way to display other stuff too.
Gorgeous! I am so glad you linked up this week. Amazing what paint can do isn’t it?