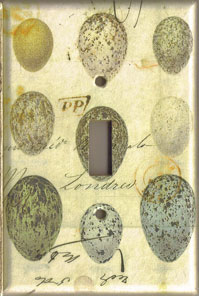
I love Country Living Magazine and the ideas I get from perusing through the pages of the magazine. It seems like there’s something I want on every page. I found these, and fell in love, but couldn’t pay $16 each. Especially if I wanted one for every room of my house.
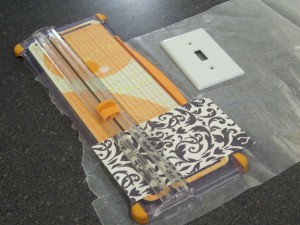
So what’s a girl to do? Make her own, of course. I thought I’d start with my bedroom, so I raided my scrapbook paper stash searching for the perfect paper to go in my room. I love this pattern and thought I’d be happy with it for a long time. I cut it close to the size I’d need, but left extra to wrap around to the back of the cover.
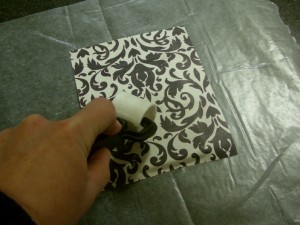
I applied the mod podge to the cover and centered the patterned paper where I wanted it on the cover. I used the roller again to make sure to get out all the bubbles.
It was at this point when I realized this was going to be a little harder than I thought because of the curved edges. So I decided to do 2 sides at a time, by applying the mod podge on the edges and back and holding the paper in place for a few minutes. Then I sat it down and let it dry a few minutes before I did the other 2 sides.
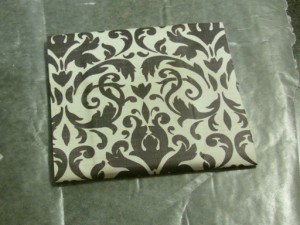
I cut off the excess paper on the sides, applied the mod podge and wrapped it around again.
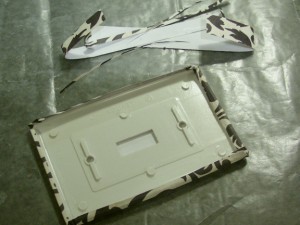
I folded the corners like if I were wrapping a present to get them to lay flat. Then I held it in place for a few minutes again. I sat it down and let it dry some more before the next step.
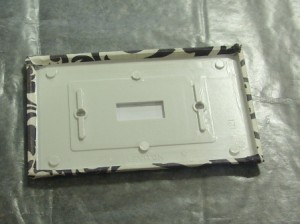
To cut out the hole for the switch I used these tools that are actually for ceramics, but they worked. Any small sharp knife or blade would work. I used them to make the holes for the screws too. I didn’t worry about them being perfect because they were going to be covered by the screws anyway.
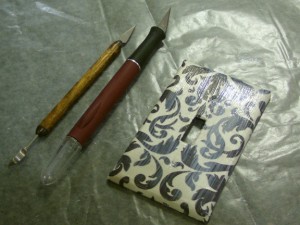
Then I applied 2 coats of mod podge. It’s going to be touched a lot so I need to be able to wash the surface off.
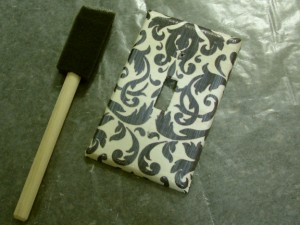
Wait for it to dry and then put it back over the switch. Ta-Da!
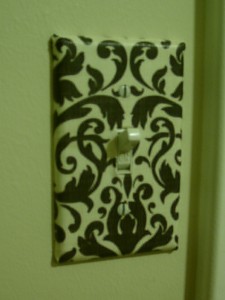
I really like it. I tried to center the pattern over the switch. I was only off a little, so I’m pretty pleased.
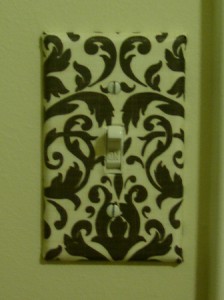
While I was looking through the scrapbook paper I found one that will match the hall bathroom perfectly. I think I’ll have to make some more this weekend. I could probably do every switch cover in my house for under $16. Especially if I just use paper I already have.


I love, love, love these headbands. A little bit of glamour for an everyday mom like me. I’d love to have one with a Cranberry Headband with Cream Flower. Thanks for the great giveaway!
What a great idea! I love the black and white paper, it looks great!
You can also poke the hole from the back side as if you were setting an eyelet. So cool, and you can change them out anytime you change the decor or for a holiday since paper is so cheap.
SO funny. I just repainted DS7’s room in a camo theme. The main wall color is a dark khaki and the white plate covers stick out like a sore thumb. So I am working on the switches and the outlet covers. I am done with 2 and have a couple more to do. They look awesome. I am thinking that I am going to do some for my mom for Mothers day with pictures of flowers from her garden.
I either have that same paper, or some very similar. I love what you did! I think this will be a project in my future!
Love, love love the switchplate cover – what an awesome idea… small effort for large impact, my favorite!
Good for you for making your own! It came out great! I’ll bet if you go to the Graphics Fairy you can find some egg designs to print off and use!
Love this idea!! I’ve even got all the supplies (and more scrap leftovers than I ever will admit to!!) Going to do this over the weekend!
Super cute! I love it (and that pattern you used)! I might have to try this one soon.
WOW! Does that ever look luxurious or what?! I mean, seriously, it REALLY looks awesome.
I love it! I might just have to give it a try. Thanks for sharing with us today.
~ Tracy
I’m loving the black and white… and the super cheap upgrade! It must have made such a difference in your space!!
Awesome! I might have to give this a try. Great post! Thanks for the inspiration
I love this head bands! I love the raspberry and cream! Oh just the most amazing color combo. She is super creative and it is so nice that they don’t cost a small loan to buy them! However it would be really fun to win one.
I love the way these turned out. I think I actually have this paper too. Thanks for sharing this.
Love the covers I’ve done this in my new house too after I painted over the white ones trying to avoid taping off a room, so easy to do and fun way to match your decor. I saw last weekend where the Dollar tree actually have wall cover outlet stickers now. I like mod podge version much better
Love the headbands. Cranberry flower, black band would be my choice.
Well,aren’t you just the most clever. I love this idea and how personal it can be and what a great gift it would make. I am going to try this. You did a great job, thanks for inspiring me.
Cha Cha
OK, I love that. The black & white, the pattern, the fact that it’s a light switch… just everything! Thanks for sharing it, ’cause I’m on the hunt now to change up a few of ours 🙂
Thanks for linking up your victory for VOTW @ Design-Aholic. Make sure to come back again, I can’t wait to see what you have next!
-Amy
Oh so gorgeous!! As always!! 🙂
I had to see how you did these cuz I have such bubble issues w/Mod Podge. They came out great! I’ve gotta try these. Great way to spruce up a room.
I love this idea. I was actually thinking to myself this weekend that I would like to get something fun to be my light switch cover in my bedroom. I would have never thought of this. Thank you for sharing.
I wanted to try something like this. I just finished painting a room and my light switches really look out of place now. Thanks for blazing the trail…
Cindy at Lakewood
Great project! Love the paper you picked!
Thank you so much for stopping by the Talented Tuesday at My Frugal Family link party, and adding this to the page! Don’t forget to stop back next week to see which links from this week are featured, and to add your new links!
Wow, these are great! May have to try it on this, another snow day. . .let kids make their own maybe???
Great idea! I usually paint old light switch covers so they blend into the wall, but then they chip after a while. This will be really cute for kid’s rooms too!
What a great idea! I am gonna have to mod podge some of my light switches.
Sandra
Wow you are linking up to a lot of site! This is a great tutorial though, it’s amazing how a small think like this can really brighten up a room. Great work.
Jade
I think I might have to snag this idea from you. Love it..
Thanks for coming to the party “Get Your Craft On Thurs.” Please come again next week…
Lori
This is genius! Love it!
Great job! I did this in our powder room, but would really love to expand to the rest of the house! Thanks for linking up!
What a great idea! I so want to do this to my light switches!
LOVE it! Can’t believe I started replacing my covers with brushed nickel ones at $3 apiece when I could do THIS instead! Thanks 🙂
That turned out so cute! I love the black and white one…it looks so classy! I made one recently using photo transfer with Mod Podge but think this would be so much fun!
Hi there
I love this idea, and had a bit of a go at it myself
This is a great idea. Love the switchplate cover. Thanks for sharing this!