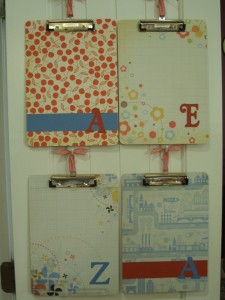
I decided to make the kids new clipboards to hang, in their lockers, in the new mudroom. They’ve had their old ones for a few years now and they were starting to show some wear and tear since they get used every day. Do you want to know how to make your own?
First, paint Mod Podge on the clipboard and apply your paper choice to the front. Use a small roller to get out any air bubbles and to make sure it adheres well to the clipboard. Pay extra attention to the edges and corners to make sure you have a good seal.
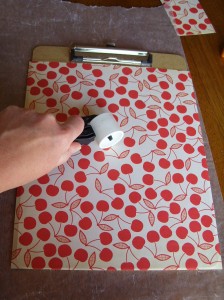
Cut 2 smaller pieces to fit around the clip at the top of the board. Mod Podge the pieces onto the board, trying to match the pattern of the paper.
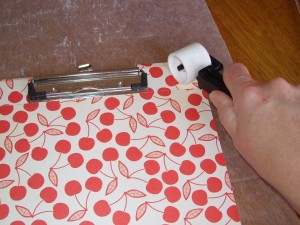
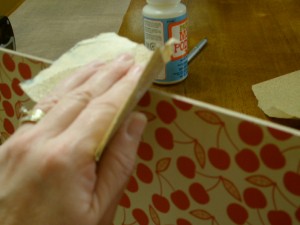
Let dry for 30 minutes, then use sand paper to sand the excess off the board. The sand paper gives it a nice finished look.
Add any embellishments or monograms you like. I used the Cricut to cut out the monograms and left the clipboard pretty simple so it would be a good writing surface for the kids. Then add a coat of Mod Podge on the top to seal it. Tie a ribbon through the hole to hang it from and you’re done.
Amanda’s:
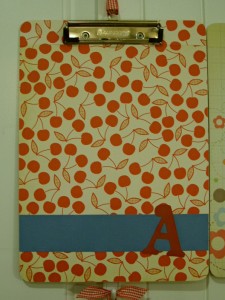
Emilee’s:
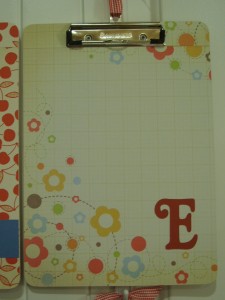
Zachary’s:
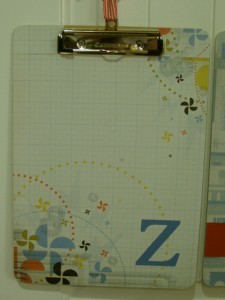
Ammon’s:
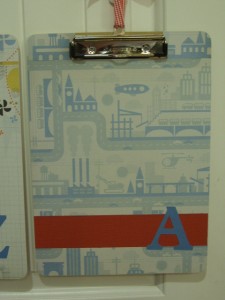
You might be wondering what we use the clipboards for. The kids have a place to put their homework assignments, sports schedules, school schedules, lunch menus, book order forms, etc. until they’re needed. They’re also great to take along in the car to have a hard, flat surface to do their homework on. We’ve been using clipboards for about 5 years now and have never lost a homework assignment since we’ve been using them. They work great for our family.
Now if I can just get the mudroom done, so these cute clipboards can hang in there.


They turned out great Leanne. I need to do something similar to keep track of my four kids’ school stuff. Lately it just piles on my desk, then magically disappears when you need them 🙂
These are great!!
Love the way you’ve decorated our boards! They look fantastic. Such a great way to get the kids excited about using them!
I’ve posted your blog URL to our Facebook page. You can check it out at:
http://www.facebook.com/saundersmfg
http://www.twitter.com/saundersmfg
Thanks for sharing!
Jennifer from Saunders
clipboards are so fun!
I love these! I am wanting to make most of our gift-giving homemade this year, and I’ve needed more ideas that are not edible and for pre-teen age. These would be perfect. Actually, these could be for any age, even a business man if the right paper is used. Thanks for the idea!
These are too cute!! The kids and I saw something like this at the store for WAY too much! I told them we could make them!! Now I KNOW we can!
thanks for another great idea!
blessings
barbara jean
Smart idea! They look so fun to look at. I’d smile with tasks attached to those guys.
Donna
Those are too cute!
Happy New Year…Kathy
I made some close to these for my Sunday school class this year, but didn’t think to use a roller. That would helped with the air bubbles, you are so smart. Thanks for giving me a tip for next time.
Really Really cute. Thanks for sharing.
Supah cutie!
Linda
Love it!! they are soo cute!
Okay, love these too! I love everything you make. You’re making me want to get the Mod Podge out again, it’s been awhile. 🙂 Thanks for linking up!
I love the way these turned out! I’ve never tried them before but recently bought Mod Podge and I’m anxious to try it…this looks like a great first project! Thanks for the inspiration! = )
These are great – I’m definitely going to try some for my boys’ rooms!
these are so cute. thinking ahead to end of year teacher gifts!
Oh these are sooo fun! Love all the bright colors too. Thanks for linkin’ up to Frugalicious Friday!
Really great tutorial. I have actually had this on my to do list since Oct. My son wants one in baseball–he loves, eats, breathes baseball. He wants to redo his room in baseball–not till we move.
Cheri
I’m linking to this on my blog today; I hope that is ok! I love your clipboards & have actually been planning to make 4 to hang in our office (once I choose the accent color for the room) for MONTHS! I knew I was going to make them myself but was not sure how to do it! Thanks so much for the tutorial!!
YAY!!!!!
Jen
You’ve been featured. Go check it out.
Cheri
Two questions I forgot to ask:
Did you mod-podge on top of the paper after you were done or just underneath the paper?
Did you wrap the paper around the sides & back and then sand it away or is it perfectly cut to fit around JUST the front barely touching the edges?
Thanks so much for your time!
JEN
These are great! Thanks for the awesome tutorial, I put a picture of the ones I made with a link to your blog on my blog today. 🙂 Thanks again!
http://lifeofamodernmom.blogspot.com/2011/03/clipboard-craft.html