
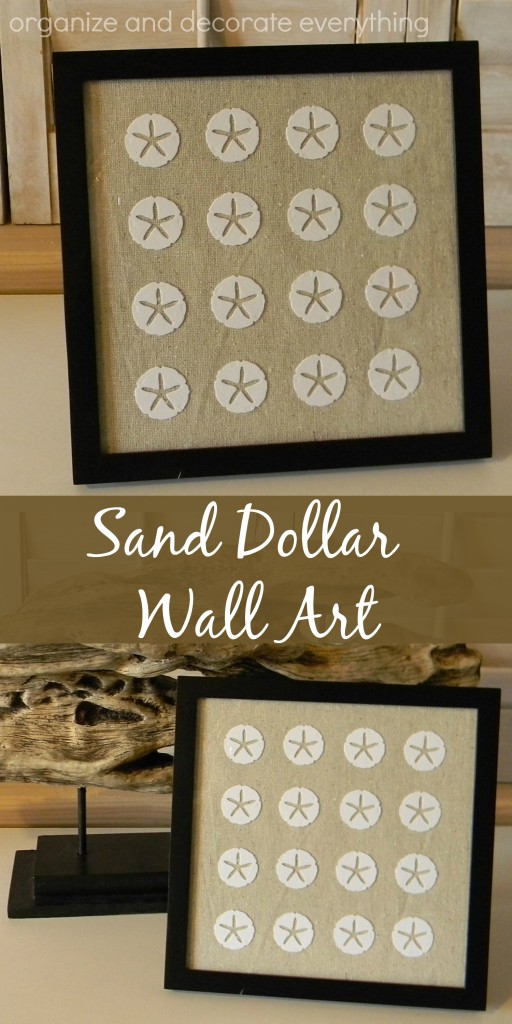
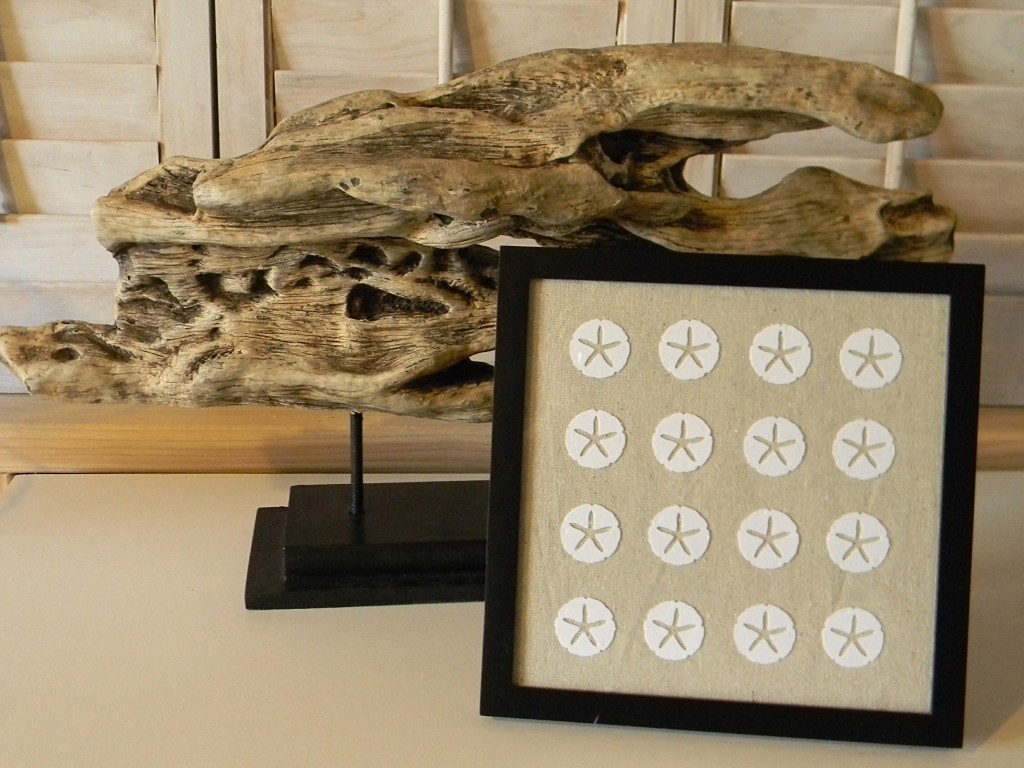
I saw this framed sea urchin wall art at Pottery Barn and knew I wanted to make something similar for Summer. It’s large, but at a cost of $139 it’s definitely out of my budget. The Framed Sand Dollar Wall Art is my version of this wall art, although it’s much smaller I still like the impact it has when displayed.

I like that I was able to use things I already had to make something similar but on a smaller scale. Because it’s neutral it fits in any color scheme and can be displayed all Summer long.
Supplies needed:
drop cloth leftover from Ammon’s under bed fort
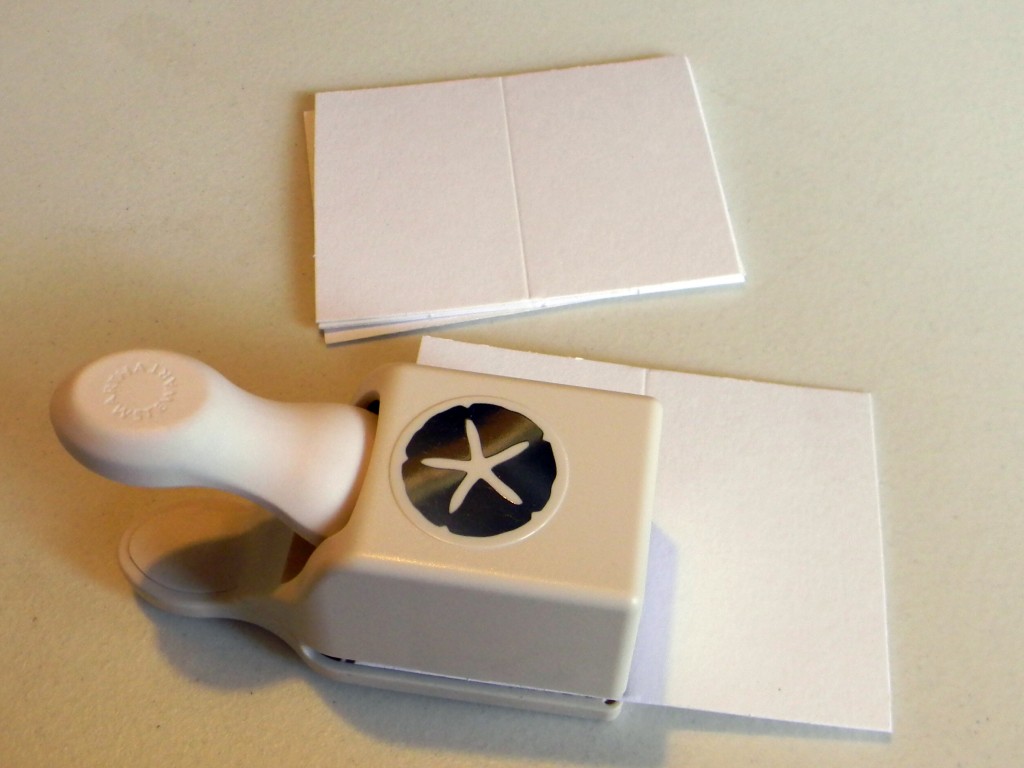
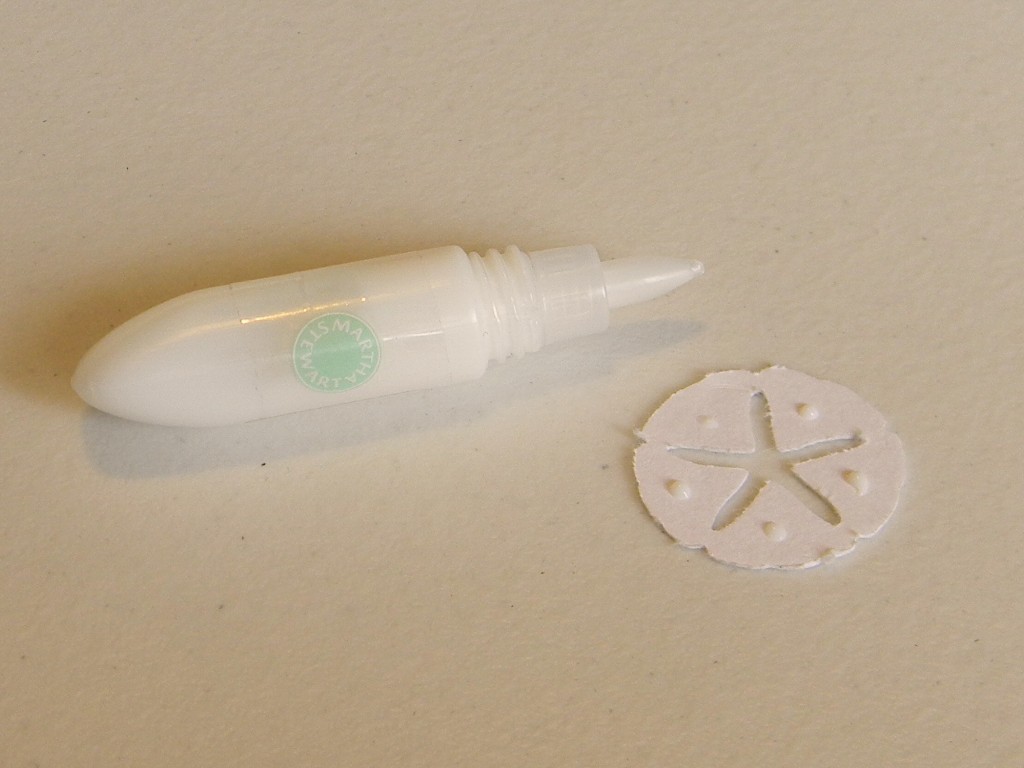
sand dollar punch (Martha Stewart) used for a Summer party
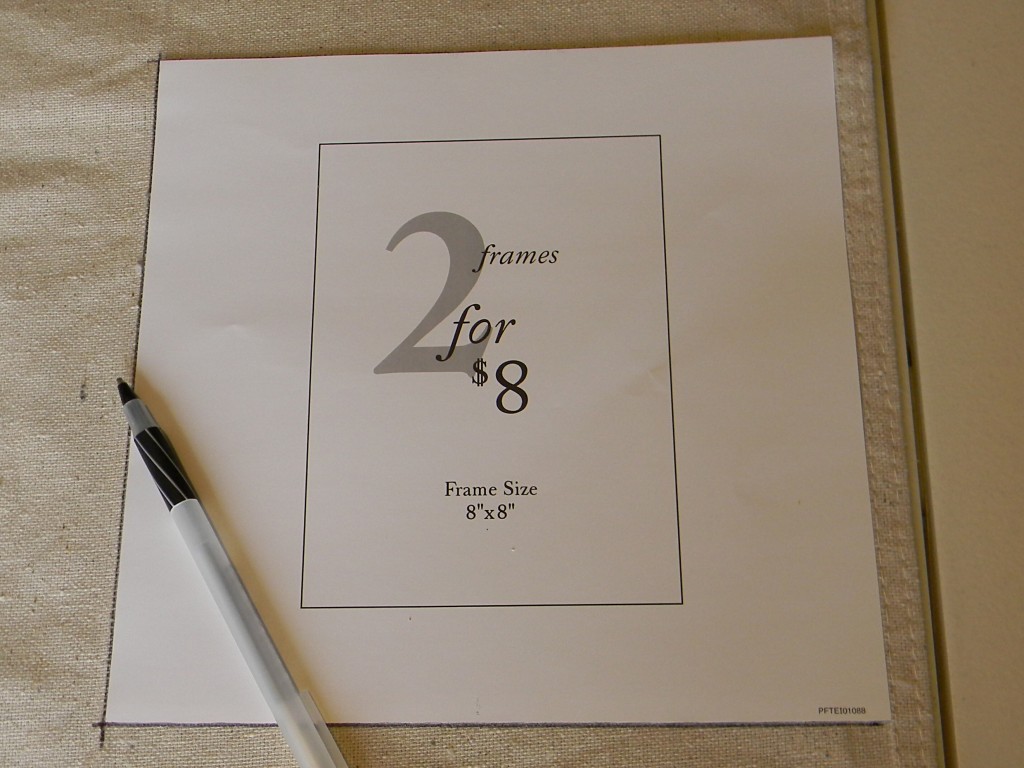
square frame
thick white paper for letterpress or card stock
adhesive glue or glue dots

I love this paper and even though I don’t own a letterpress I’ll probably be buying more. It’s thick and the texture is beautiful and I feel rich when I use it. Because it is so thick, it’s a little hard to punch though. I had to use my muscles.
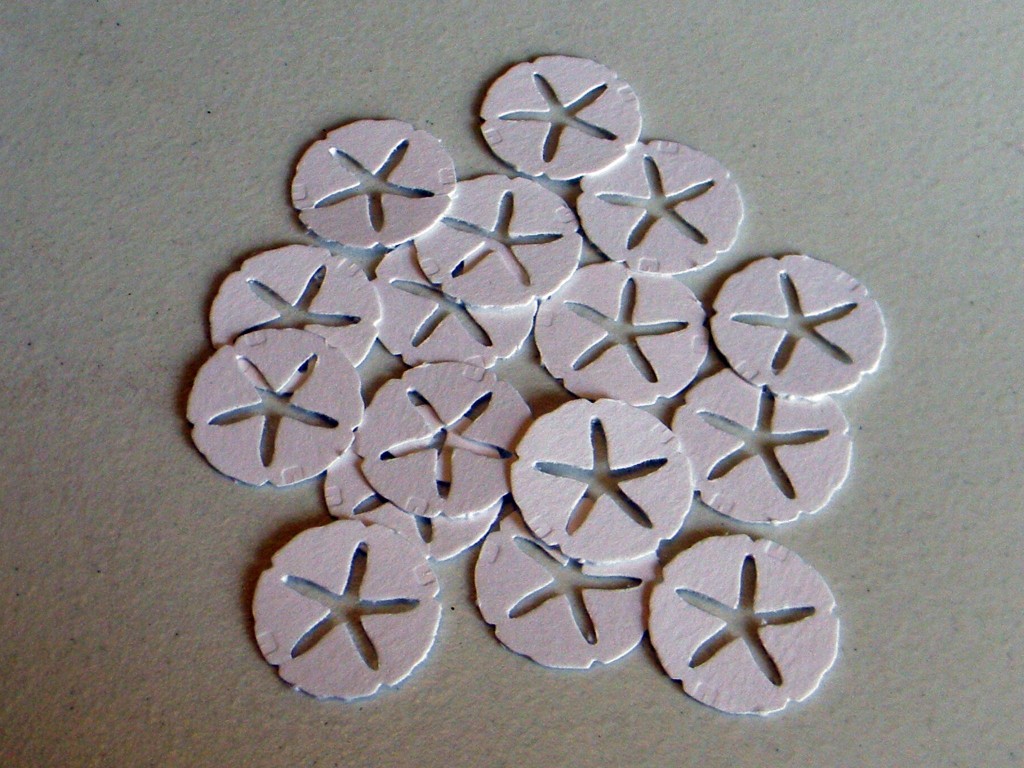
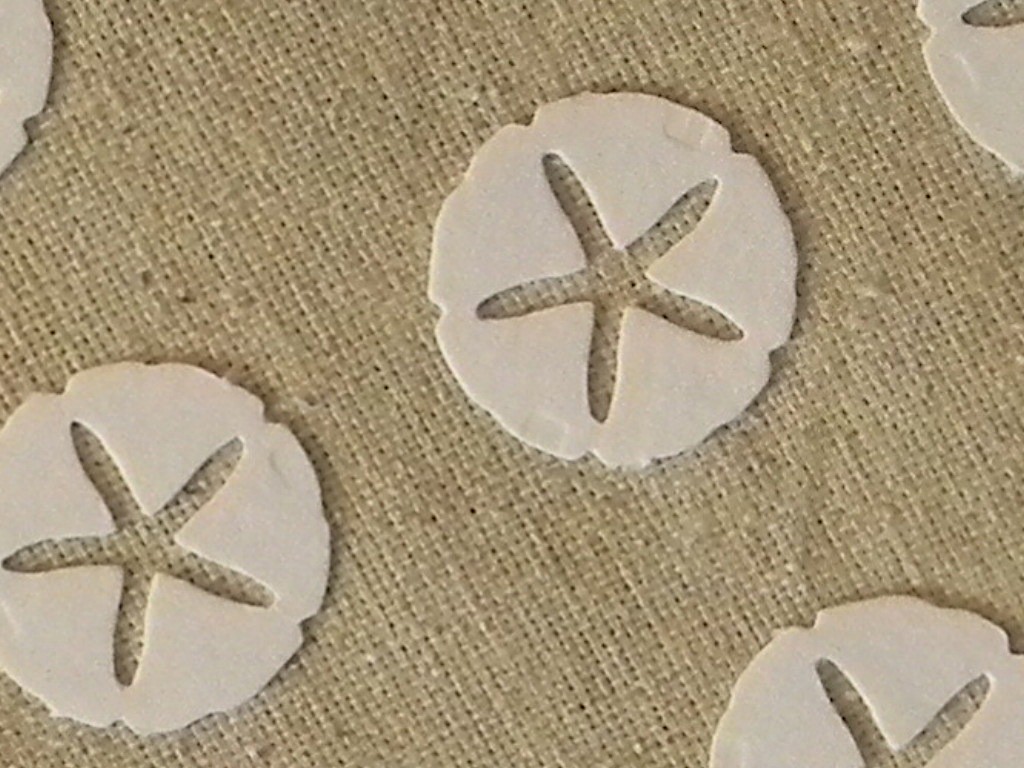
And because the paper is so thick, they almost look real (hubby thought they were). What a bonus!
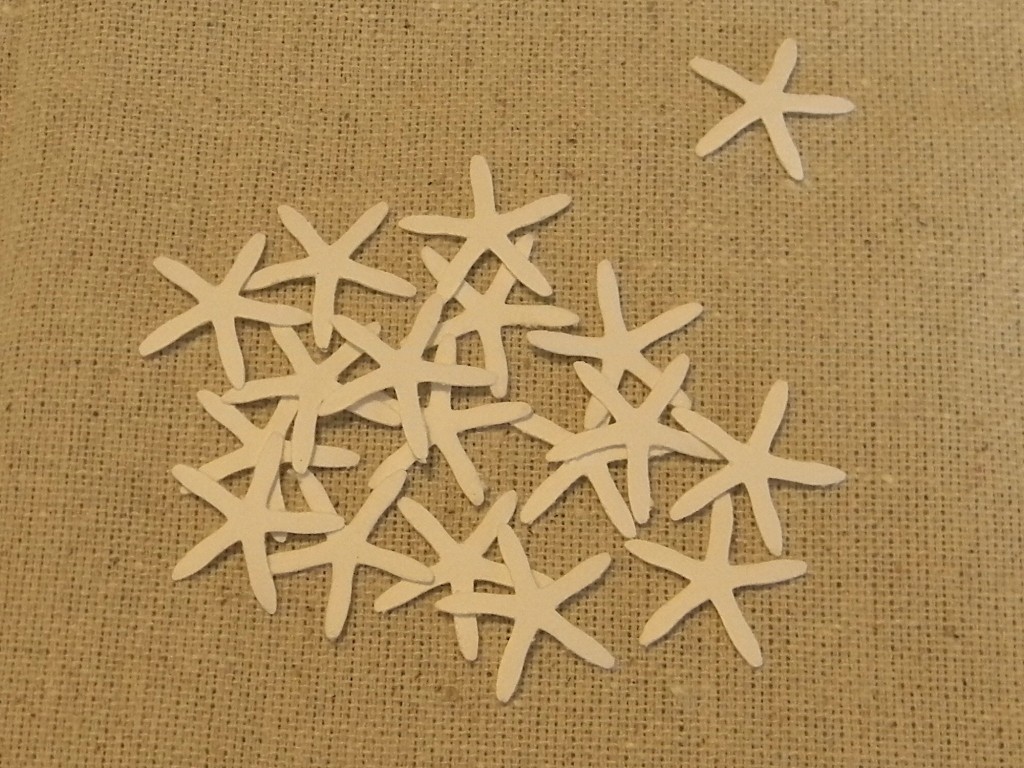
Now I also have these cute little sea stars to use on something else. I have no idea what yet.
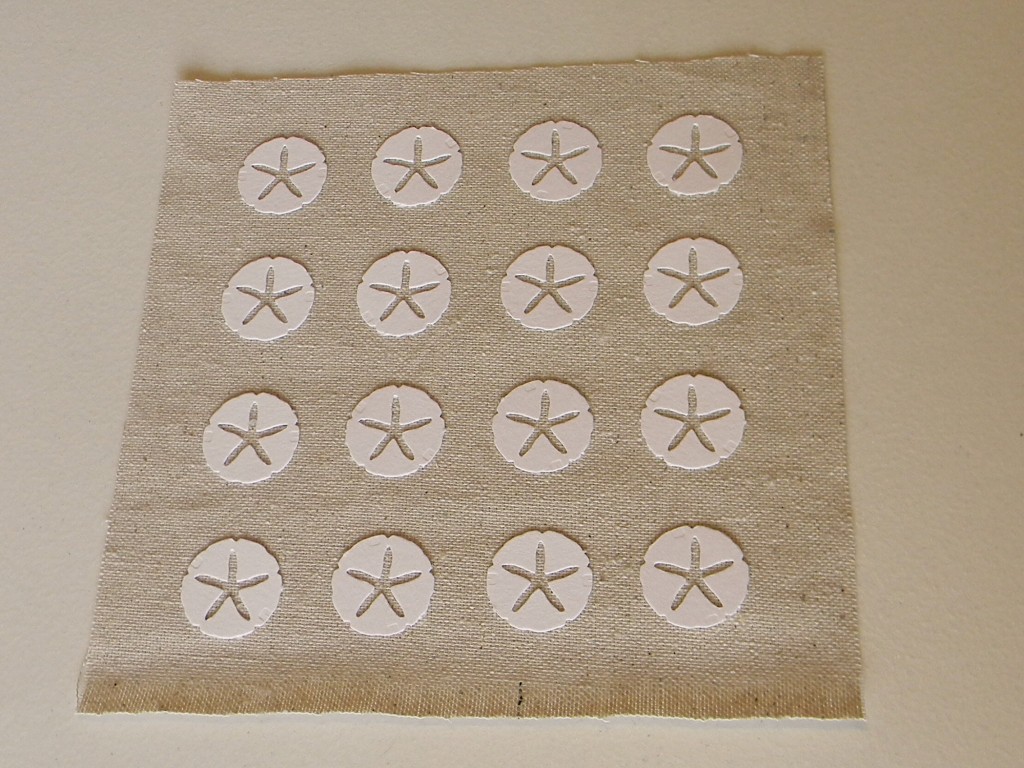
Trace around the paper insert from the frame to get the correct size of drop cloth piece. Cut out the drop cloth piece.
Lay the sand dollars on the fabric to get the right amount and the correct spacing. I hate to measure so I didn’t, I just eye balled it. Don’t look too closely.

I didn’t have any glue dots on hand but I found this Martha Stewart glue in the drawer and it worked perfectly. I probably wouldn’t have used it if the paper wasn’t so thick though.
Once they were all glued down, I let it sit for about a 1/2 hour to let it dry before I stuck it in the frame.
I love the 2 different textures together. It even looks great under the glass.
And I really like the contrast of the black frame. If you don’t like the contrast you could always paint the frame white or tan.

I’m so excited to change my mantel again so I can put out my sand dollar wall art along with the driftwood piece. Hopefully I’ll be able to show you soon.


OH I love this idea! I have everything but the punch but that’s nothing a little trip to Michael’s can’t fix! 🙂 I am adding this to my list!
Love the look of this Leanne! And it’s perfect for summer! Beachy and beautiful!
xoxo,
Amy
Lovely!! This is the perfect addition to summer decor. It looks great. I think your spacing is just fine. 😉
Visiting from The Stories of A 2 Z. Hope you’ll stop by my blog to say hi. 🙂
This is absolutely ADORABLE! And I love how easily and inexpensively you made it. What a fabulously creative idea.
What a neat way to replicate san dollars! A great pottery barn knock off!
That looks great! I thought they were real until you showed the punch! I love yours! I think it looks 1000000 times better that the pottery barn one!
This is adorable! Totally looks like it belongs in a beach home 😀
I hope you’ll be linking this up to Your Whims Wednesday!
What a fabulous idea. I have started to do our bathroom in a beachy theme and I will absolutely be copying this, lol. Thanks so much for the fantastic idea.
Cute!! 🙂 This has definitely inspired me!! I need to get with it on my daughter’s “Hula Baby” room 😉
So cute! What a great idea!
I’ve put together a round up of great beach themed projects on Craft Gossip today and included your post. 🙂
This is VERY cute!
Adorable! I may have to try this – looks seriously awesome!
Great knock-off! This looks lovely.
Love this! It turned out fabulous. Now I need that punch, lol ( I already have quite a collection of punches.)
What a simple and easy project that just is lovely! I like the idea very much!
have a great day!
How pretty & perfect for summer! Didn’t realize these were paper until I read the tutorial!
GORGEOUS! I just bought 100+ tiny starfish off ebay for $4.99 for my beach themed guest bathroom and THIS is what I plan to do with a handful of them. Thanks for the tutorial!! Beautiful!
You’ve been featured at my party this week
Congratulations! You are awesome. Stop by and grab a button if you’d like.
Great idea – thanks for sharing! I’ll have to keep this idea in mind for a birthday gift – I know someone who would love it!
What a fabulous idea. I’m your newest follower. Cheers
Leanne your art work is super cute. I love the idea fo using punch paper – so many possibilities! Thanks so much for linking to the Sunday Showcase Party – I greatly appreciate it. I have featured this. Hope you are having a great week ~ Stephanie
Love it! I thought they were real too!