In January I taught a group of women in my church about organizing. I went over a lot of tips, tricks and ideas for organizing, plus some tools I use in my own home and clients homes. One of the tools I talked about was a memo board. The ladies decided they wanted me to teach them how to make a ribbon memo board and these clipboards at a meeting in April. Here’s how we’re going to make them:
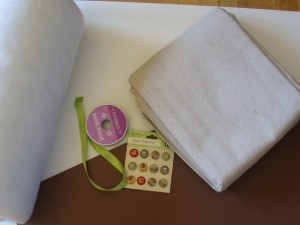
First, gather all the supplies you’ll need:
OSB board for the back- it comes 2′ x 4′, this is 1/3 of the sheet
Foam core board
Batting
Material- I used a painters drop cloth
Roll of ribbon
Buttons or brads
Glue gun and sticks (at least 6)
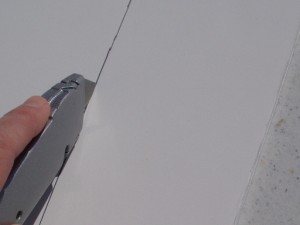
Cut the foam core board to fit the size of the OSB board. A box cutter works great and makes a smooth cut.
Cut the batting about 2″ bigger than the board on every side and the material a little bigger than the batting.
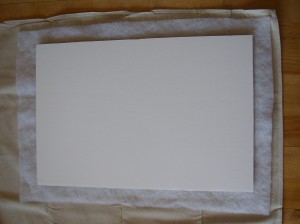
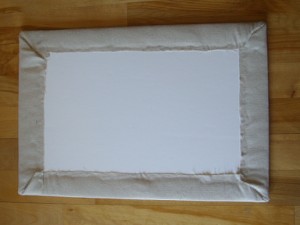
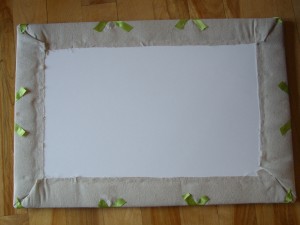
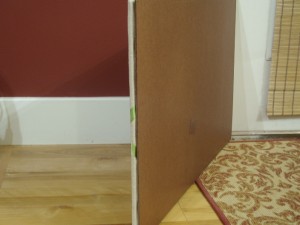
Start gluing the material and batting to the board corners first, like this.
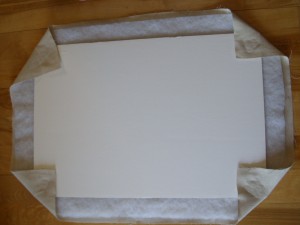
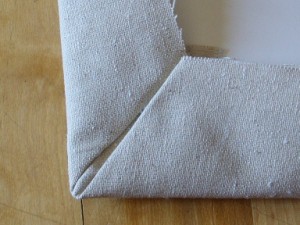
Bring both sides of each corner into the center of the corner and glue. Then glue all the sides. Pull the material tight, but not too tight.
Here’s a close-up of the corner.
Now you’re ready for the ribbon. This was the hardest part for me. I used yarn first to map out my ribbon pattern. The easiest way for me was to start with the corners and bring them 2/3 of the way into the board. Once you have all four corner to center ribbons glued down, measure the other ribbon pieces equally spaced from each other and glue on the back of the board.
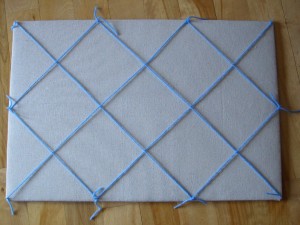
Does that make sense? Here’s another picture to help. Just make sure your diamond patterns all line up.
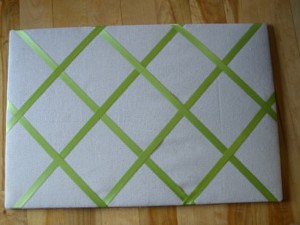
Here’s the back. Not very pretty, huh? Don’t worry. It’ll be covered up.
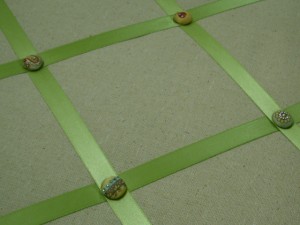
Now you can add the buttons or brads. I added a little glue to the brads just to secure them a little more.
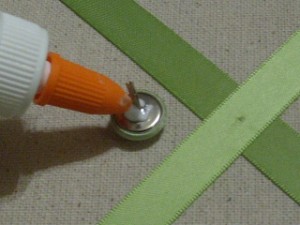
I like using the brads because you can poke them all the way through the foam board and secure them on the back side.
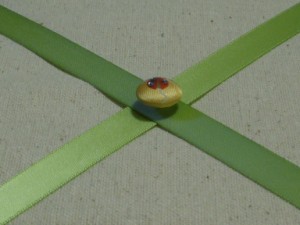
Like this.
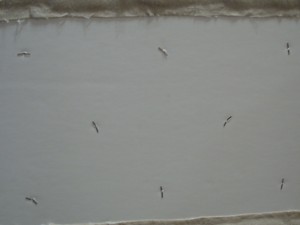
Next secure the OSB board to the back of the completed board. I used liquid nails. It needs to sit over night and don’t hang it up for at least 24 hours. Add 2 saw tooth hangers to the back of the board after it’s set.
Ta-Da!
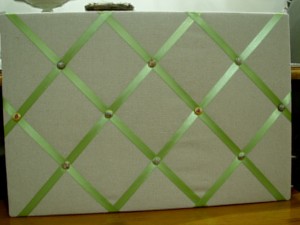
Here’s some of the cute brads.
The board works this way
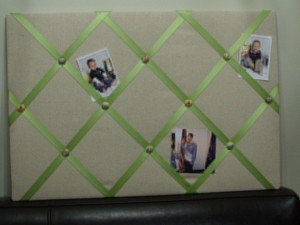
Or this way.
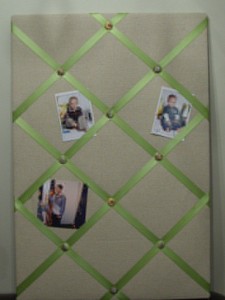
Total cost for the project: about $8.00.


Thank you for this tutorial. I’m following this from over at Just-a-Girl’s link party.
You’ve inspired me to make one for each of my daughters, and one for myself!
(Hope you are feeling better soon)
Warm regards from Kitty
I’ve always wanted to make one of these. Thanks for this excellent tutorial. Truly inspiring.
That was a great tutorial. I think I could make one of those. I think I will in fact. Thanks for sharing and get well.
Brooke
Gorgeous as always! Thanks for a great tutorial!
Adorable! And thanks so much for giving the overall cost. I hate seeing a project I’d love to try and then later realizing it wasn’t worth the effort because of the cost factor.
I hope you feel better soon!
That’s a great idea! They should enjoy bringing such a pretty memo board home!
super cute! I love it!
So sorry you’ve not been feeling well….I got sick last week which is rare for me, especially in the spring! WE mom’s of lots HATE to be sick, eh?! Hope you get back to full strength asap 🙂
I’m so glad you posted this tutorial. I’m helping a friend revamp her 13 year old daughter’s room, and she wants one of these for over her desk. I will definitely use your instructions to make hers!
I found one of these for .99 at a thrift store. Even though it was a color I didnt like, I bought it with the intention of recovering it. Now, thanks to your post I know exactly how to do that! Thanks for sharing.
wow, look at that, very creative and inspiring, I wish I could design something like that
I am new to the blogging world and ran across yours while being mostly bed ridden. I have enjoyed reading what you have to say and being inspired by you to do a few things as I get better. Just yesterday I made clipboards for my four children who are still at home. I wasn’t sure what they would think of them so I let them pick the paper I would use. I was thrilled this morning when I saw a kid place a form for me to fill out in her clipboard! I made a small change to your pattern by placing a coordinating ribbon along the top of the board just under the clip to cover the seam left by adding the paper to the corners. I had trouble getting it to line up straight. So, thanks for the idea. It is working already.!
This is wonderful!
Thanks for joining Get Your Craft on Thursday. Please join me next week for another great party. Don’t forget to stop by and enter my giveaway. I’ll announce the winner at next weeks party!
Great job on the ribbon board! I’ve made some in the past for friends and they were a hit! Your board is just beautiful and buttons are soooo cute! Where do you pick up those brads? I think I had used upholstery tacks on mine..Great project idea!!
Very cute Leanne!
I love it! You did such a great job 🙂
So cute. I love the colors!
I am featuring a necklace tutorial and giveaway. I’d love it if you stopped by my blog!
Great tutorial for a wonderfully useful crafting project!
Thanks for linking up on Craft Schooling Sunday!
I always wondered how to space the ribbons out properly! Thanks for the tutorial. Very nice board.
I hope you’ll drop by AtticMag and give JaneT some advice for her headboard to bench project.
Allison
Wonderful job!! I never knew these could be made that easily! Hmmmm… 😛 I think I have *another* project!
Hi Leanne, this project turned out great! Hope you’ll be well soon!
Great tutorial. I bought a borad like this many years ago. Now I see how easily it can be made.
What a neat idea. We have been looking for a way for my son to display the pictures that he takes maybe this is a good way for him to do that. Thanks!
So fun! I need to make one of those! I especially like the green ribbon!
Very cute memo board! I love it. It’s perfect for spring.
That looks great, and thanks for such an easy-to-follow tutorial!
pretty project! great job! I’m dropping by from Cottage Instincts. I hope to see you back at my place soon! until later…
This is so cute!! Good job…these things can get pricey! passing through from the girl creative tonight…nice to meet you! -shaunna 🙂
You make it look so easy! Thanks for the tutorial. I just may have to give this a try.
The brads are great and so cute. Next time I make one I’ll be adding the brads. Thanks for sharing with Made it Monday! Jules
This turned out so adorable. I’m loving it!
God’s blessings,
Sarah 😀
Such a cute memo board! You did a wonderful job!
Thanks so much for linking it up!
XOXO
Jen
Leanne,
Love the photo board! turned out lovely.
happy crafting!
Linda
Craftaholics Anonymous
That looks great!
Thanks for linking up!
~Liz