
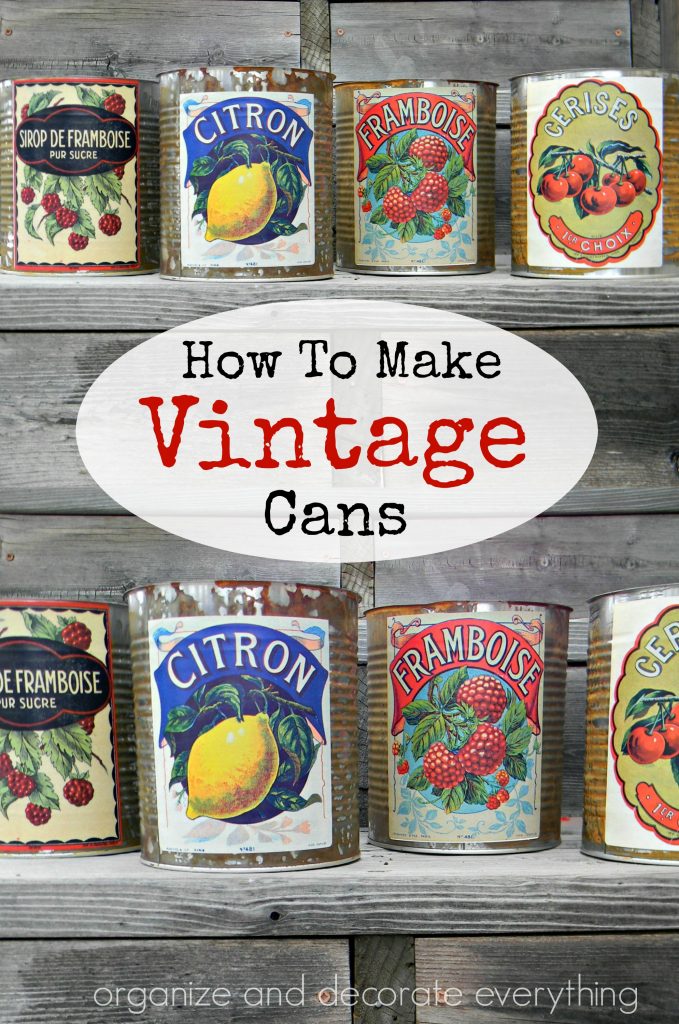
How to Make Vintage Cans using new cans and vintage looking labels. There’s so many options to choose from. You can even make them several different sizes.
This post contains affiliate links for your convenience. I get a small commission which helps me run this blog but there is no added cost to you.
I love old vintage cans but they’re not always easy to find. Even when you find them they might be too rusted, not the right color or the label is torn off. It’s hard to find exactly what you want. I’m going to show you how to make Vintage Cans and get the exact look you want using new metal cans and printed labels. (photo of finished planters for event)
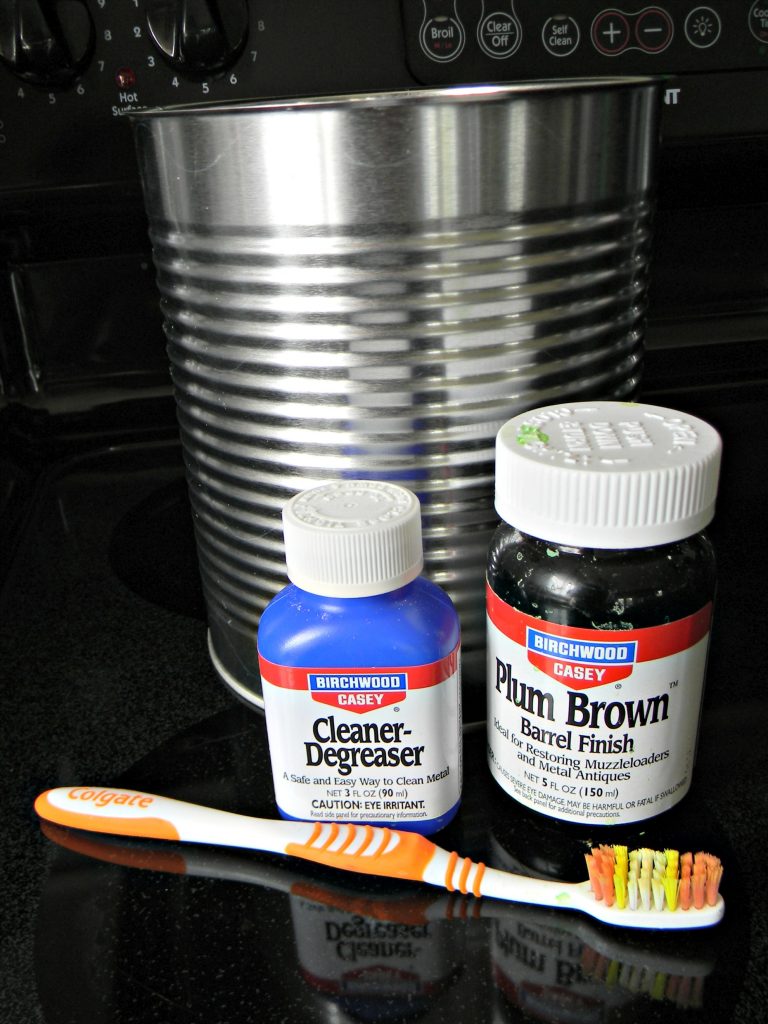
Here’s the supplies you’ll need for the Vintage Cans:
Cans– (these are large #10 cans from any LDS cannery for only .75 cents each) or you can also find them at Lowe’s or Home Depot (you can even use soup or fruit cans if you want smaller containers)
Plum Brown Barrel Finish– (found at most sporting goods stores or Amazon)
Cleaner/Degreaser– (found next to the Plum Brown or Amazon)
Rag– (to apply the cleaner)
Tooth brush– (to apply the plum brown)
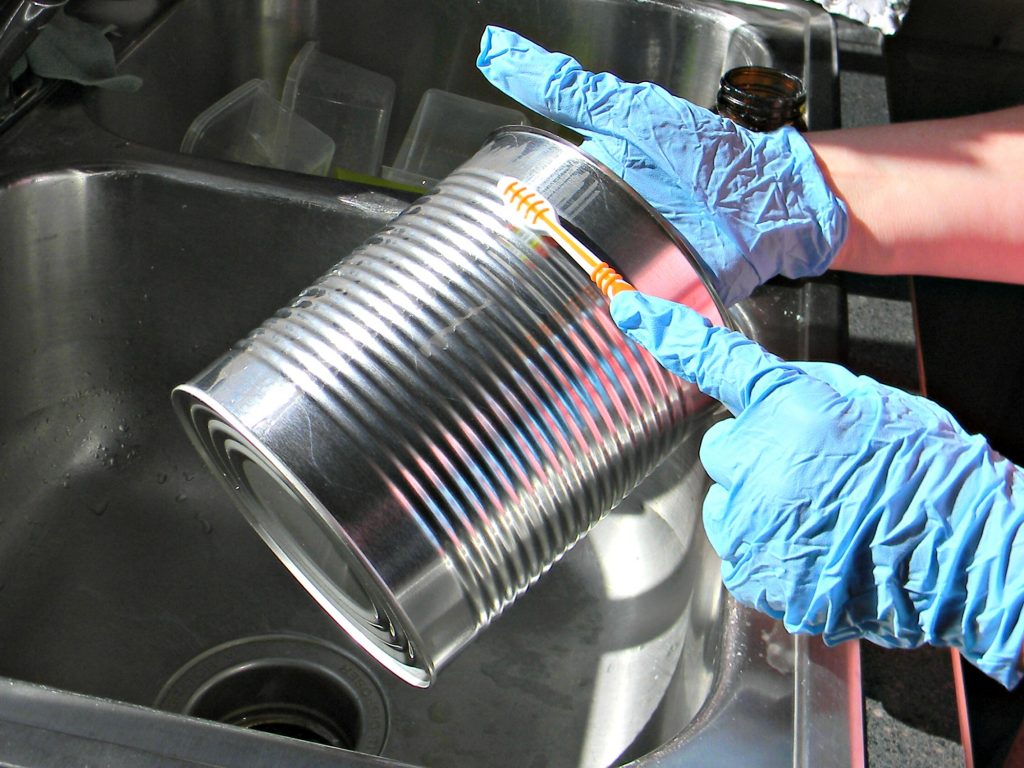
You will also want to wear gloves and an apron.
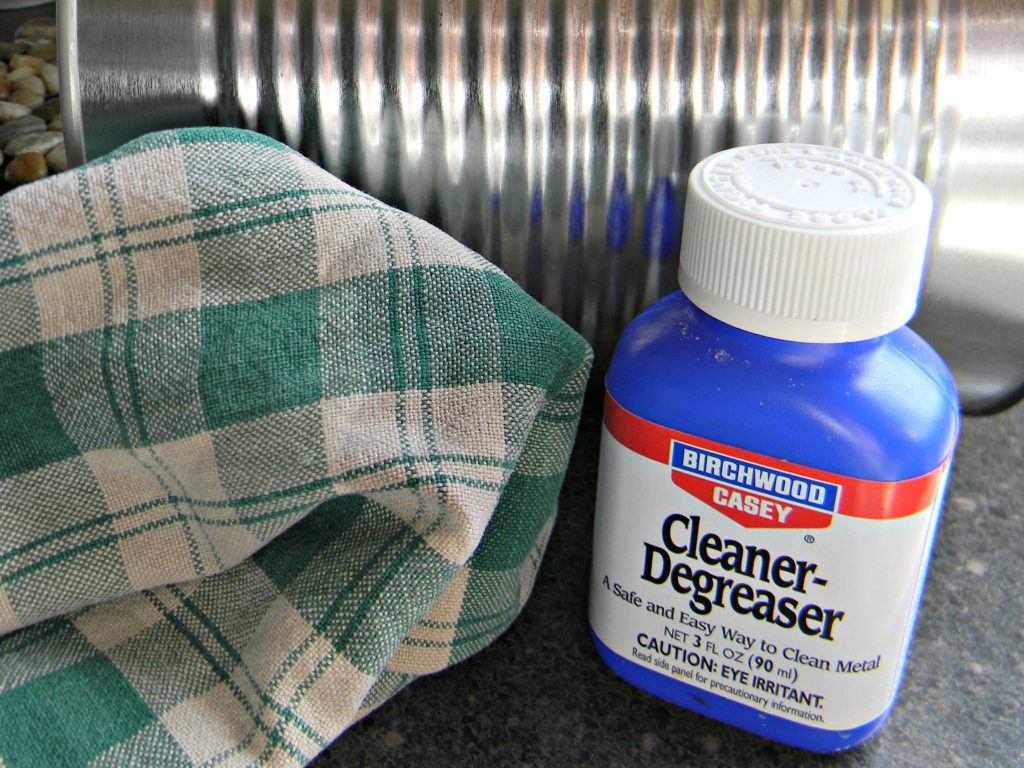
Apply the cleaner/degreaser to the can using a rag. I only used it on the outside of the can. It cleans off fingerprints and other spots so the Plum Brown can work it’s magic. I would recommend wearing gloves even though the label didn’t say anything about that.
Apply the Plum Brown with a toothbrush. Just dip it in the bottle and brush it on the can. I brush it on top to bottom, not side to side. It didn’t seem to go on as well that way. I did it over the sink and wore an apron just in case it got a little messy (which it did).
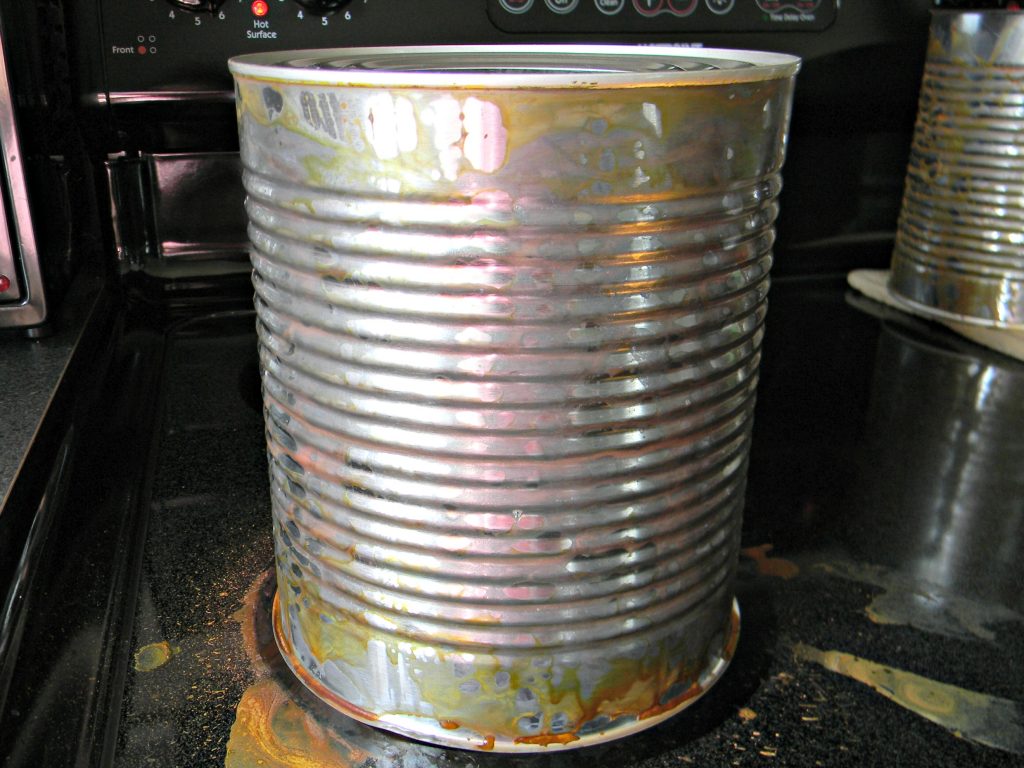
Place the can on the burner (top down) and heat for about 20 seconds. Every stove is a little different so leave it on until the can starts turning rusty. Turn the can over and put it back on the burner for about 10 seconds. Use kitchen tongs when you handle the can. Don’t touch it because it’s very hot.
Place the cans on hot pads or a rack to cool. It only takes about a minute. As you can tell it makes your stove pretty messy, but it was easy to clean up with a little scrubbing.
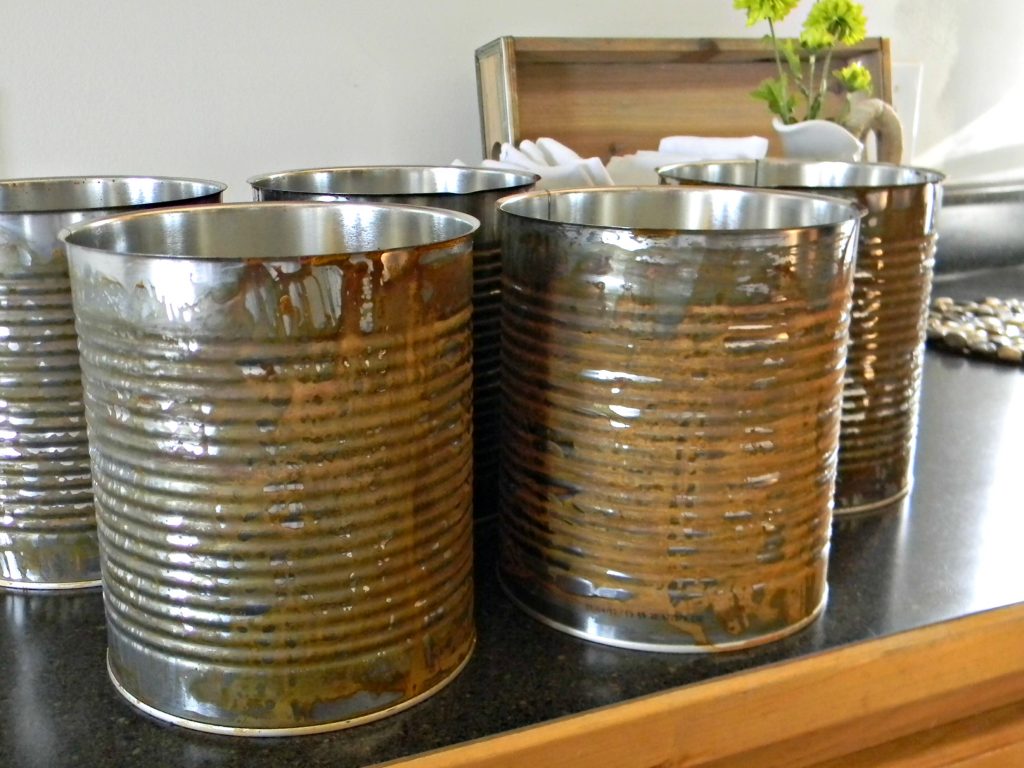
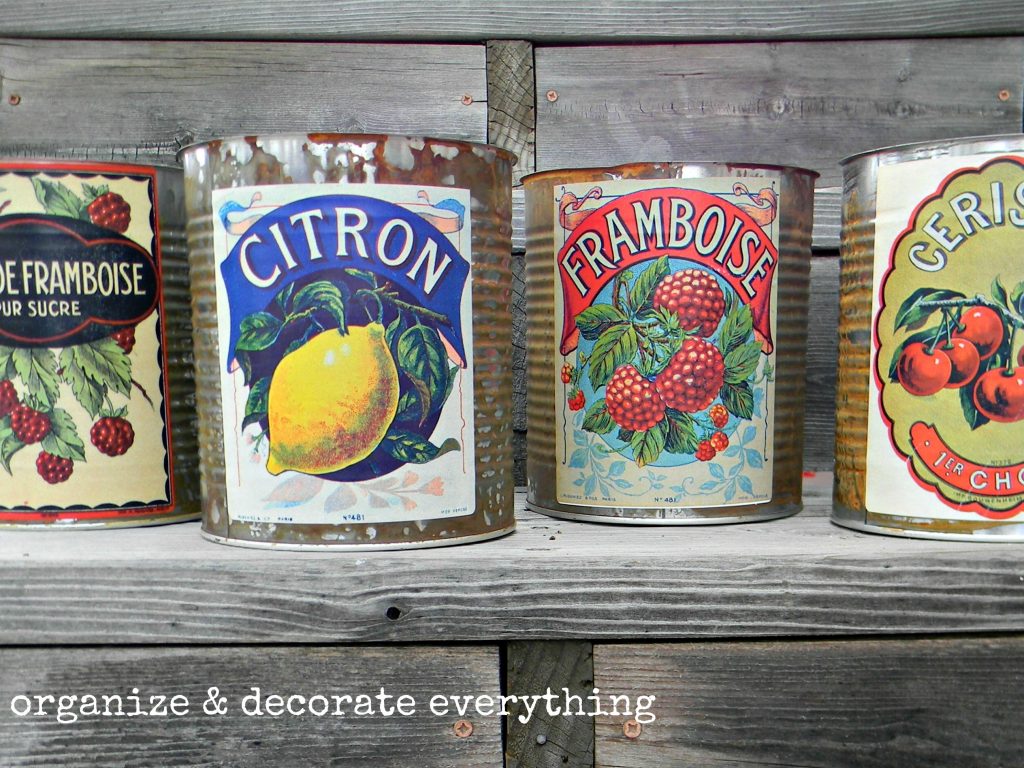
Check out their rusty vintage goodness.
These labels are so beautiful and perfect for vintage cans. These are found on Flickr but a google search for ‘vintage fruit crate labels’ will give you many additional sources.
French Labels
English Labels
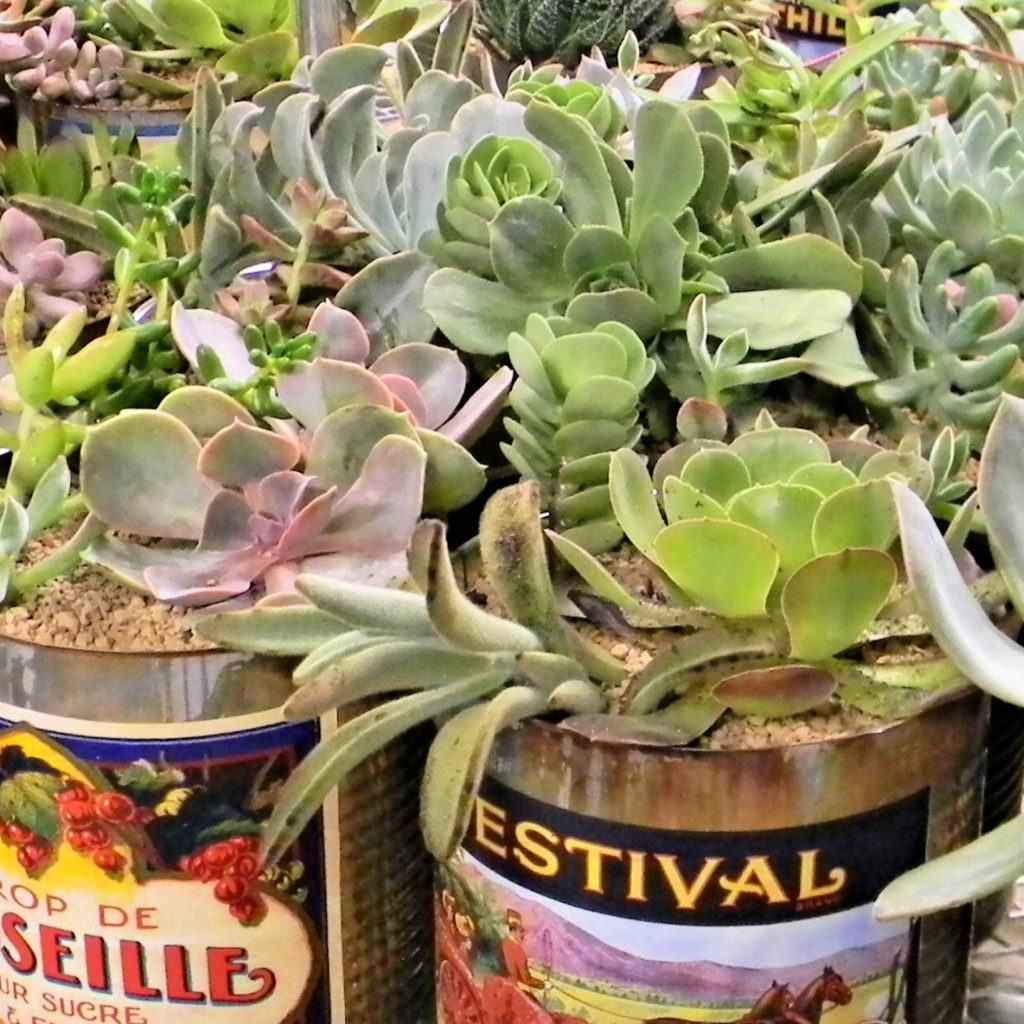
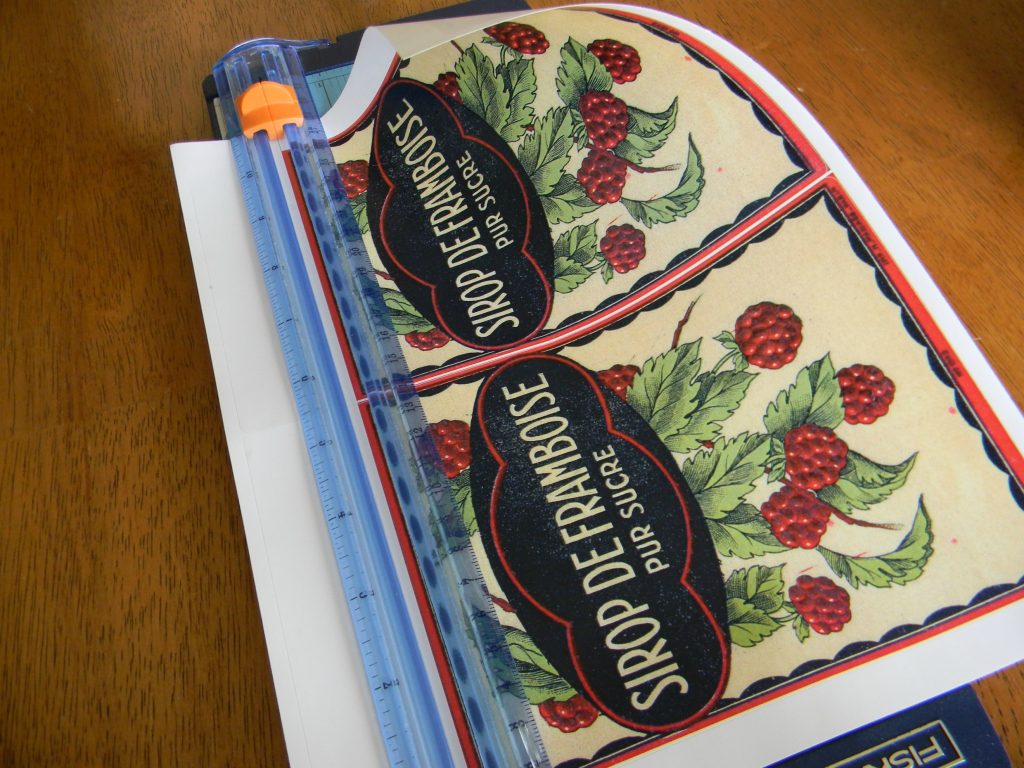
The images are printed on weatherproof polyester label sheets by Online Labels. The labels are available in many different sizes and they’re easy to cut using a paper cutter.
Aren’t they awesome? I love how they turned out. None of them are the same which is totally perfect for the rusted metal can look.
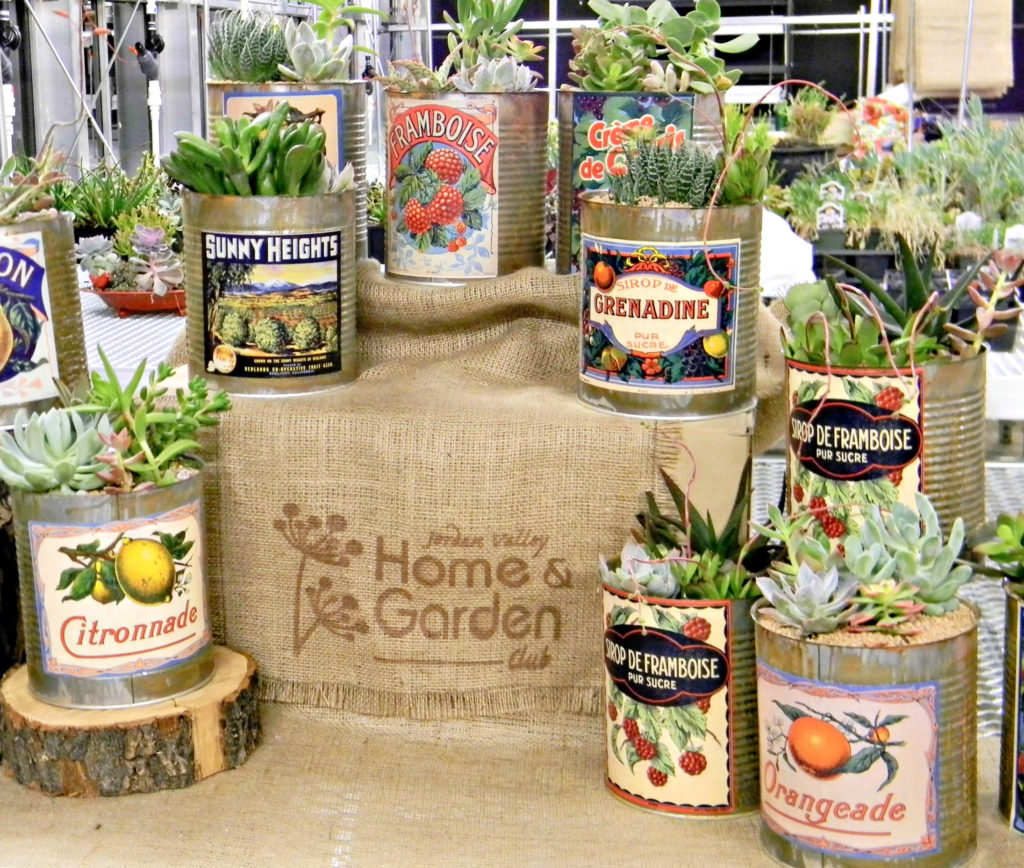
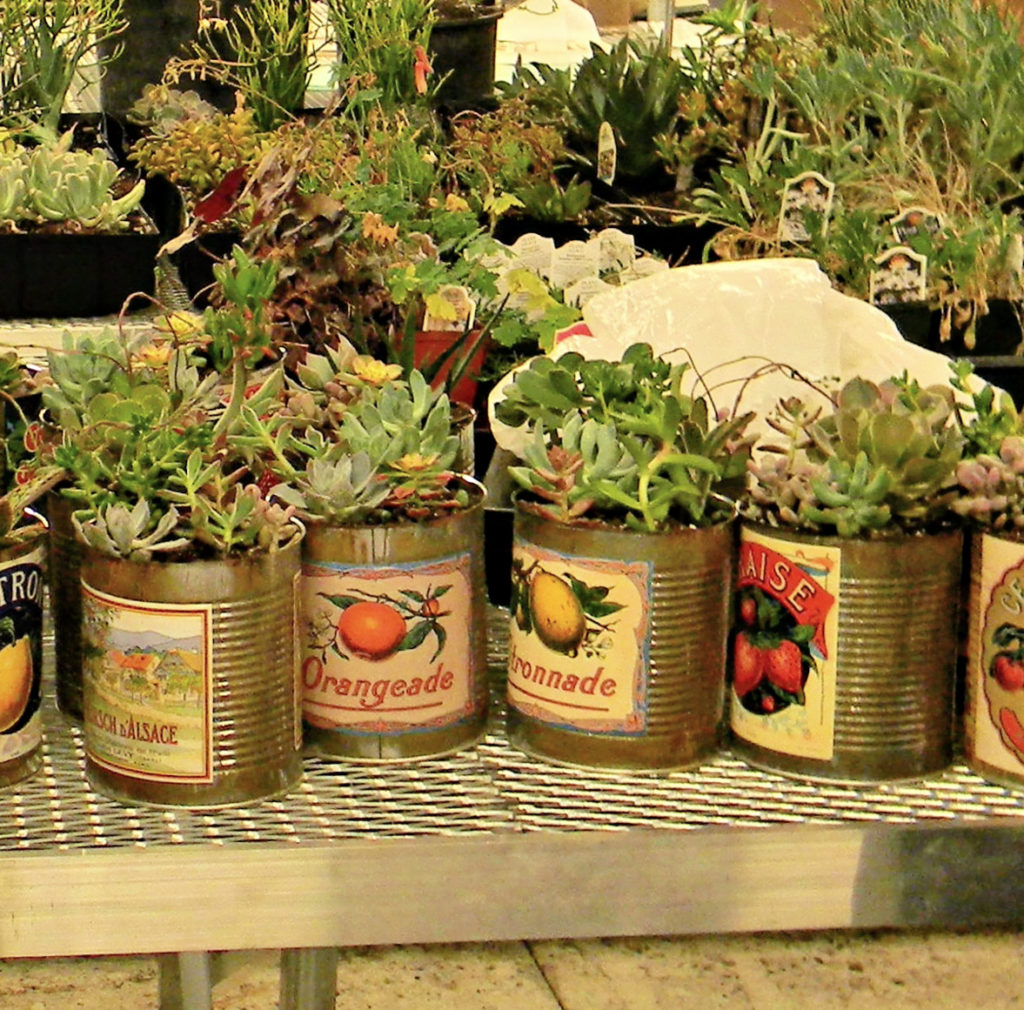
There’s so many uses for the cans plus they add a little unexpected art to your space. The large ones can be used to hold cooking utensils and many other things, and the small one would be perfect for succulents or herbs. They would also make a great housewarming gift. Fill with someone’s favorite flowers and give as a gift!
How about a bit of trivia: Did you know that can label art work was the birthplace of commercial art in America? The advent of Lithography enabled companies to use art to sell their product commercially and there was a great deal of competition between companies to create the best work. Here’s a link to a bit of history if you’re interested.
the labelman.com
Pin it for later: How to Make Vintage Cans
You might also like these posts:
Enamel Painted Boxes
DIY Luminary


