
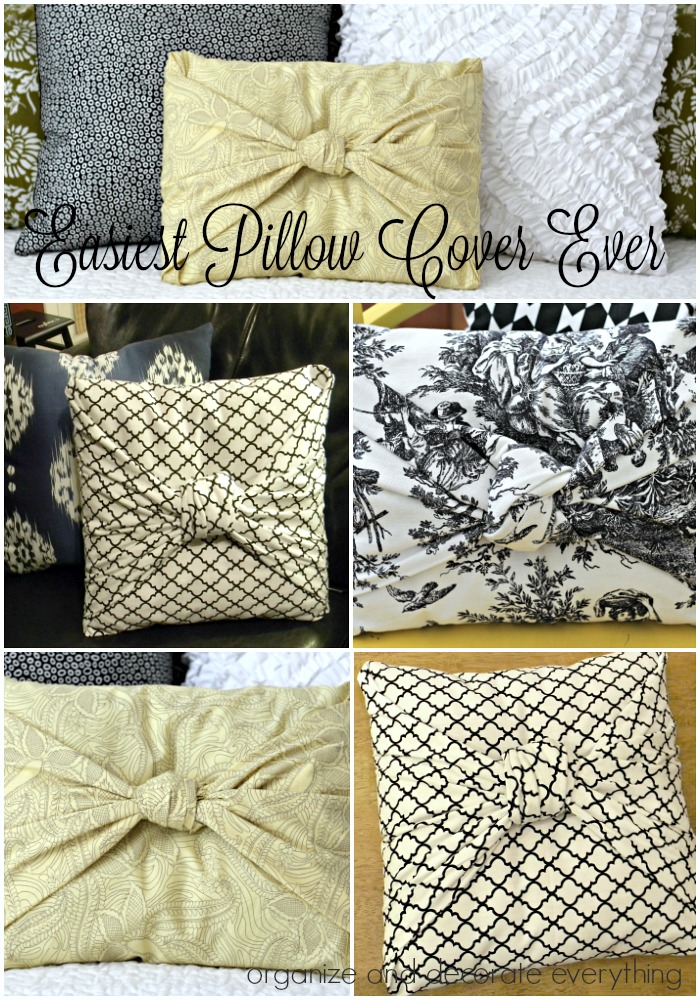
This is the Easiest Pillow Cover Ever. No measuring! No sewing! Just fold and tie. If you’re like me you like changing your home decor with the season or with new trends. And if you’re like me you also love pillows. The problem can be the cost and where to store all those extra pillows. That’s when I discovered the easiest pillow cover ever. You can now change your pillows as often as you like in only a few minutes and for very little money.
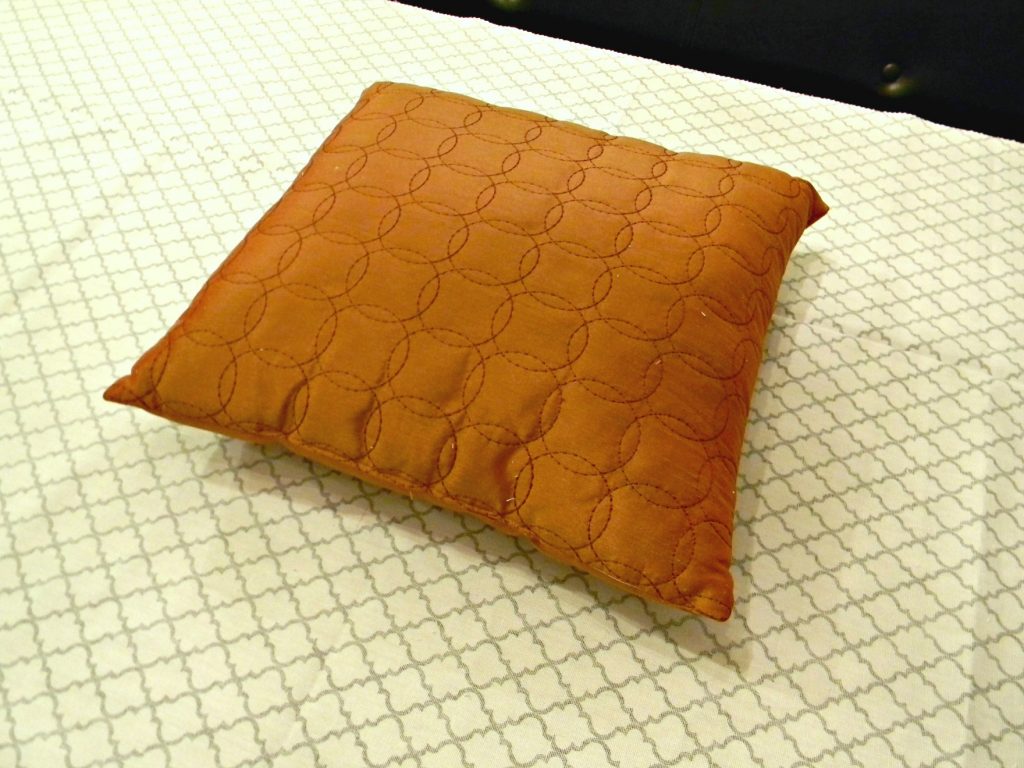
There is not an exact measurement for the fabric because pillows come in all shapes and sizes but this is the formula I use. The fabric needs to be 3 times as long (wide) as the pillow plus 4-6 inches and twice as tall plus 2-3 inches.

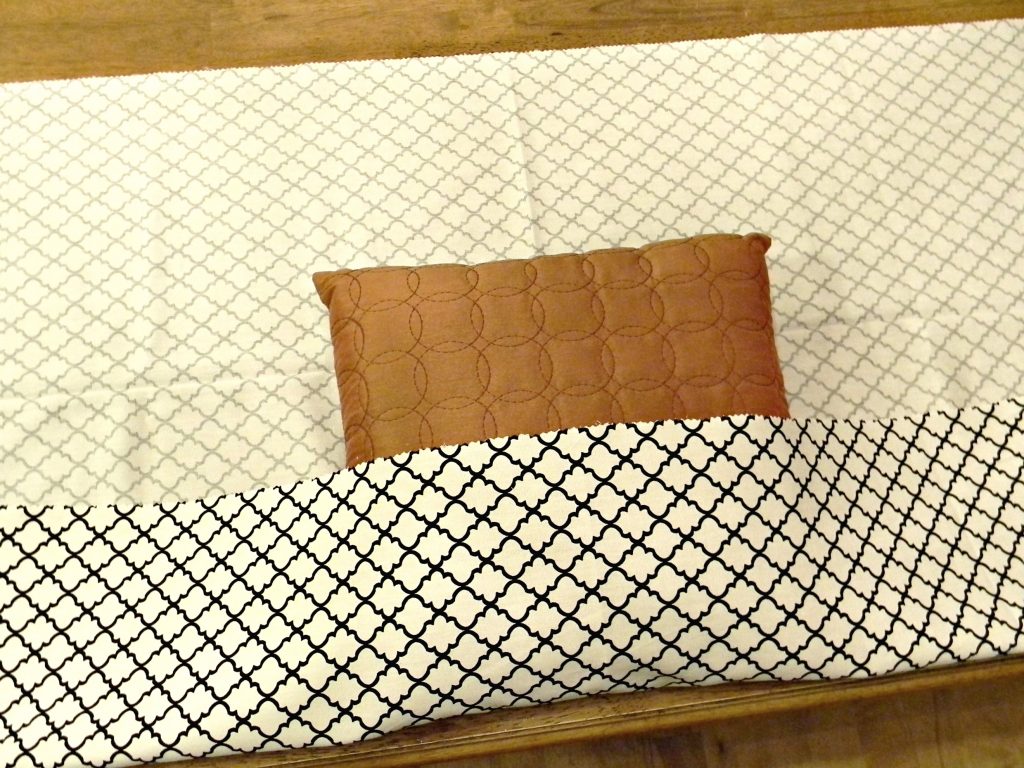
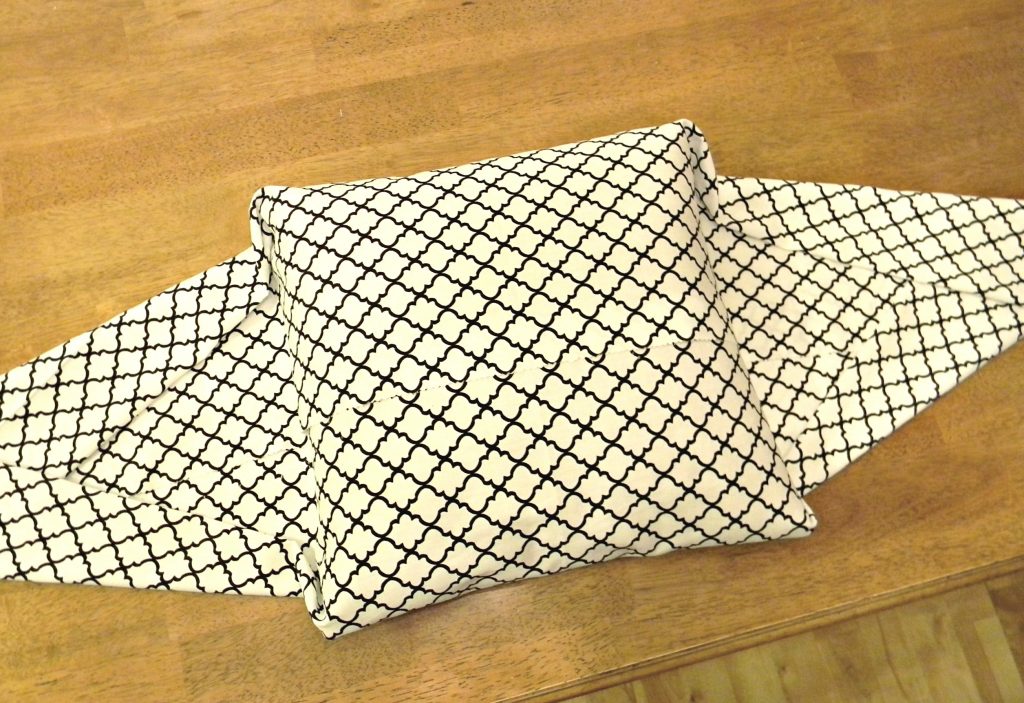
I used pinking shears to cut the fabric so it wouldn’t fray. Start by folding the bottom half of the fabric to the center of the pillow.

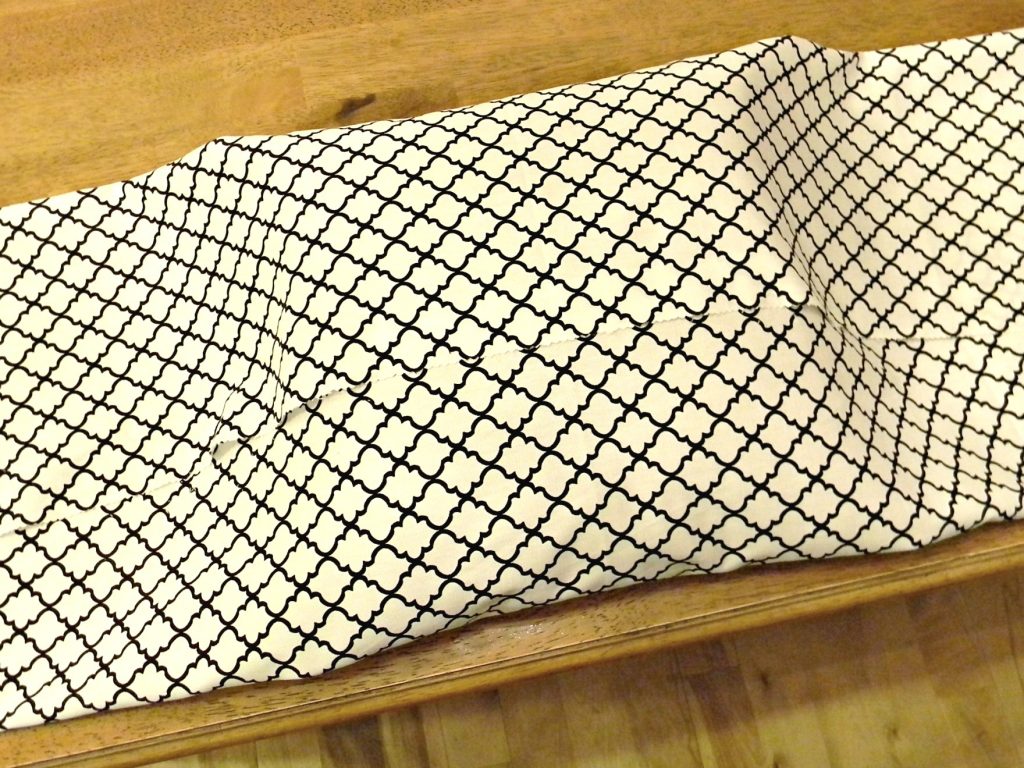
Then fold the top down to the center. The fabric will overlap an inch or so. Make sure the raw edge is in the center of the pillow so it will be hidden when it’s tied.
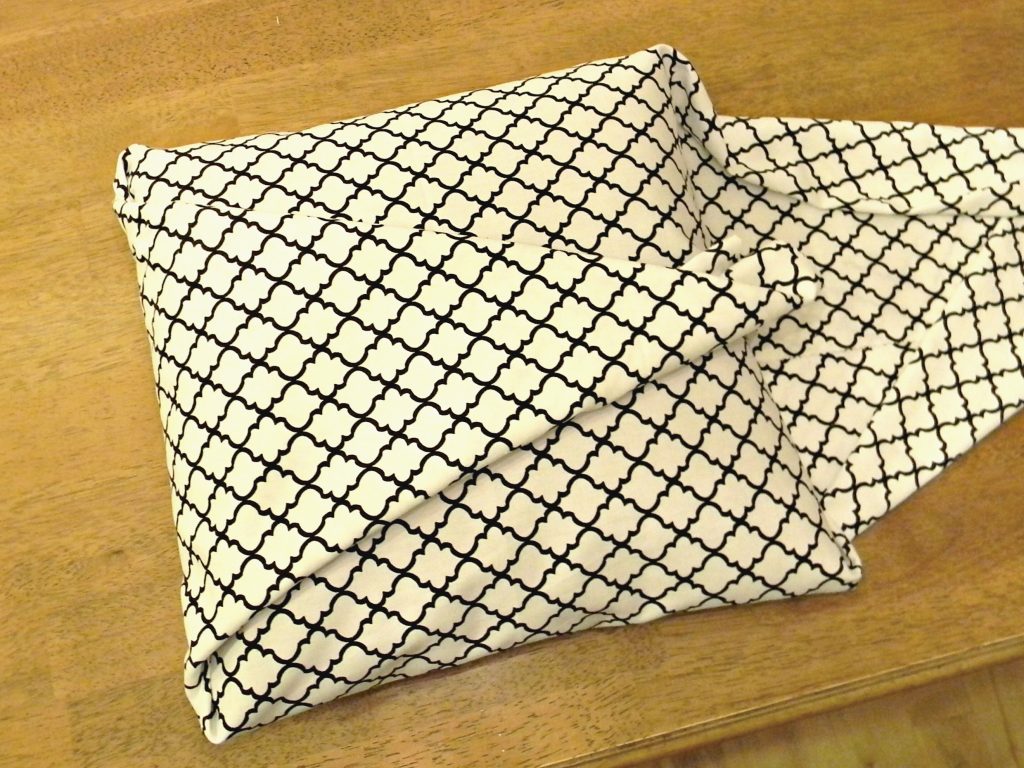
Fold both ends of the fabric as shown in the picture. Some have had a hard time making this look neat. Think of wrapping a package and make the folds crisp to have a professional looking end result.
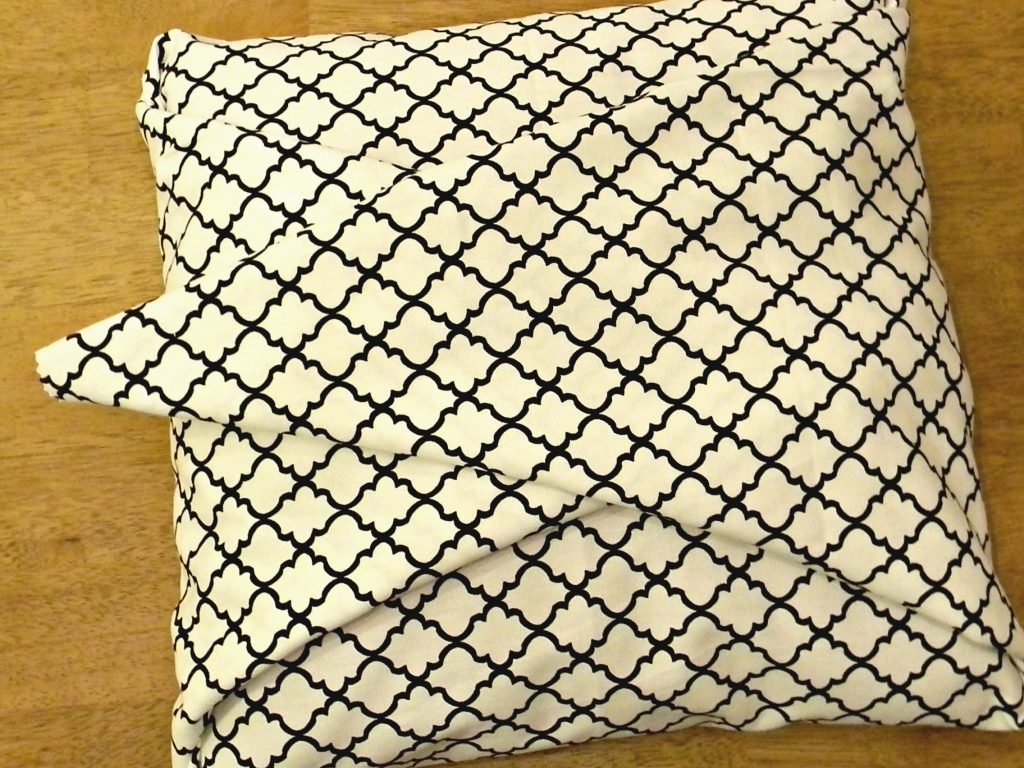
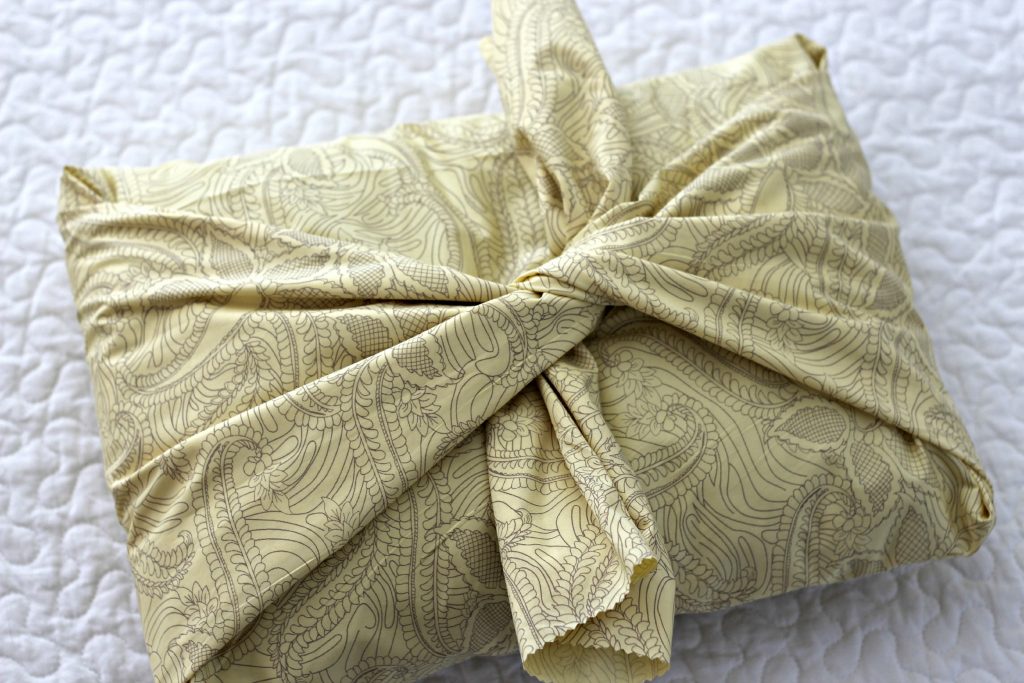
Bring the left side over the top of the pillow.
Then the right side.
Now tie the ends together. Place the right side over the left side, as shown.
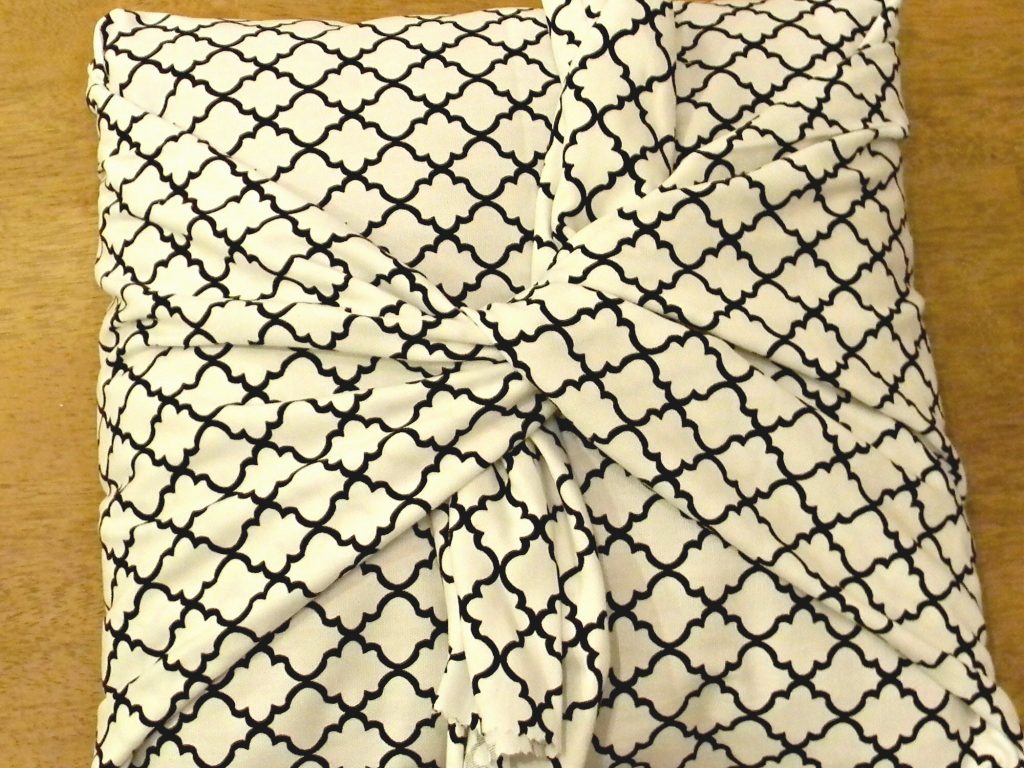
Then bring the bottom up and over the top. It’s like a square knot, which is right over left, then left over right.
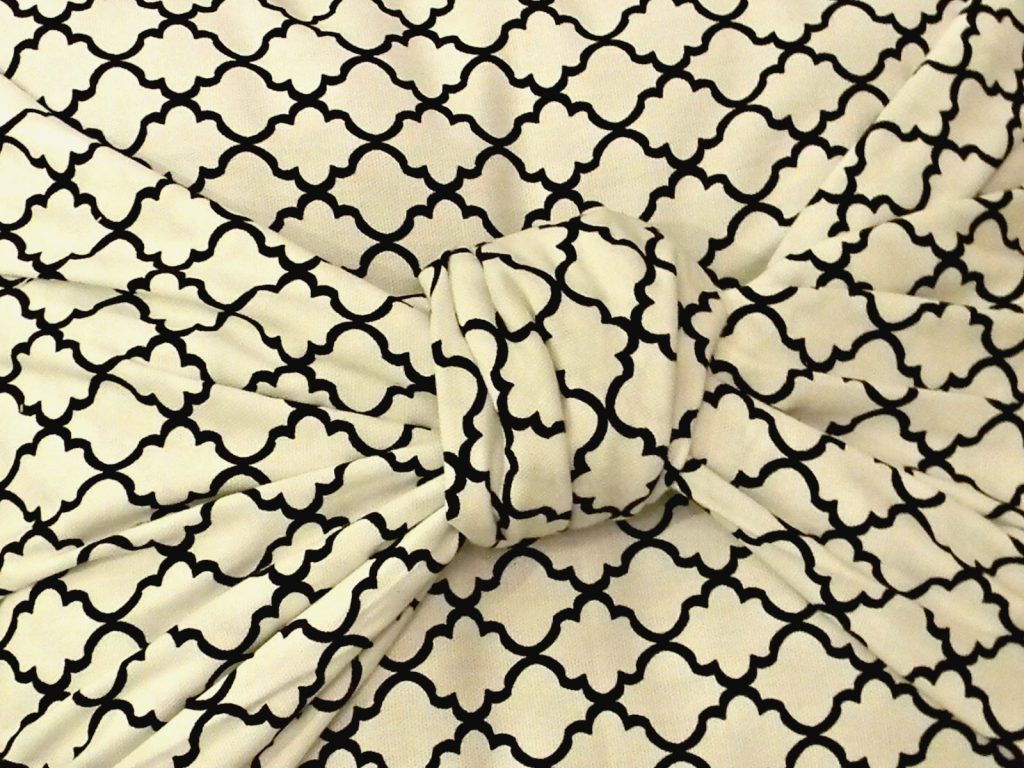
Tuck the ends of the knot under the sides of the fabric, as so.
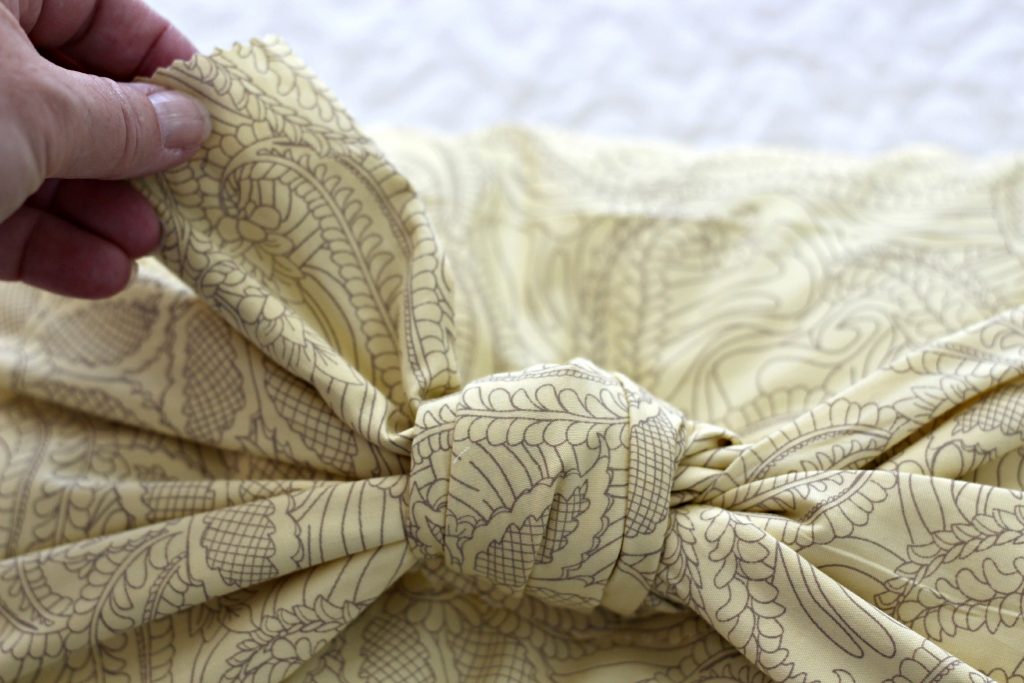
Ta-Da! You now have a beautiful pillow cover without any sewing. Hey, I don’t sew much and this is the perfect no-sew solution.

I prefer a little thicker fabric because it holds it’s shape better. Thin fabric is a little easier to work with though. You can even try fabric with a little stretch to make it even easier. I would try a thin fabric for my first pillow, but if it’s going to be used often I would use a thicker fabric that holds it’s shape.
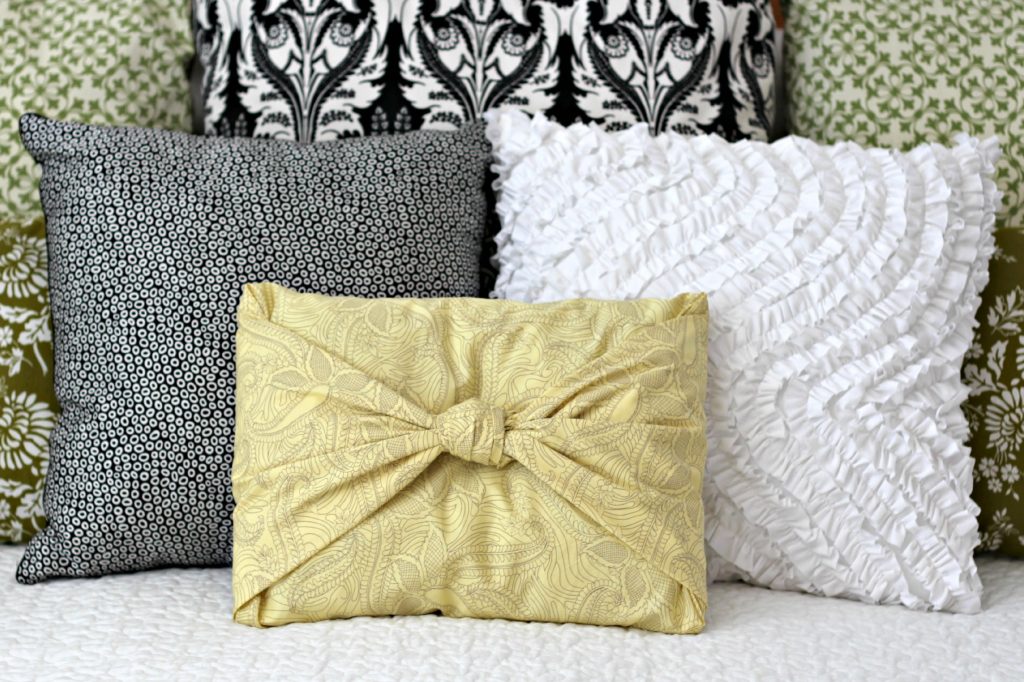
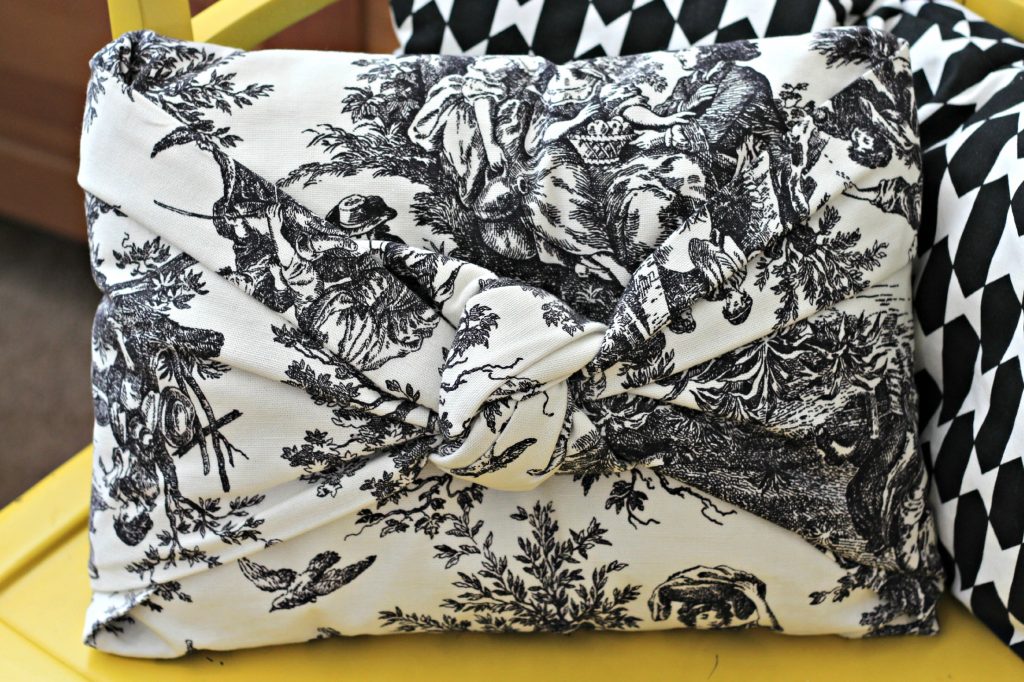
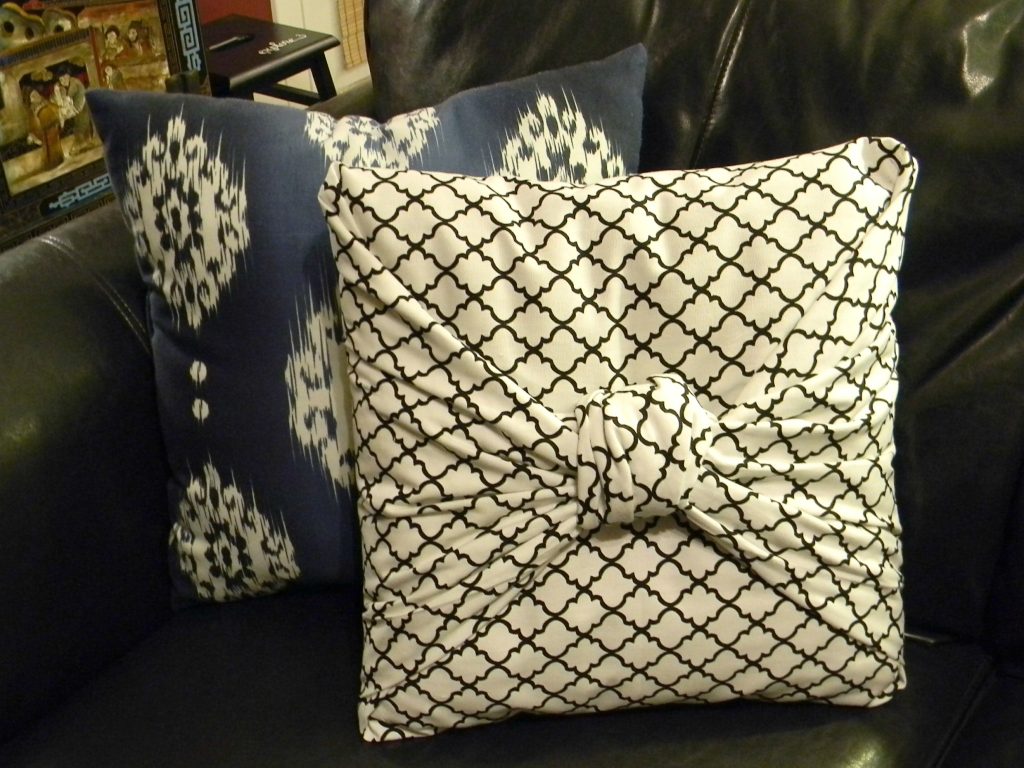
I love the knot. And it looks great on the love seat.

It even looks great on the back if I want to switch sides. So what do you think? Is it the easiest pillow cover ever or what?

Pin it for later:


this is fantastic. And it looks so much cuter than if you sewed a square. Love it
LOVE this. I’m not very into sewing, so this is perfect for me!! Thanks for the great idea.
Oh my! I adore this – -so quick & easy…and perfect for someone fickle like me that wants to change pillow covers pretty much all the time. Thanks so much for sharing – – and for the easy to follow pictures. 🙂
Wow, this looks amazing, I can’t believe it’s that easy! I am going to try this for sure – thanks for the inspiration!
Visiting from the CSI Pillow party =)
Ingenious and cute!
Now this is a project I CAN DO! I love it- so simple and it really looks great! Can you share some tips on finding fabrics?
Wow! That was super easy. I just came over from the CSI project and I love this pillow! Thanks for sharing!
This is brilliant. I’ve hated the pillows that came with our sofa for years. I think I know their fate now.
This is awesome! I can’t believe there was no sewing involved with this pillow! Stopping by from CSI
Brilliant! And beautiful! I cannot bring myself to buy nice looking pillows because they are so pricey. But we do have some cheap ones we’ve had for years now. This tutorial is the perfect thing for them! Of course I had to share! Great thinking, Leanne!!
Really clever, thanks for sharing. Take care, Laura
i love this and that you didn’t even have to sew anything! lovely!
I love this! I can’t sew so this is great!
Brilliant! I may try this with some outdoor pillows that are looking tired. That knot looks great with the ends all tucked in!
I love it! I need to update my pillows but do not own a sewing machine. This idea is perfect!
I featured this on my blog! Thanks for sharing!
LOVE this! I’m so doing this! I love no-sews!
Blessings,
Lana
I’m such a sewing slacker! This solution is perfect for me. Thanks for posting. I can’t wait to share it with my readers on MeckMom.com.
What a great idea…especially if you are looking for a quick change!
Awesome…and I don’t need to sew…I’m sold! 🙂 Thanks for sharing!
The is great! I made a similar pillow for winter, but mine was sewn which stresses a lot of people out! 😉 I love, love, love your way of doing it. (And, quite frankly, I think it is much prettier than mine!) Thanks for sharing this idea!
This is BRILLIANT!!! I’m going to be doing just this very soon! Thank you for sharing!!!
Great minds think alike. I made something similar yesterday 🙂 I love the fabric you used!!!! Very cute.
What a cute and easy pillow! love how it looks and how easy it is to do!!
I’d love for you to link this up to my new link party, Your Whims Wednesday!
I can’t wait to try this! Love it. I”ll link back when I do!!
Love the idea! Will have to try this!!
Fabulous!! Will definitely be trying this. Thank you!!
I wrapped a birthday gift like this a couple of weeks ago, so it’s useful for more than just pillows!
Oh my goodness, I just (literally) stumbled upon this post and I am in love! Awesome 🙂
I think I love you! Seriously, this is one of the best tutorials I’ve seen in awhile. There are so many of us out there that don’t sew, and are very jealous of the wonderful things people whip up with their sewing machines. Now I can change out my pillows with the season. Perfect. Thank you!
Camille
Geez, Louise, thank you for posting this! I have about ten throw pillows that I need to sew covers for. I have the pillow inserts. I have the fabric, just haven’t had time to get out the sewing machine and DO IT! This is a great temporary fix!
Oh wow!! I love a fabric project that I don’t have to sew!! And your instructions are great! I think the knot on the front looks so pretty. I’m having a giveaway on my blog of some zebra-print fabric, so if you’re interested I’d love it if you’d come check it out.
So lovely, I can not believe how easy it is! I am having a PILLOW FIGHT on my blog {contest for charity} and would love it if you would consider entering! Link below!
This is GENIUS!
Megan
Great technique – I think I’m going to go with silk to give my old cushions a new lease of life!
This is brilliant!!! I’m going to be covering many of our pillows to match our new color scheme, this is such a great and easy idea! I am so excited to give our pillows a facelift!
wow, your idea is very impressive. in this time, when we have to save money, we can use ur way.
i will copy how you make your throw pillow looks cute and fantastic 🙂
but maybe not every fabric can be used like yours i think, maybe we will hardly get nice shape when we use light-weighted fabric such as silk and so on…. maybe it best made from thick fabric (of course, i can be wrong 🙂 )
i love your idea
found this on pinterest…i love it so much i want to cry! i’m going to go dig around through my fabric stash now…thanks!!!
This looks great! I’m on a hunt to find a no sew solution to cover a chair pad and stumbled onto this. I’ll have to pin it, I can think of so many places to use this! Thanks for the great pics and explanation : )
just wondering if this is strictly a deco pillow…. im thinking that if too many ppl touch or play with this pillow the fabric may separate in the middle… just wondering. very very cute though!
that is so easy, no sewing no any thing just fabric only.
Thank you for sharing Leanneja. 😉
This is perfect! I love this idea. The tied side is super cute!
I love this idea …. so easy and simple Pillow Cover but really great … thanks so much
Dorria embroidery design recently posted..Embroidery Design 106
How do you tuck the knot for the finished look?!?!
Also I didn’t have a piece of cloth long enough, so I just turned my pillow and folded the corners over – still works!!
This is awesome! Seriously, so clever. I’m a new follower! I hope you’ll follow me back but no pressure 🙂
This is a great tutorial–thanks! I’m curious what fabric you used. I love it.
Can you show a photo of what the square knot looks like before and after tucking? I don’t know how to do one and make it look so pretty!
Could you clarify a bit more on how to tie the square knot? Do you just tuck them underneath? Thanks!
This is one smart idea. I have seen them but had no idea how to do it. Thanks. I am doing that with my cushions,
lI need more detailed instructions on how to fold the pilllow. Have not crafted in a long time, but I do know how to tie a square knot, but for some reason I cannot get the visual on this pillow. I would love to make it as soon as possible for a friend.
Thank you
I love this! How did you do the knot. I’ve gotten to that point but I’m stuck.
I just made two of these pillows for my bedroom and I love them! It couldn’t get easier. Thank you for sharing the pattern and great tutorial.
how do you tie the square knot?
I have wolf fabric to make a pillow for my husband, but I am sewing-challenged! I can, however, tie a square knot and this is perfect…thanks so much!
What do you do with the ends after you tie the know? Any specific trick to tucking them in/away?
This looks awesome!!!! Please give me instructions on how to tie the square knot because I have not a clue on how to do it. I will be waiting with fabric and pillow in hand ready to get started!
This was the best trick for covering pillows I’ve ever seen. Thank you so much for sharing. I will be covering several of my pillows. I wasn’t sure what a square knot was but thought it may be similar to the way you tie your shoes, and it is
It is a nice idea, thanks for share it.
Ale
Costa Rica
I LOVE the look of this pillow!
I am redecortating my bedroom right now and I have a pink throw blanket on the foot of my bed and I needed an extra pop of pink at the head of the bed. I looked and looked for premade pillows but nothing matched.
I found the perfect fabric and I have been trying to make my knot look as good as yours but I am unsuccessful! Do you have any tips for us? I know the square knot but I don’t understand what you are doing with the ends.
Thanks,
Alecia
How much fabric do you use?
Just made this tie pillow……Love it so easy!!!!!
I also want to know how much fabric per pillow??
Thanks
While this is a great idea and I love an easy no sew project…the directions could use a little help. I under bought my fabric to start with- it’s not just 3times and 2 times the height and width of the pillow you are using. You have to include the curve of the fabric around the pillow. So you will need enough fabric to wrap all the way around your pillow for the height and enough fabric to wrap around one and a half times around for the width. For my pillow that was standard-ish at 16 inches square I needed 45 inch x 55 inches for my fabric.
Lots of people have had trouble with the knot, including myself. I did the first step of the knot like tying your shoes (like shown in her pictures above) and then just wrapped and tucked in the two tails around the knot to make it look like the finished product. To keep the tails tucked in, I used safety pins to tack in it place on the underside of the knot. My finished product looked great, just a little frustrating to get there. Hope these extra tips help you!
I tried this using outdoor fabric for some pillow to use outside on the patio. Perhaps it is because the fabric is thicker and sturdier than most decorative fabrics, but it didn’t work! The knot ended up being way too bulky and wouldn’t stay intact. Time to break out the sewing machine…
Great idea — thank you! I tried it and was short on fabric (the tails weren’t long enough to tie), so I started over and turned the pillow diagonally and it worked! Obviously, this only works if your fabric looks OK going diagonally.
I tried this pillow cover and it and it was SO easy and cheap! Thanks for a great idea.
you are a genius!!!!
Loved making this pillow!!
A FEW TIPS FOR THOSE WHO WANT TO MAKE IT!!!
Use a little bit more fabric for the long side, I used a few extra inches and even that was a little less than I liked.
If you don’t know how to tie the square knot (which I did not) then tucking the edges under and SAFETY PINNING them looks really great!
I tried with some upholstery fabric and had the same results as the commenter who used the outdoor fabric – it was wayyyyy to bulky to get the cute final product shown here. I improvised and still ended up with something cute – but I would definitely recommend using a thinner fabric to be able to get the cute knot!!!
A “Square” Knot is one of the simplest to tie.
You take an end of your rope (or in this case fabric) one end in each hand. Tie the left over the right and under; and the Right over Left and Under. I imagine for the sake of the neatness of the finished product the ends would simply be tucked inside the fabric out of sight.
Very cute! I love the fabric! Where can I find it?
This is the most FRUSTERATING pillow cover EVER! I bought two different fabrics in the specifications listed, and in your pictures, when the fabric is folded and brought over the top of the pillow; it looks very flat and neat, but when I am doing it, regardless of how I try to fold it, I have a ton of fabric that is at the ends where it’s supposed to be tied for te finished product. I FINALLY figured out how to tie that knot, but it’s impossible to get a clean finished pillow with so much extra fabric, regardless of how much I iron it down. HELP!
I’m sorry it’s frustrating you. I just fold it how it shows in the post. Try to make the fabric on the ends as narrow as possible before you try to tie the knot. Tie the knot over under, then under over (it’s a square knot). That will make it flat in the front then just tuck the ends under the side fabric. Make sure your fabric isn’t too think or it makes it a little harder to work with.
Hi, I am a contributor for The Lovely Project, a lifestyle blog. I would like to include a link to this tutorial in my next blog, due to post Dec 19. This is great and easy!
I love this idea. The knot makes it! Can’t wait to try this. It looks “sew” easy. Thanks for sharing!
This is so clever. I featured it
NEVER SAW ANTHING SO EASY…….THANKS I WON’T BE SEWING….LOVE THE WAY THE PILLOWS LOOK
I do everything as it shows and I cannot get this finished look… Perhaps my pillows r too old, I think this would work w a very squared and firm pillow, mine is a lil worn out and wen I do thins it just like a bigblobof fabric sitting on my couch 🙁 I bought enough fabric for the four couch pillows and now I have all this fabric AND. No couch pillow covers! :'(
I love changing pillow colors and patterns all through the house. This will make my life so much easier!! My wallet thanks you!!
I know this is really weird, but where did you purchase the blue ikat pillow in the bottom picture? I found 3 of those pillows a few months ago at Salvation Army and I LOVE them, but the tags were cut off, so I’ve never been able to figure out where they are from! This is the first time I’ve seen them outside of my own.
And also – cute pillow idea!
LOVED this idea, but couldn’t do the knot. Also, my fabric was about too short so there was a 1-1/2″ gap when I folded it over. I ended up using safety pins instead. I just safety pinned each side to the pillow after folding it over so it would stay in place. Then I did the step before knotting and safety pinned each end to the pillow, pinning under so the pins wouldn’t show. Looks great on both sides and no need to attempt a knot. This also solves the issue with thicker fabric not knotting.
Cute but not as easy as it looks. I used a lightweight cotton, and there is just to much fabric to make a nice knot.
This is perfect where I’m constantly changing colors on my mantle. What ever my mantle is that’s the colors I decorate with (pillows/candles). My spring/summer mantle is yellow and teal, Christmas is teal and red, Halloween was black and white but this year I’m going with black and teal, Valentines red and teal, etc………I got tired of buying pillows and storing them. I’ll post pics when I’m done. Thank you for your post! <3 it!
As a Den Mother 50 years ago I remember this: Right over left and under, then left over right and under makes a square knot good and tight. Hope this helps. It is the ends you tuck over and under and pull as tight as you need for a neat knot.
What a great idea Leanne! I’m going to pick up some fabric tomorrow and try this. By the way I like the design on the other pillow cover on your loveseat!
A wonderfull idea !! Thanks a lot !!
hi! this was the best idea ever:) i was super annoyed by all the tutorials that say “sew this” or “get a gluegun” or “take your pillowcase” so this was SOOOOOO perfect for me. thank you so much!!
What a great idea! The pillow is super cute too.
could you please do a little video or do a you tube video and then link to it? I can’t get the knot part! Thanks a bunch!
how much material is needed, please?
how much material does it take to make the no sew pillow.
Kathy
This solves all of my problems! Well, not all of them, sadly, but the decorating-related ones. I’m trying unite a color scheme in our new home and was thinking throw pillows would help, but we already have the ones that came with our old couch, and I wouldn’t want to toss them or anything. Perfect solution! Oh yeah, and I know I would never get around to sewing anything. Thanks so much!
I love it because you can un-tie and throw it in the wash. Thumbs up!!
What a fun pillow! I love the knot, too, and I so-o-o-o appreciate your tutorial with photos. (I need the photos to get the folding right.) Thanks for sharing!
Unpicking a pillow case and use it may be the way to go for cheap material. Grand idea and easy washing.
Probably the most easiest pillow cover making tutorial ever found on web. So nice and decorative. If anybody want to save money, they can use your way. Thanks.
Is there a video on how to make this pillow
This is outstanding! I’ve been wanting some Christmas pillows for my bed but didn’t want to spend the money. This is the perfect solution! Thank you so much for sharing❤
So beautiful!! I love these! I used shower curtain material for my patio furniture.
Too cute and easy!
luv this and will do it!
Thank U for sharing.
🙂
Too cute and easy!!! I like knot cover.
You are a genius !!! Love them, they will be all over my house !!!