
Make an inexpensive DIY Craft Table using a flat table top and 2 short bookcases.
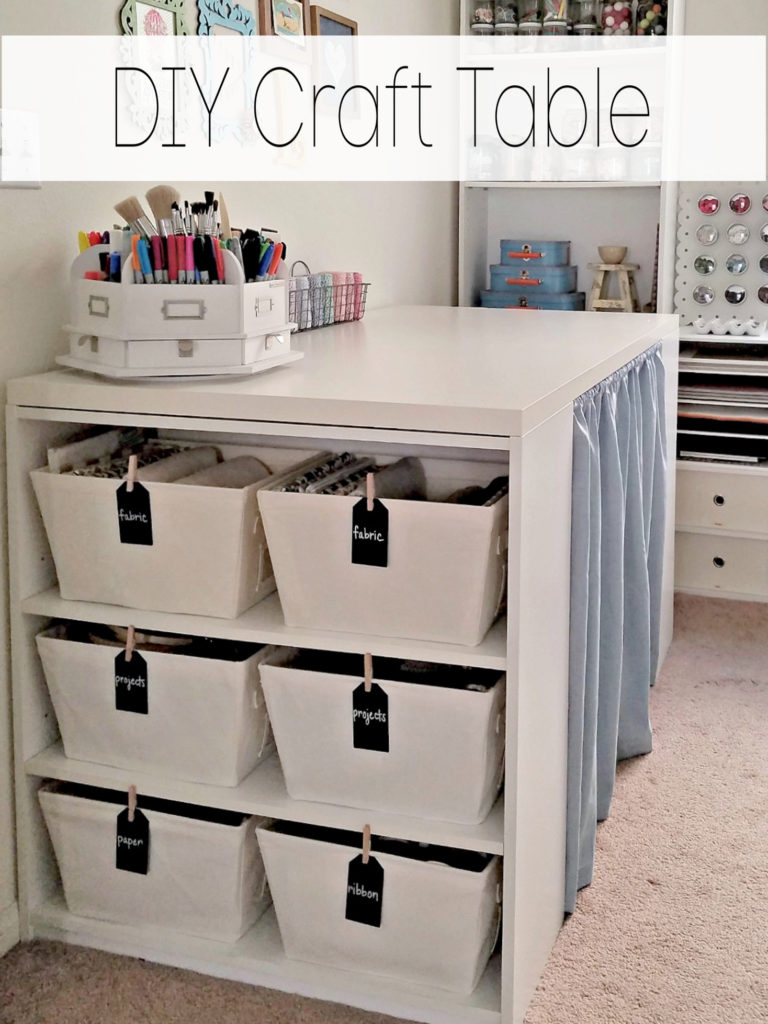
This table was created almost 10 years ago when a company approached me to share an easy and inexpensive table that could easily be taken apart and moved when needed. I’ve used this craft table in 2 homes and 5 rooms inside those homes so it’s been moved often. The table provides ample storage and work space needed for many projects.

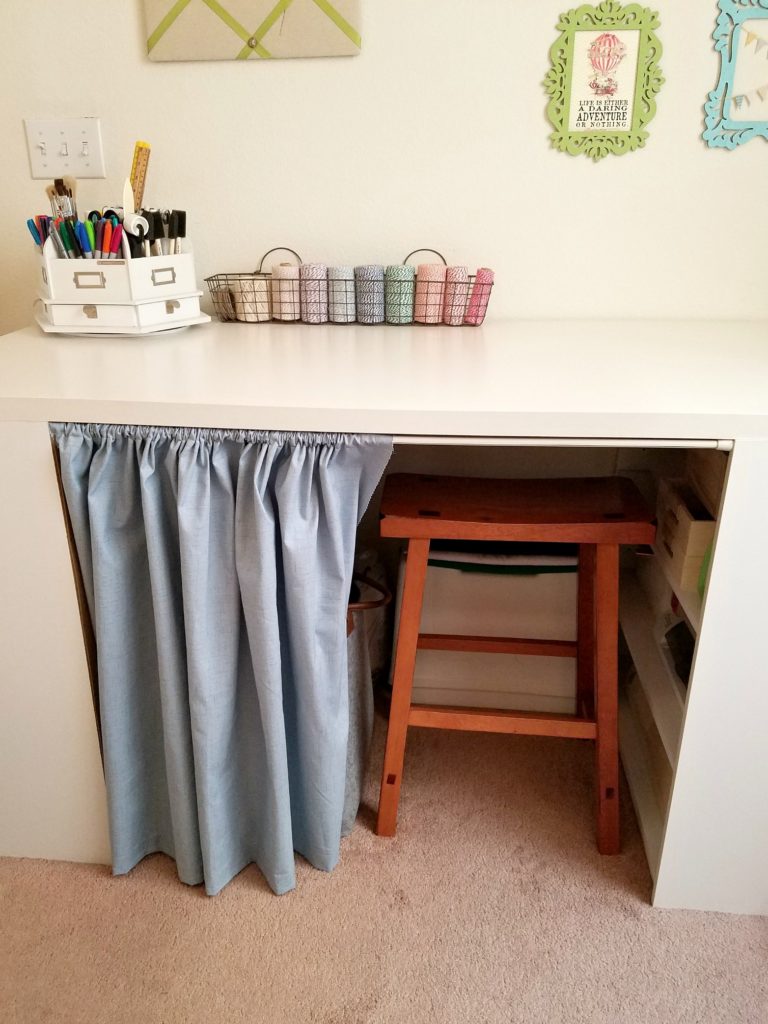
These exact bookcases aren’t available anymore but there are many other inexpensive options at Walmart and Target to choose from. Just make sure they are the short bookcases so the table will be table or counter height when finished. I use a counter stool with my craft table. I prefer counter height so I can sit or stand. If you craft a lot you know what I mean.
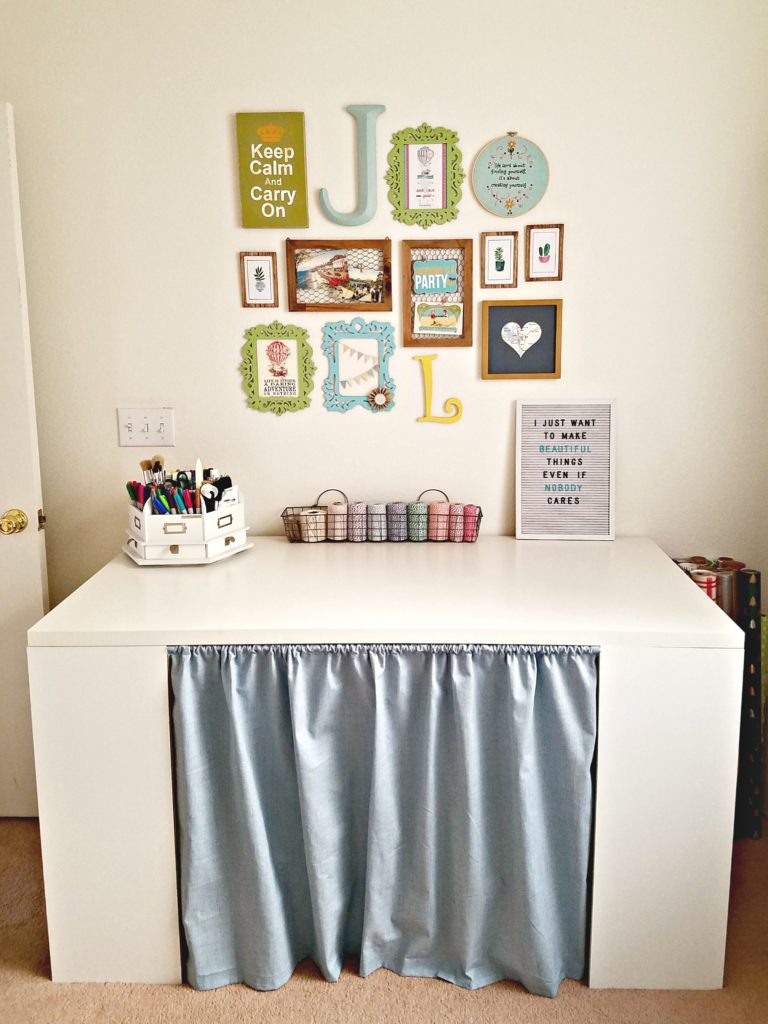
IKEA has many table tops to choose from in different colors and finishes. The IKEA table top is called Linnmon but might be limited to in store purchases only. The table tops range from $20-$50 depending on the size. Mine is 47″ long x 23 1/2″ wide. We also have 3 of the smaller table tops with legs in our house for desks. There’s such a great selection of table tops and legs that you can design them however you want.
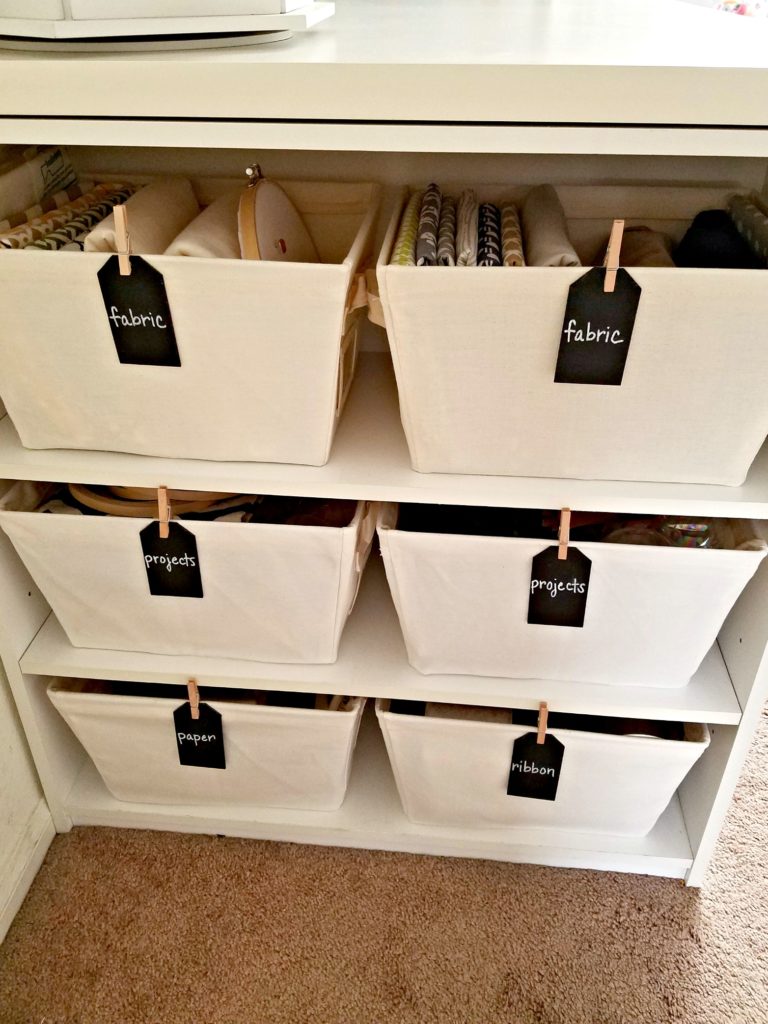
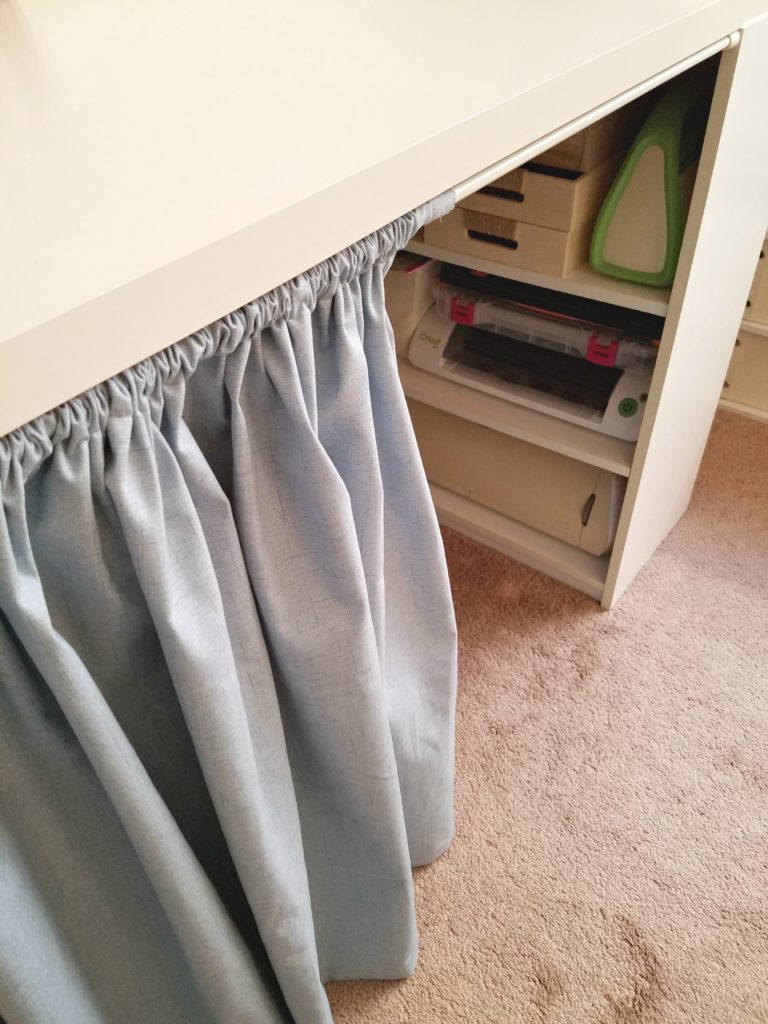
Place the table in the center of the room or against a wall. The bookcases can both face outward or one outward and one inward. It can easily be configured to accommodate your storage and crafting needs. My outward facing bookshelf holds baskets to contain small items. And the other bookshelf faces inward to hold big and odd shaped items.
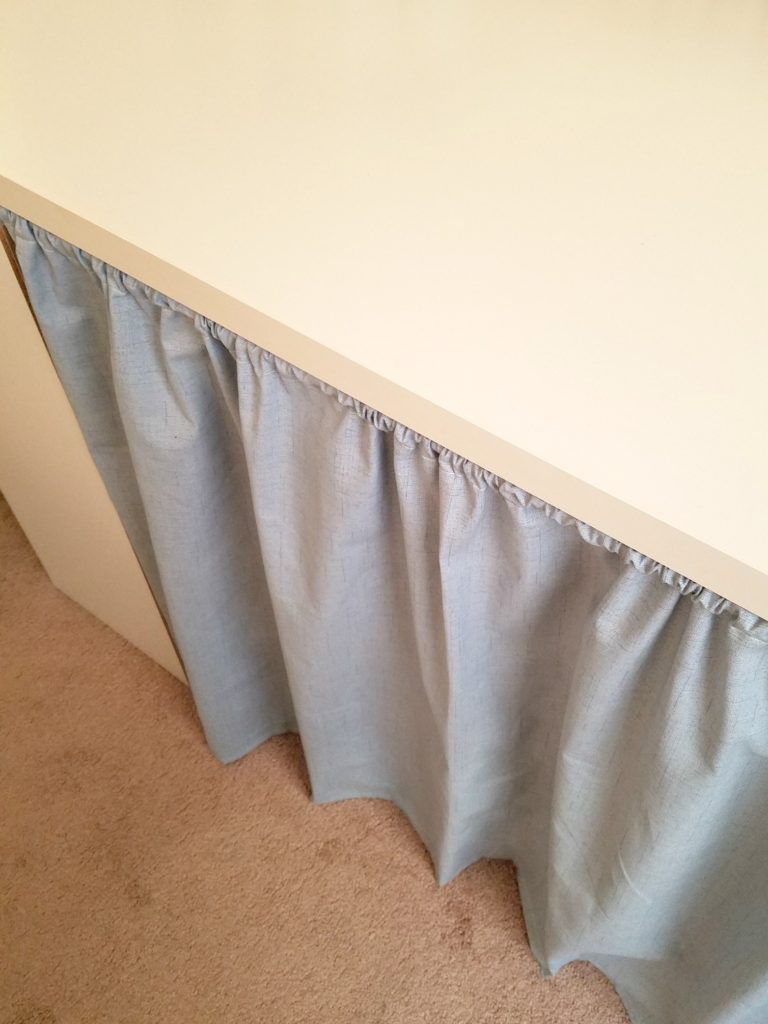
I decided I didn’t like the storage showing so I made a curtain to hide the supplies under the table. It looks so much better and completed. It’s so simple but makes such a big difference. Check out the craft table curtain post.
I haven’t had any problem with the table top moving on the bookcases even while I’m crafting. I know some of you have a concern about that though so I would suggest adding a 1″x 2″ to the underside of the table top. Cut it the length of the space between the 2 bookcases and secure it with liquid nails. Make sure the bookcases are securely against it and that should keep it from moving. But again I don’t think it’s really necessary.

The table can easily be taken apart by taking the top off and moving the bookcases. You can reconfigure it or move it wherever you like. Everything is pretty light weight once you take the supplies out.
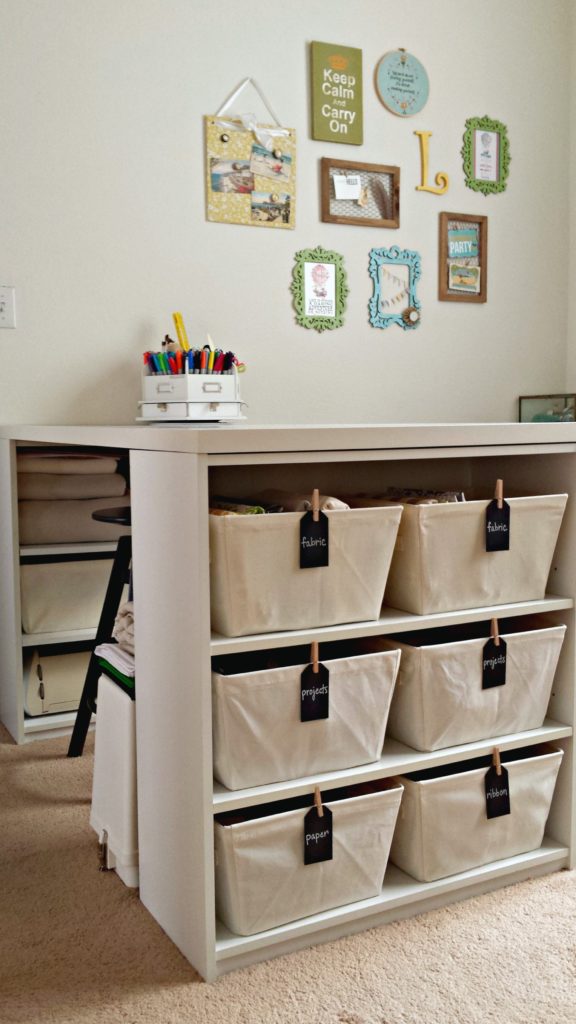
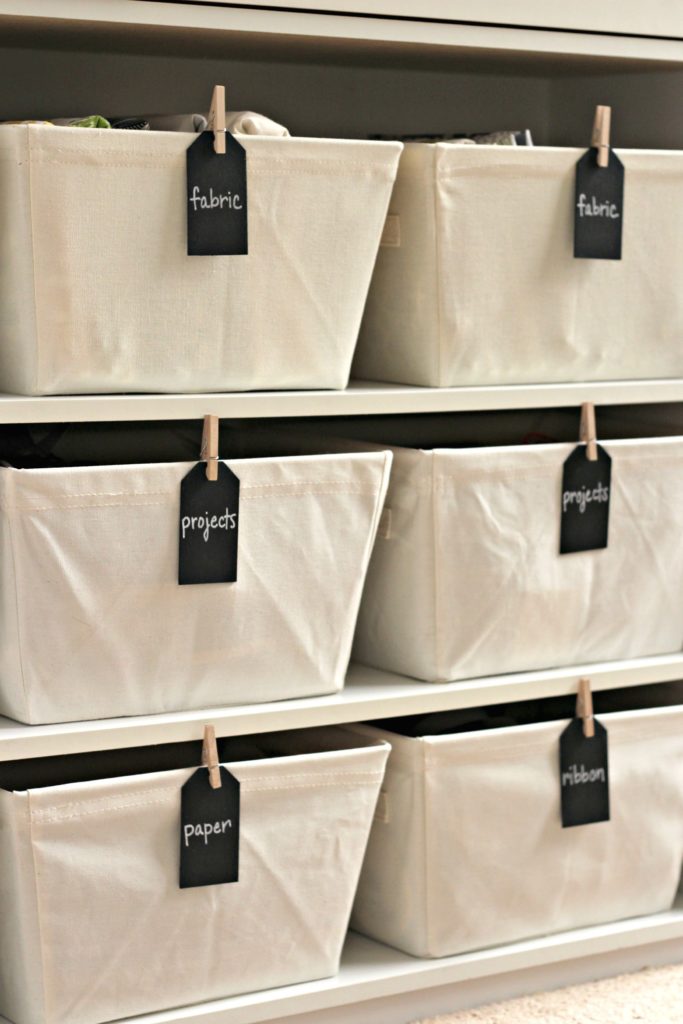
Even though I love the space to craft I think I love the storage space even more. The baskets make it easy to store items out of sight but convenient to retrieve. I added tags to my baskets since I’m using it in a craft room and I want to be able to find things easily. Chalkboard tags make it easy to change the labels.
You can save a lot of money making a craft table yourself and the bonus is that it can be taken apart and reconfigured to fit almost any space.
Pin it for later: DIY Craft Table
You might also like these posts:
DIY Outdoor Crate Coffee Table
DIY Frame


