
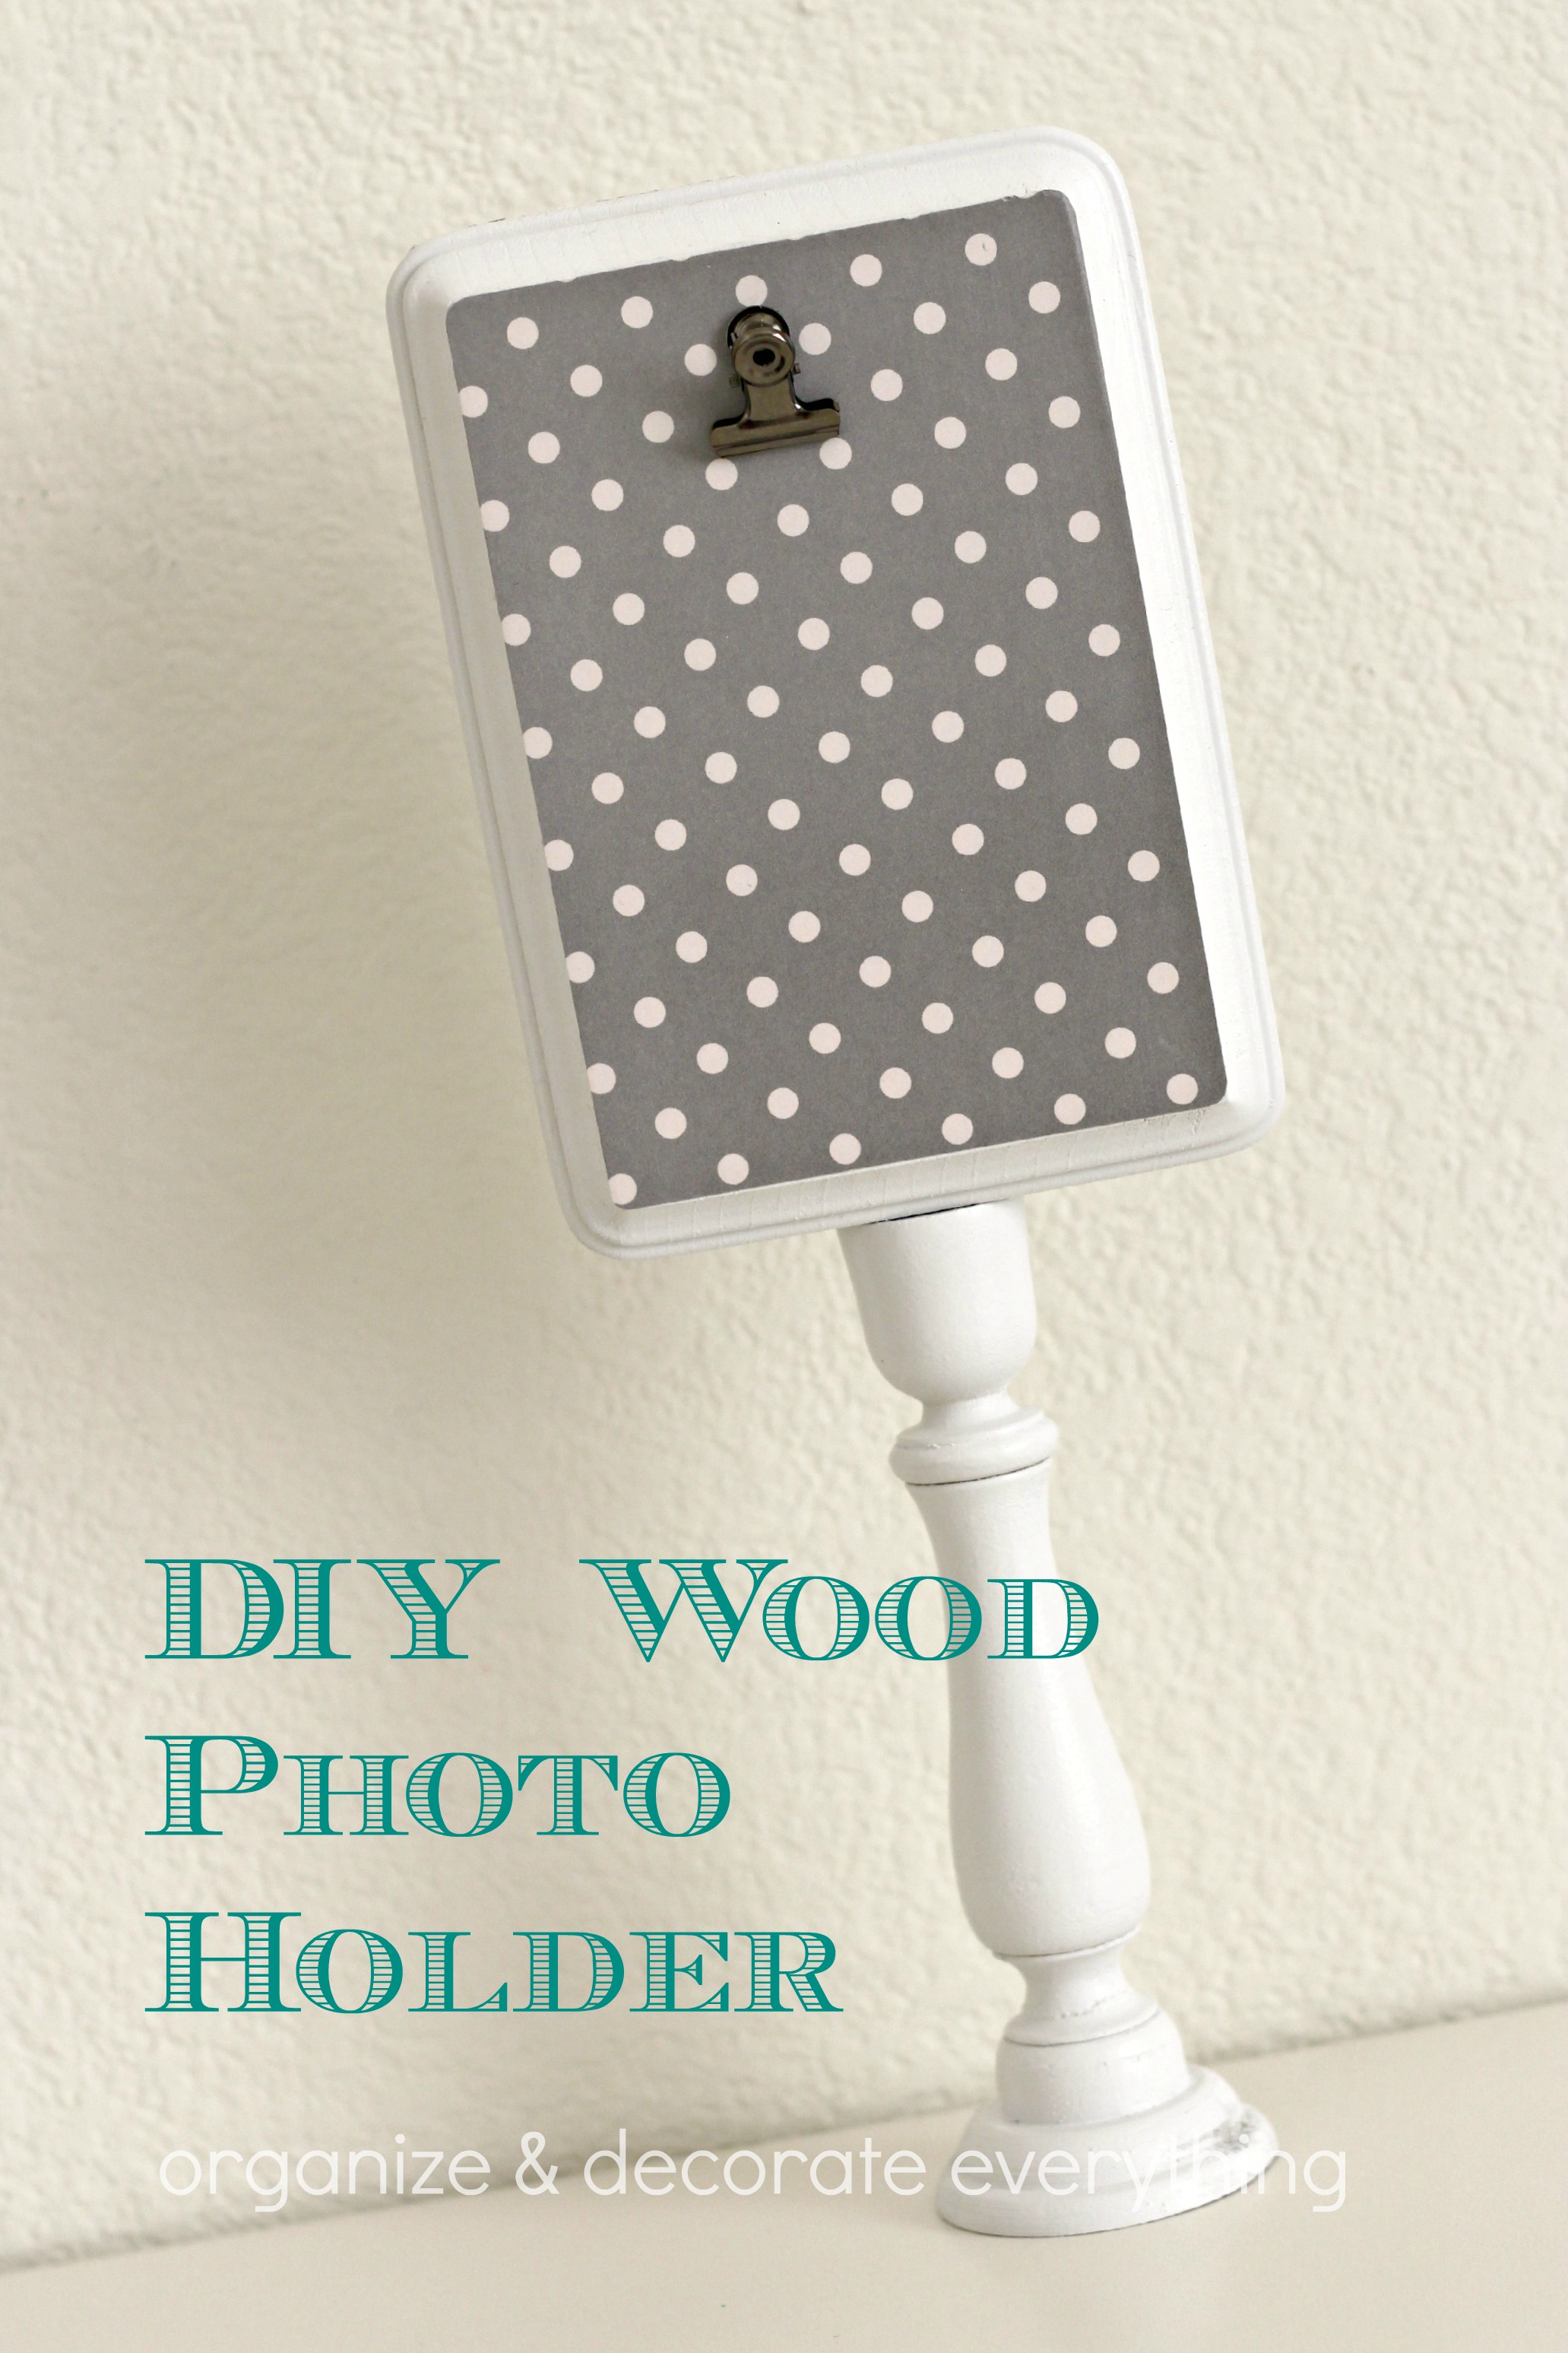
Today I’m sharing how to make a DIY Wood Photo Holder to use in many areas of your home.
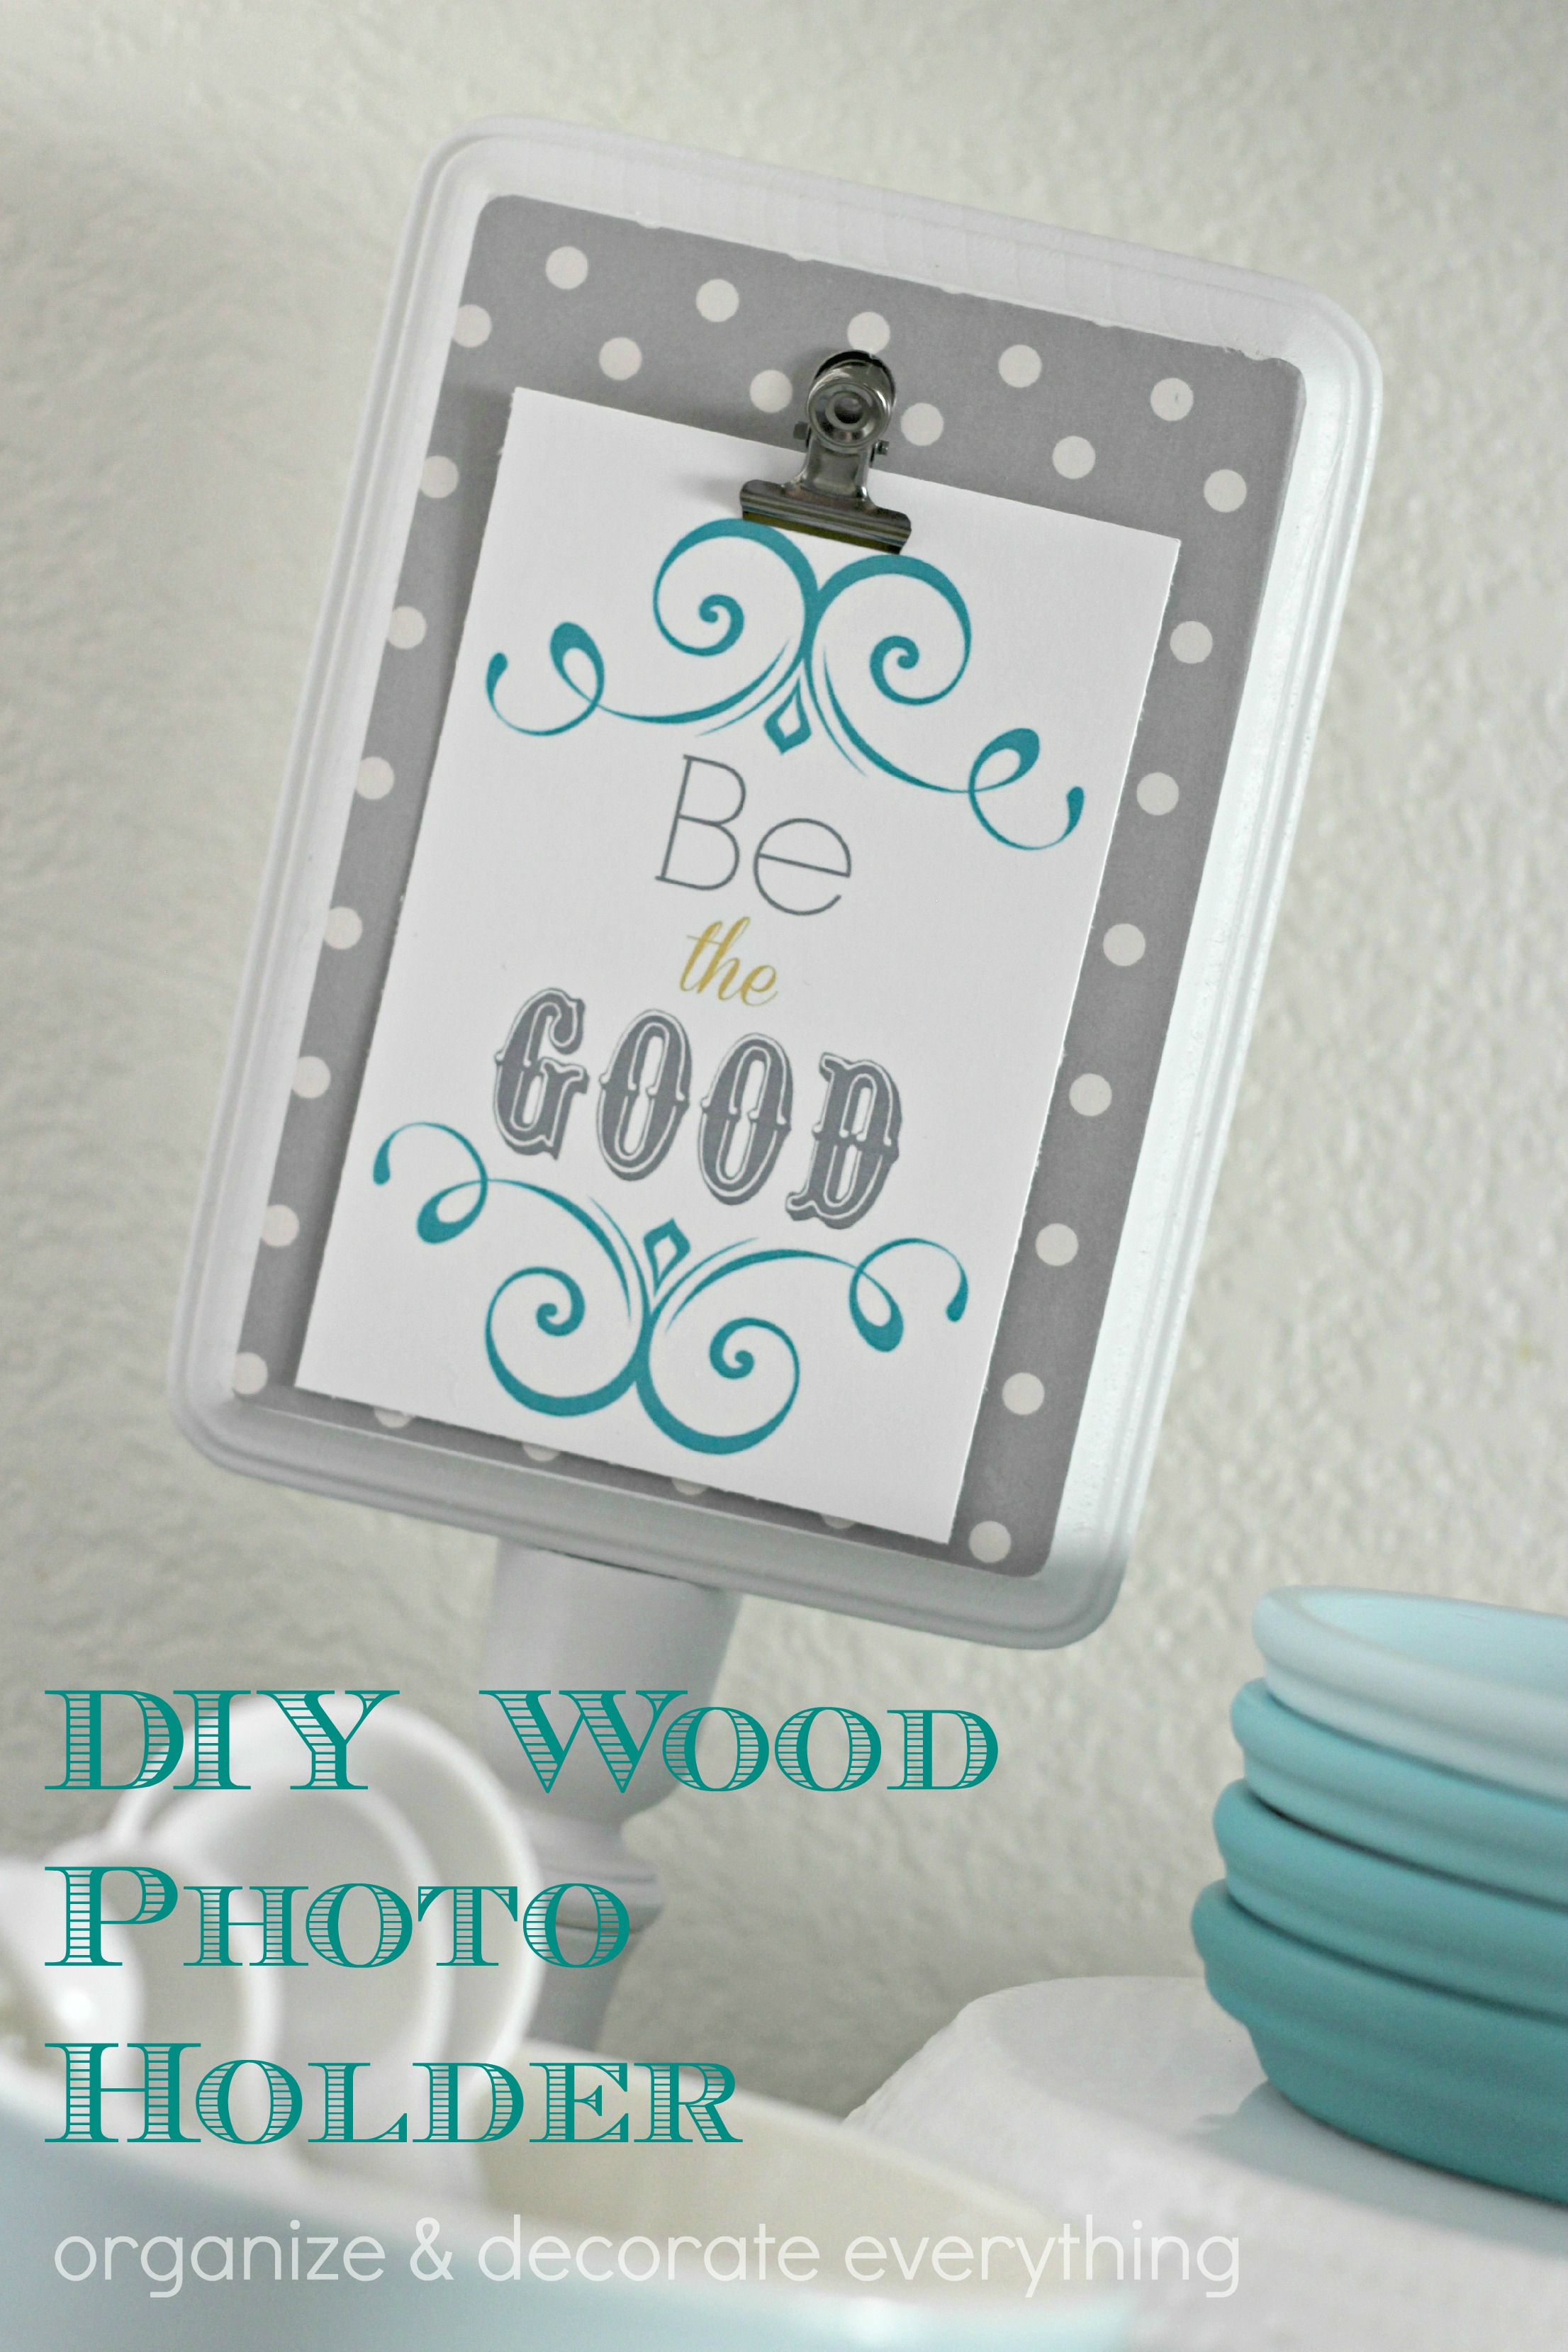
When I make or purchase something I like to make sure it fits in at least 3 different areas of my home. There are a few reasons for this: I don’t buy as much stuff, I like to move things around, I like things with dual purposes. This pretty little DIY Wood Photo Holder can hold photos, cards, recipes, quotes, or memos in any room of your home.
Let’s get started!
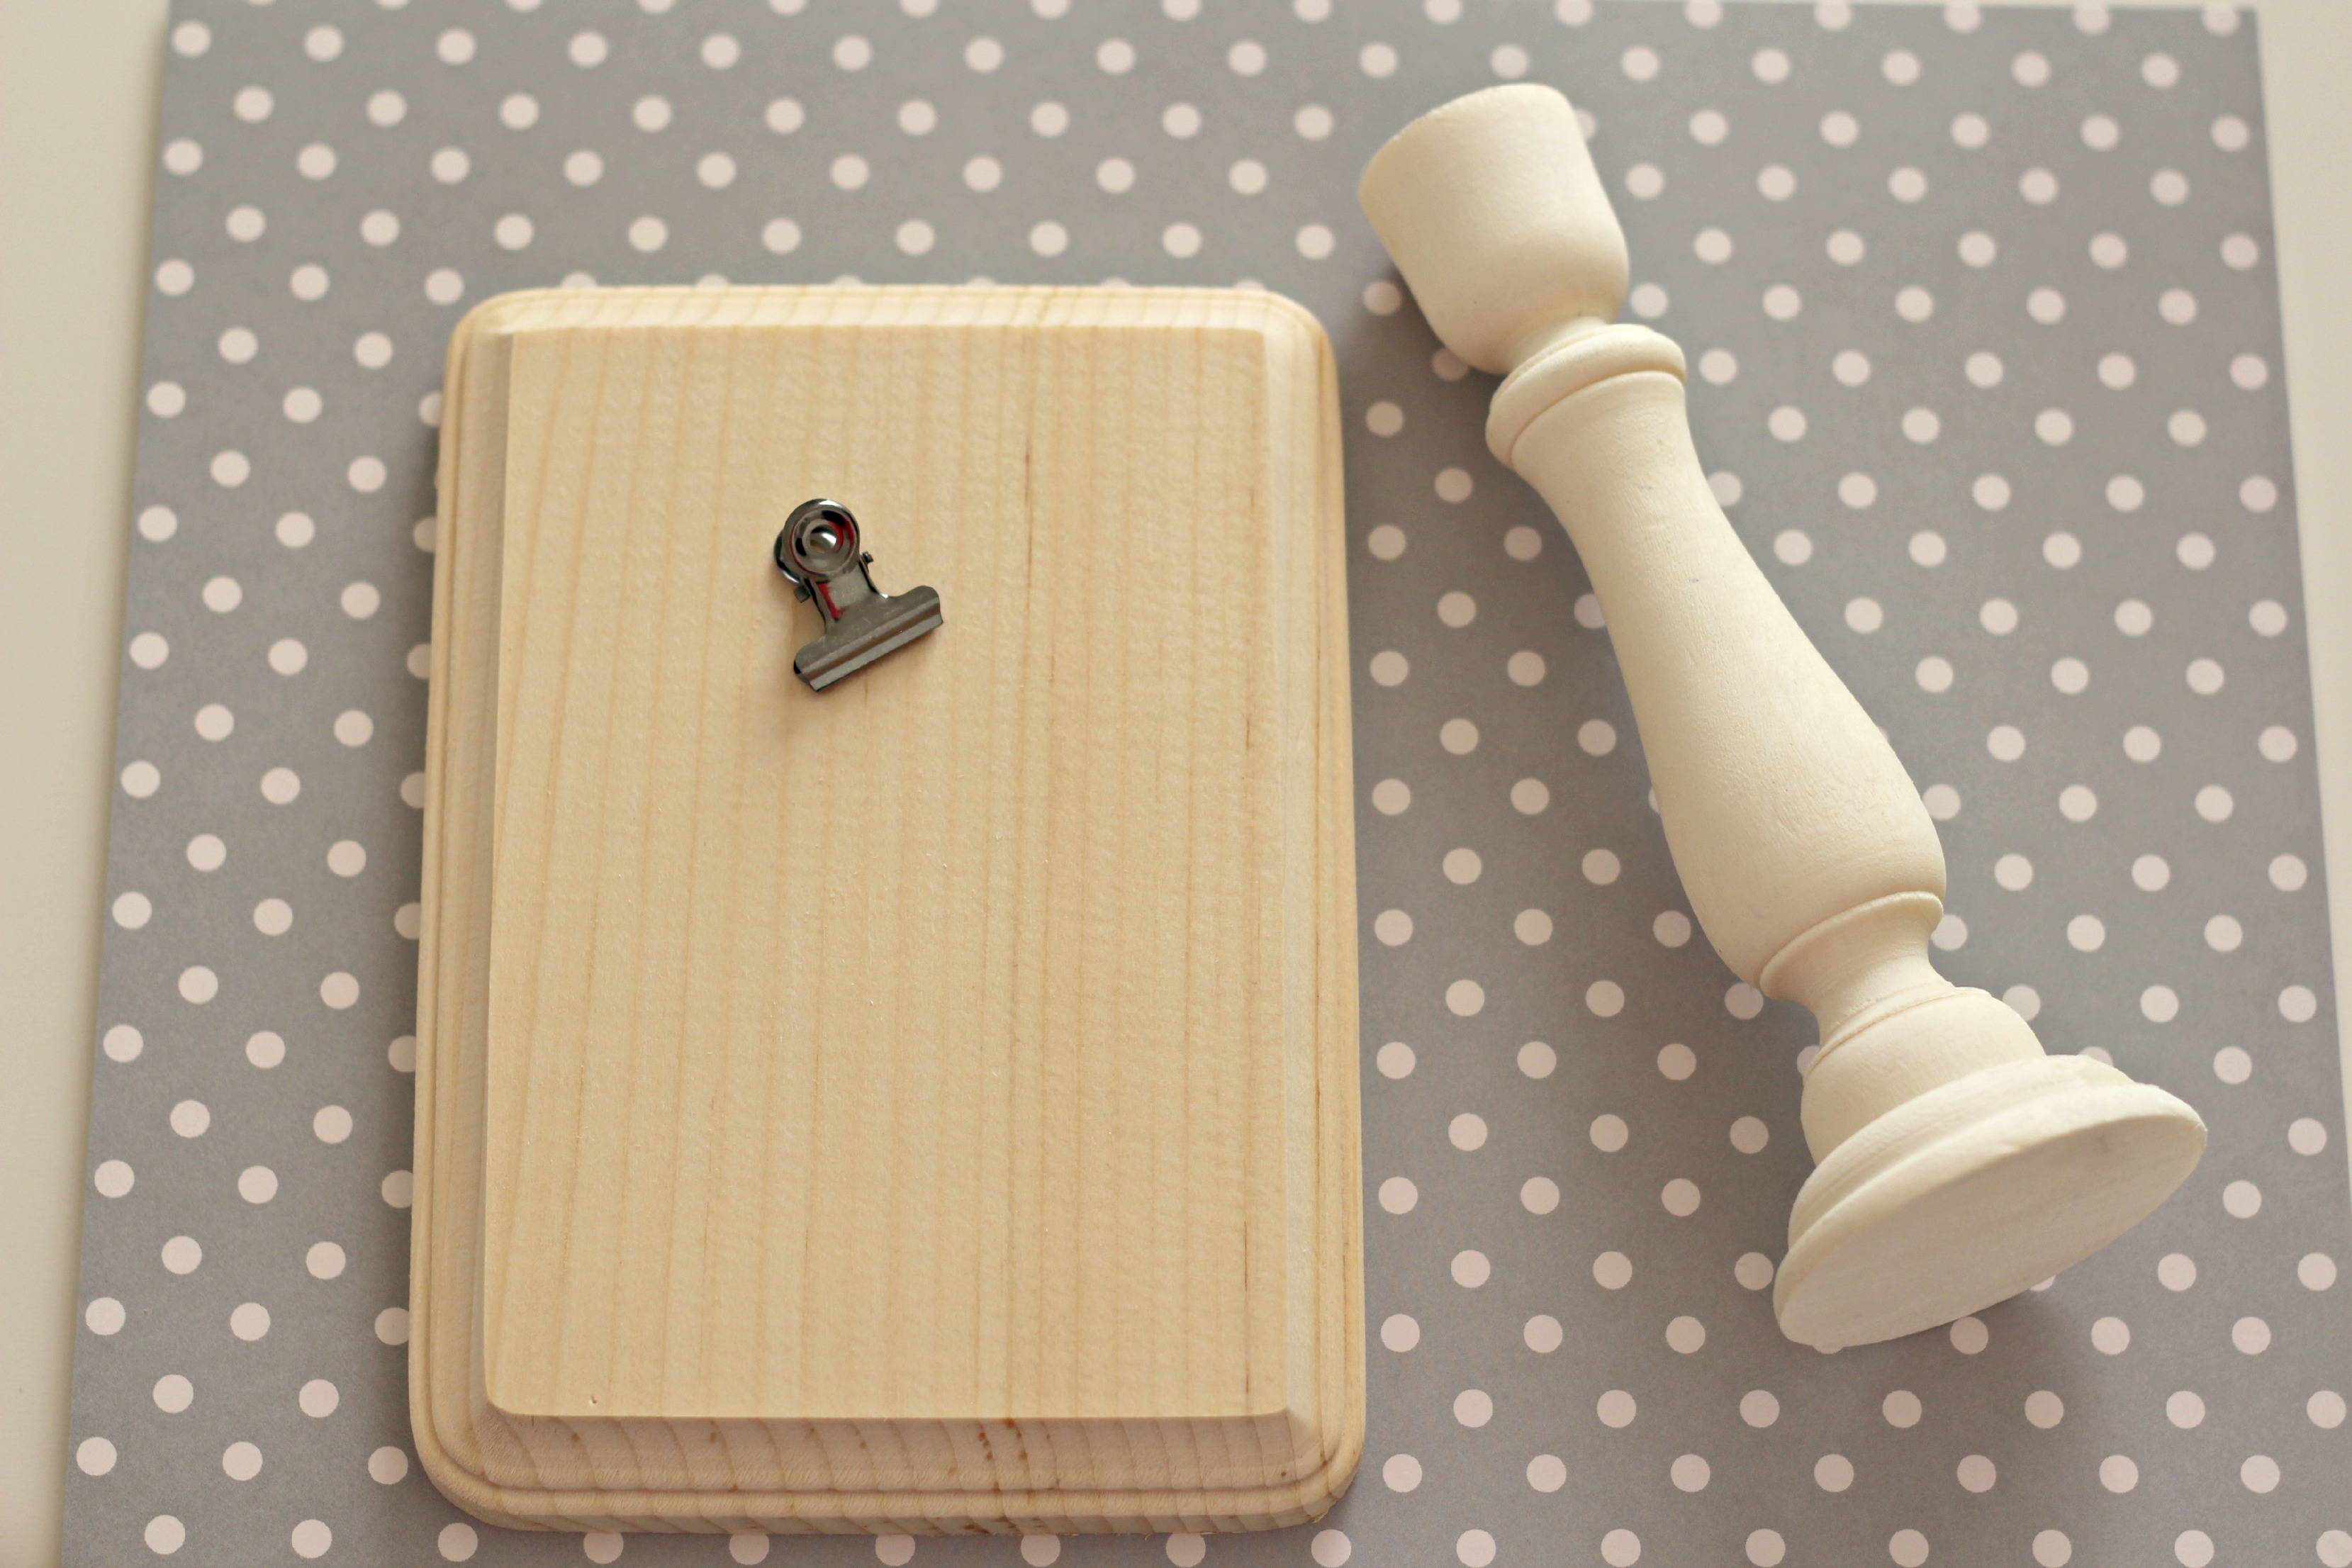
Supplies Needed for Wood Photo Holder:
Solid Wood Frame or scrap piece of wood
Candlestick or Wood Spindle (I used a candlestick)
Scrapbook Paper (your choice)
Spray Paint (any color)
Clip (from scrapbook supplies)
Skewer (optional)
Cork (optional)
E6000 glue
If you’re using a candlestick that has a metal ring or cup, remove it. It’s easy to remove by using a knife to pry the edges up and you’ll need to do that to get a flat surface. Paint all the wood pieces now to give them time to dry. I use spray paint because it’s fast and goes on smooth but acrylic paint works well also and you have more colors to choose from.
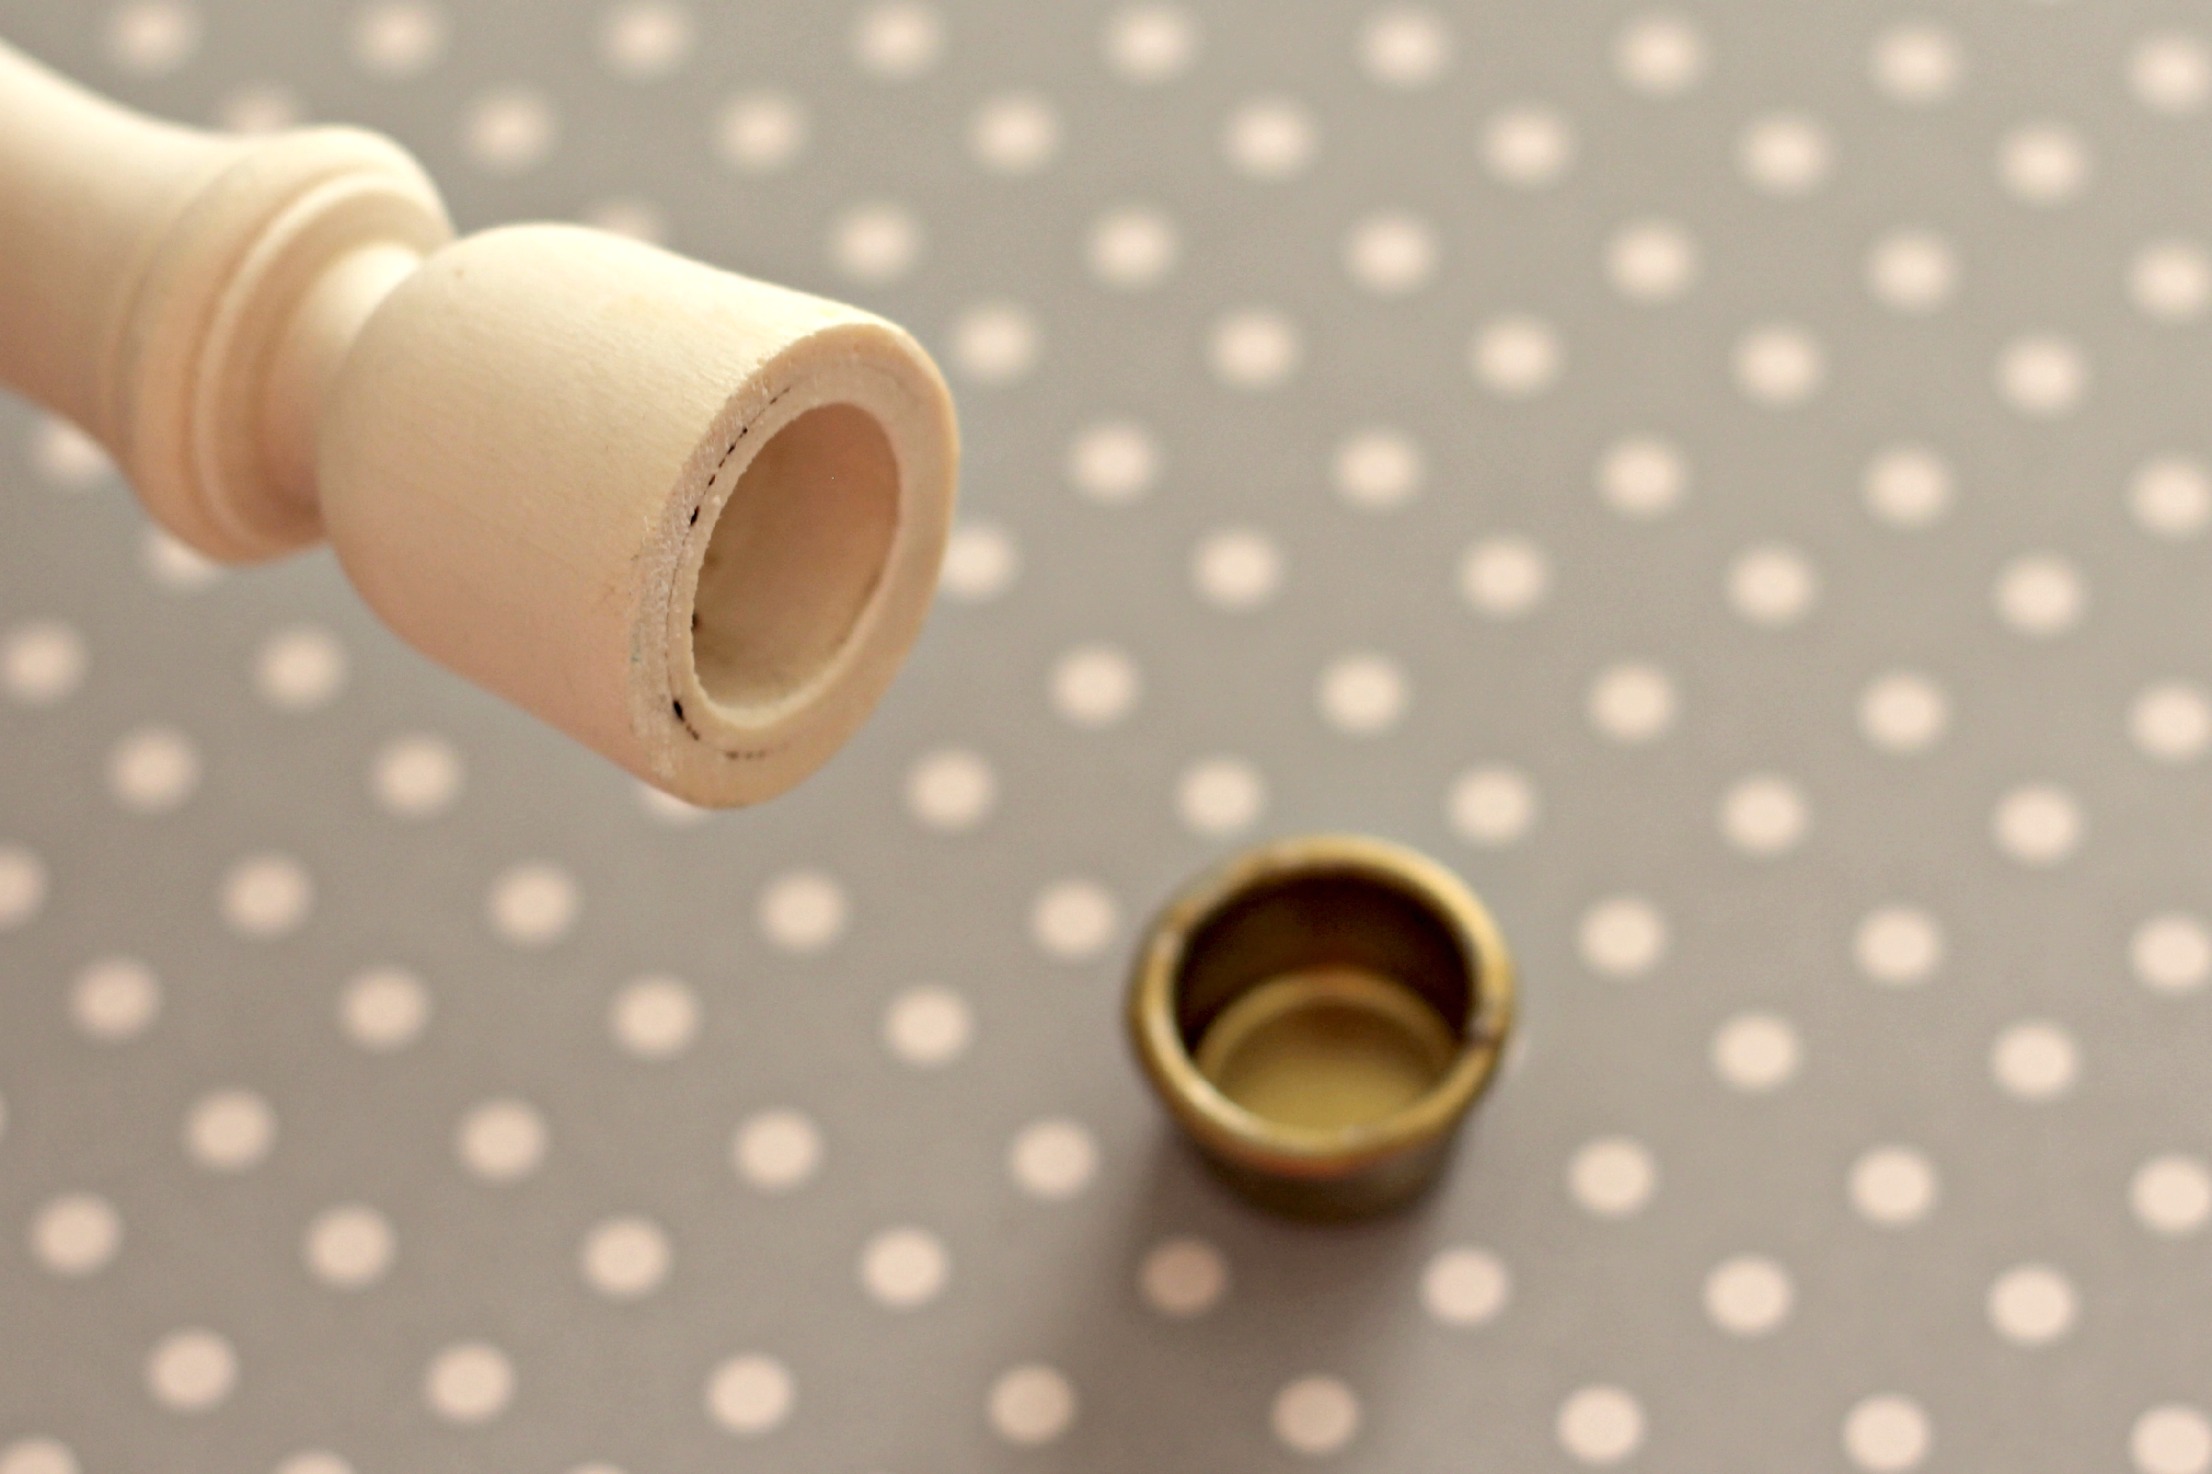
Use a cork to fill the hole and paint it the same color as your candlestick. You could also use flower foam or modeling clay. Use anything you can fill the hole with to make the surface flat.

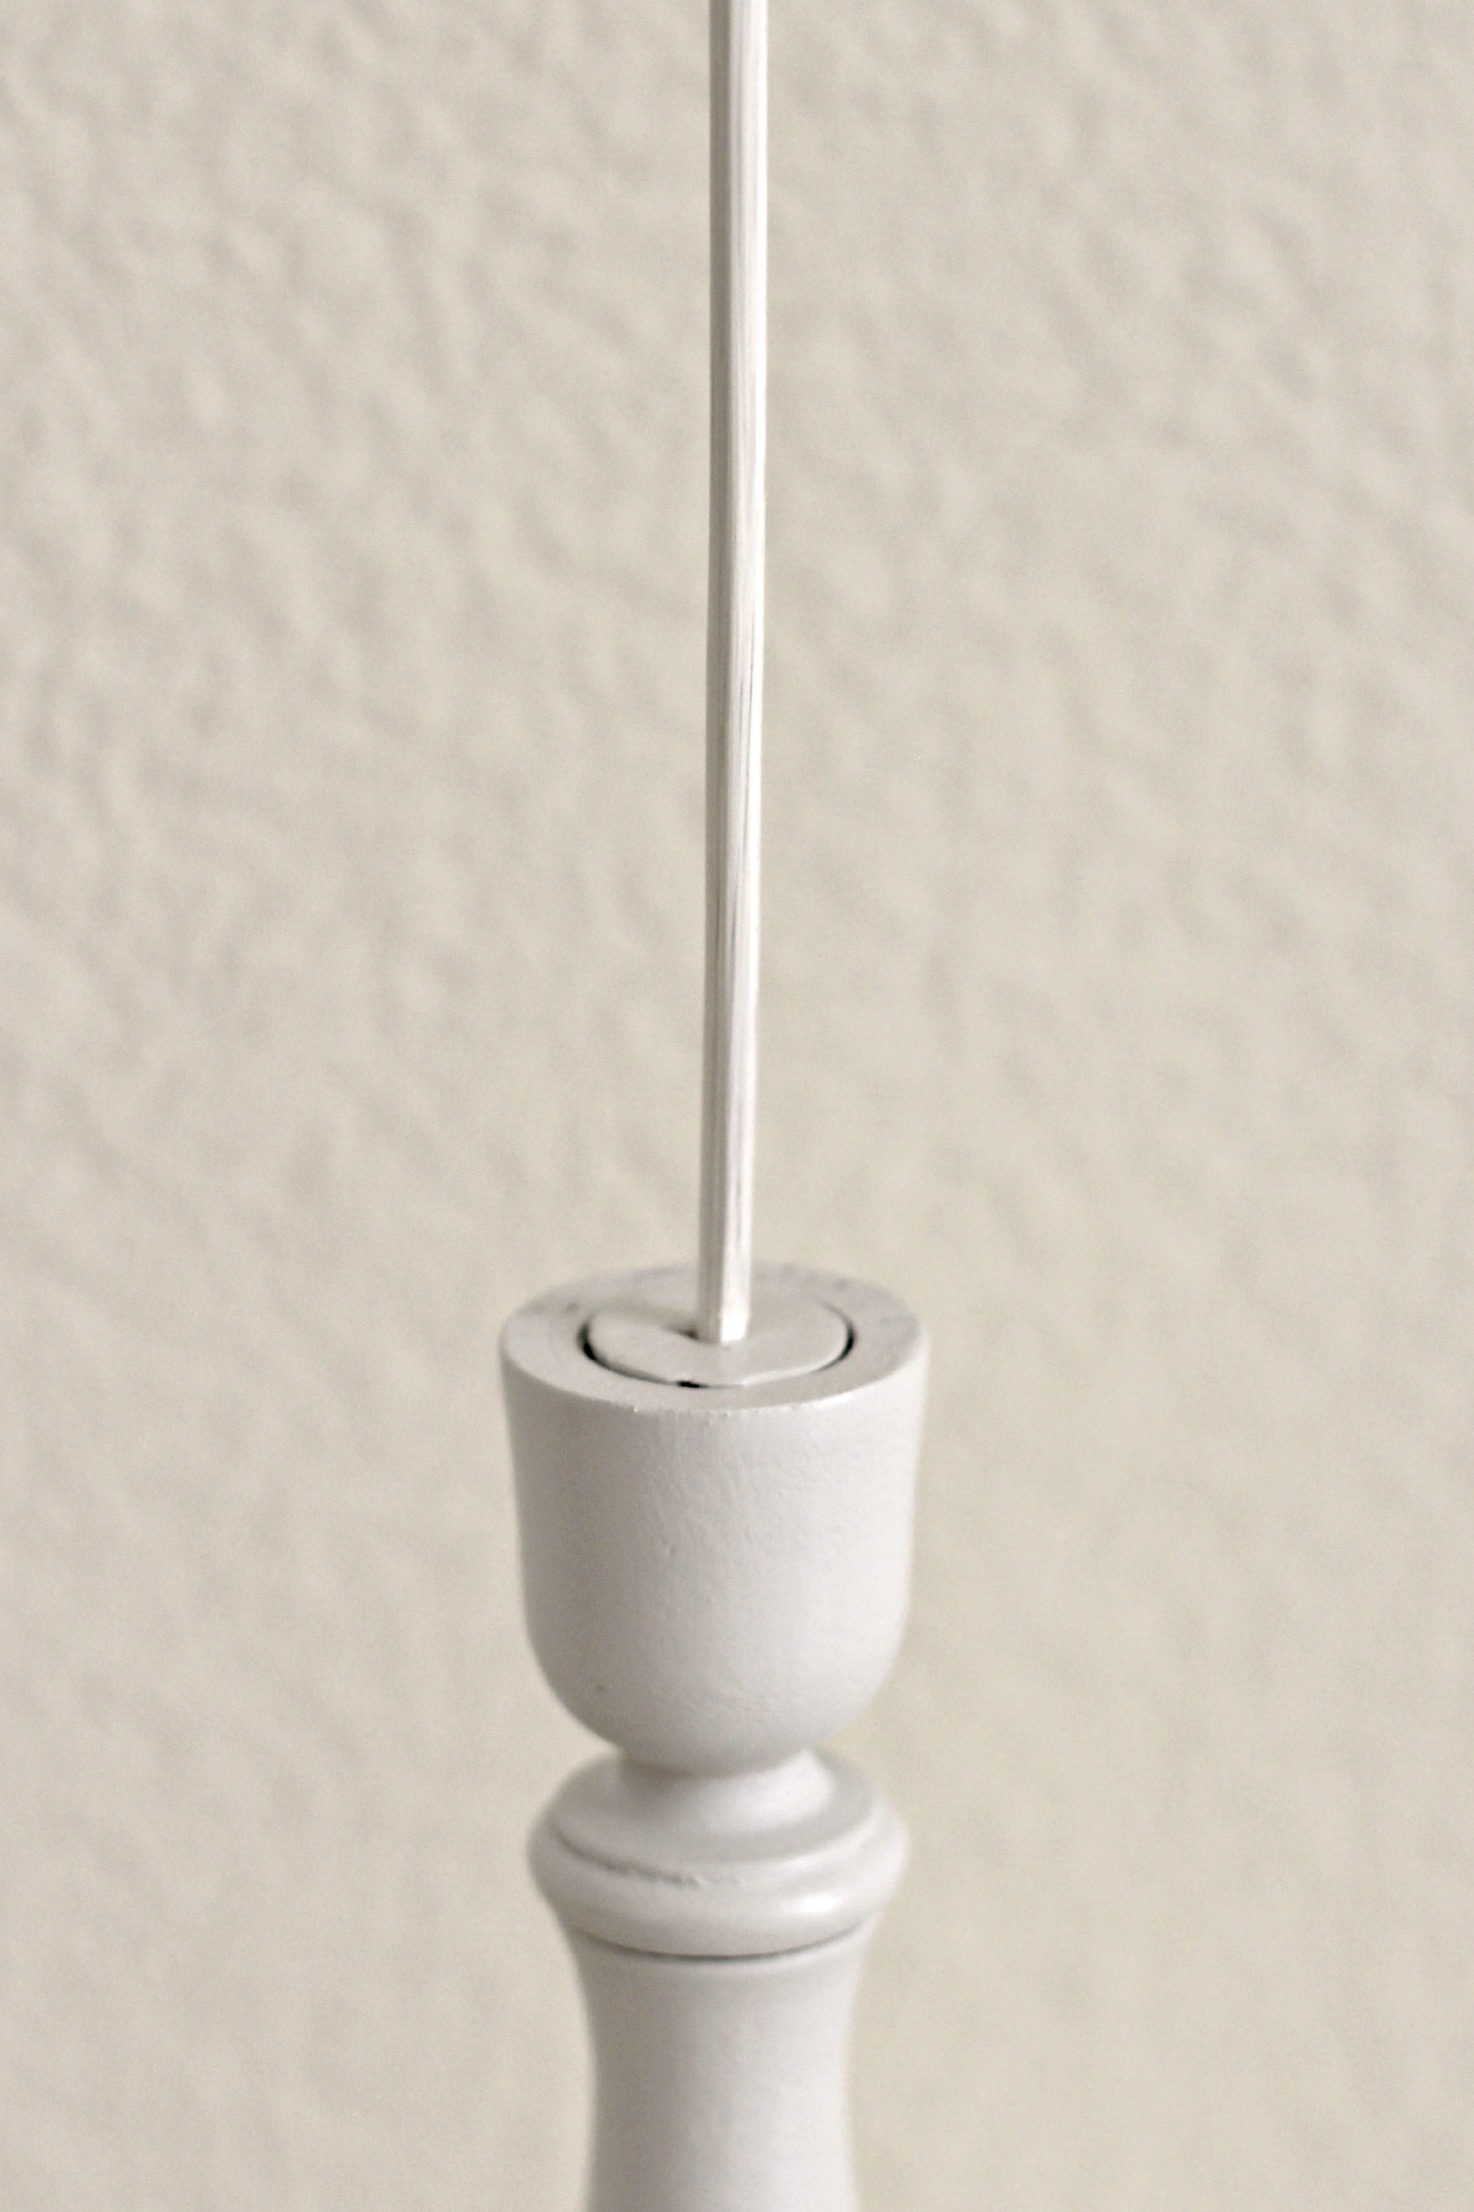
Cut the skewer to end about 1/2″ below the top of the photo holder. Stick it as far as it will go into the center of the cork, then set it aside until you finish the photo board.
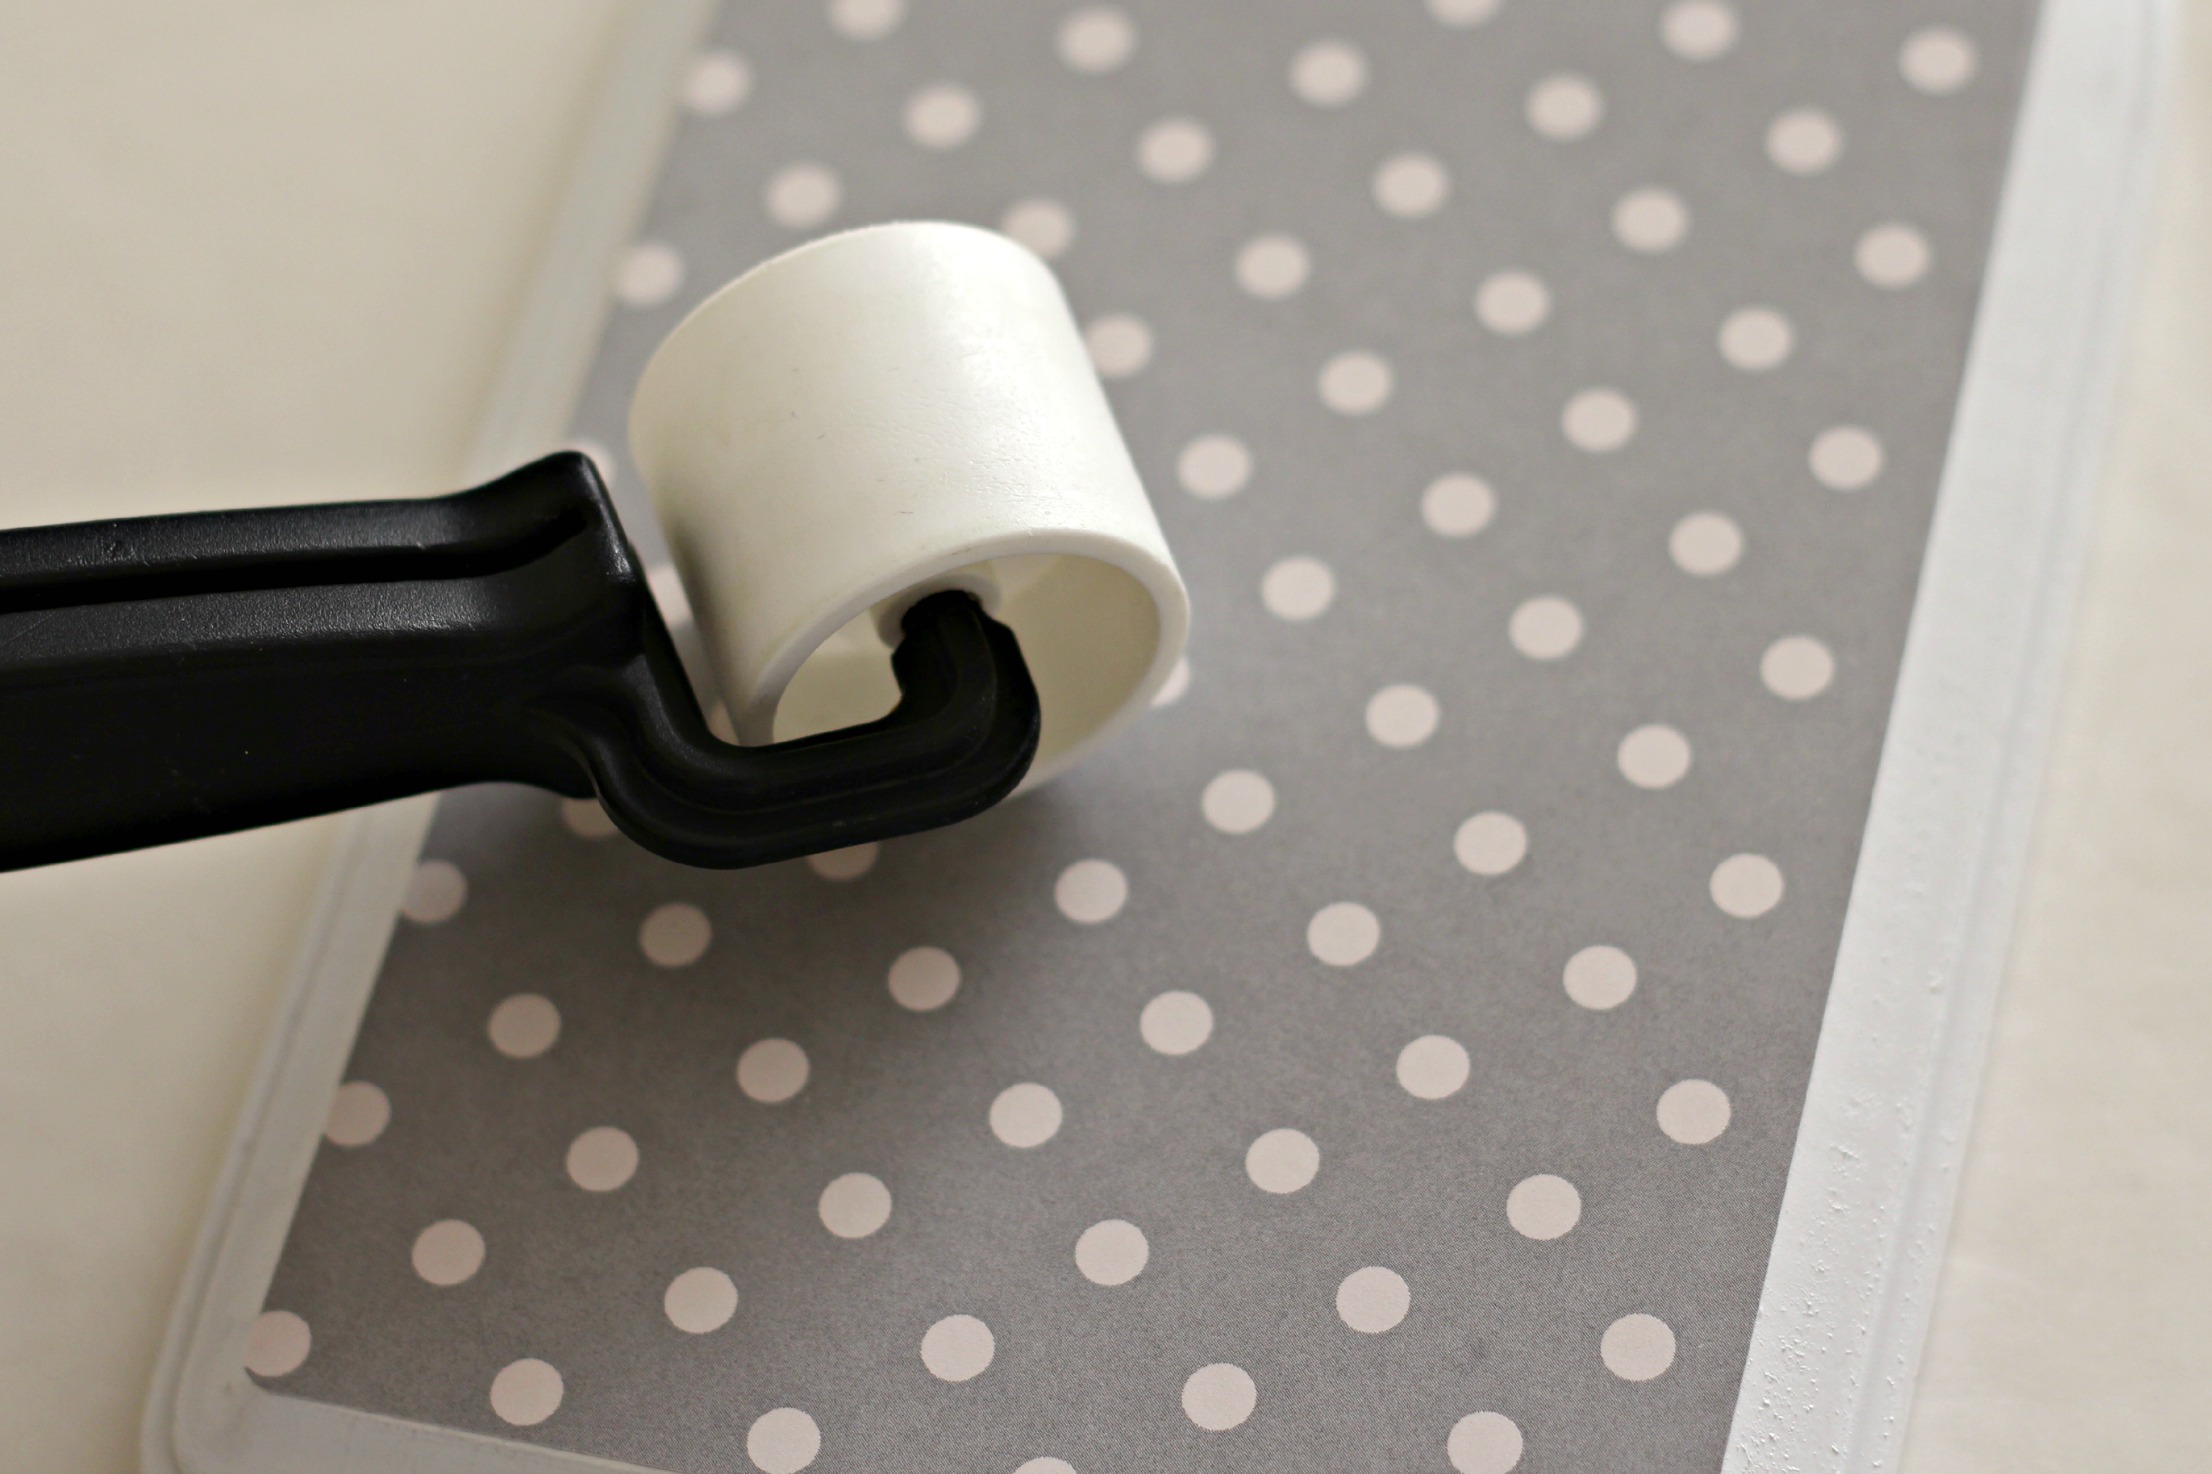
Cut a piece of scrap book paper to fit the front of the photo board then apply it to the board with mod podge. I like to use a roller to make sure all the bubbles are out. Let it dry 10-15 minutes then apply mod podge to the top to seal the paper. Then let that dry about 20 minutes.
Now add the clip to the front of the board using E6000 glue. Let it dry at least an hour before going on to the next step. I placed the clip down a little too far on the front of the board. When I make another one I will adhere it as close to the top as possible to make more space for whatever is clipped to the front.

Now it’s time to adhere the board to the candlestick. Add E6000 to the bottom of the board and the skewer to adhere the 2 pieces together. Let dry a few hours or overnight to make sure it is secure.

I love how it turned out! And because of the colors and pattern I chose it will work in any room of my house. I’m going to start with it in the kitchen.
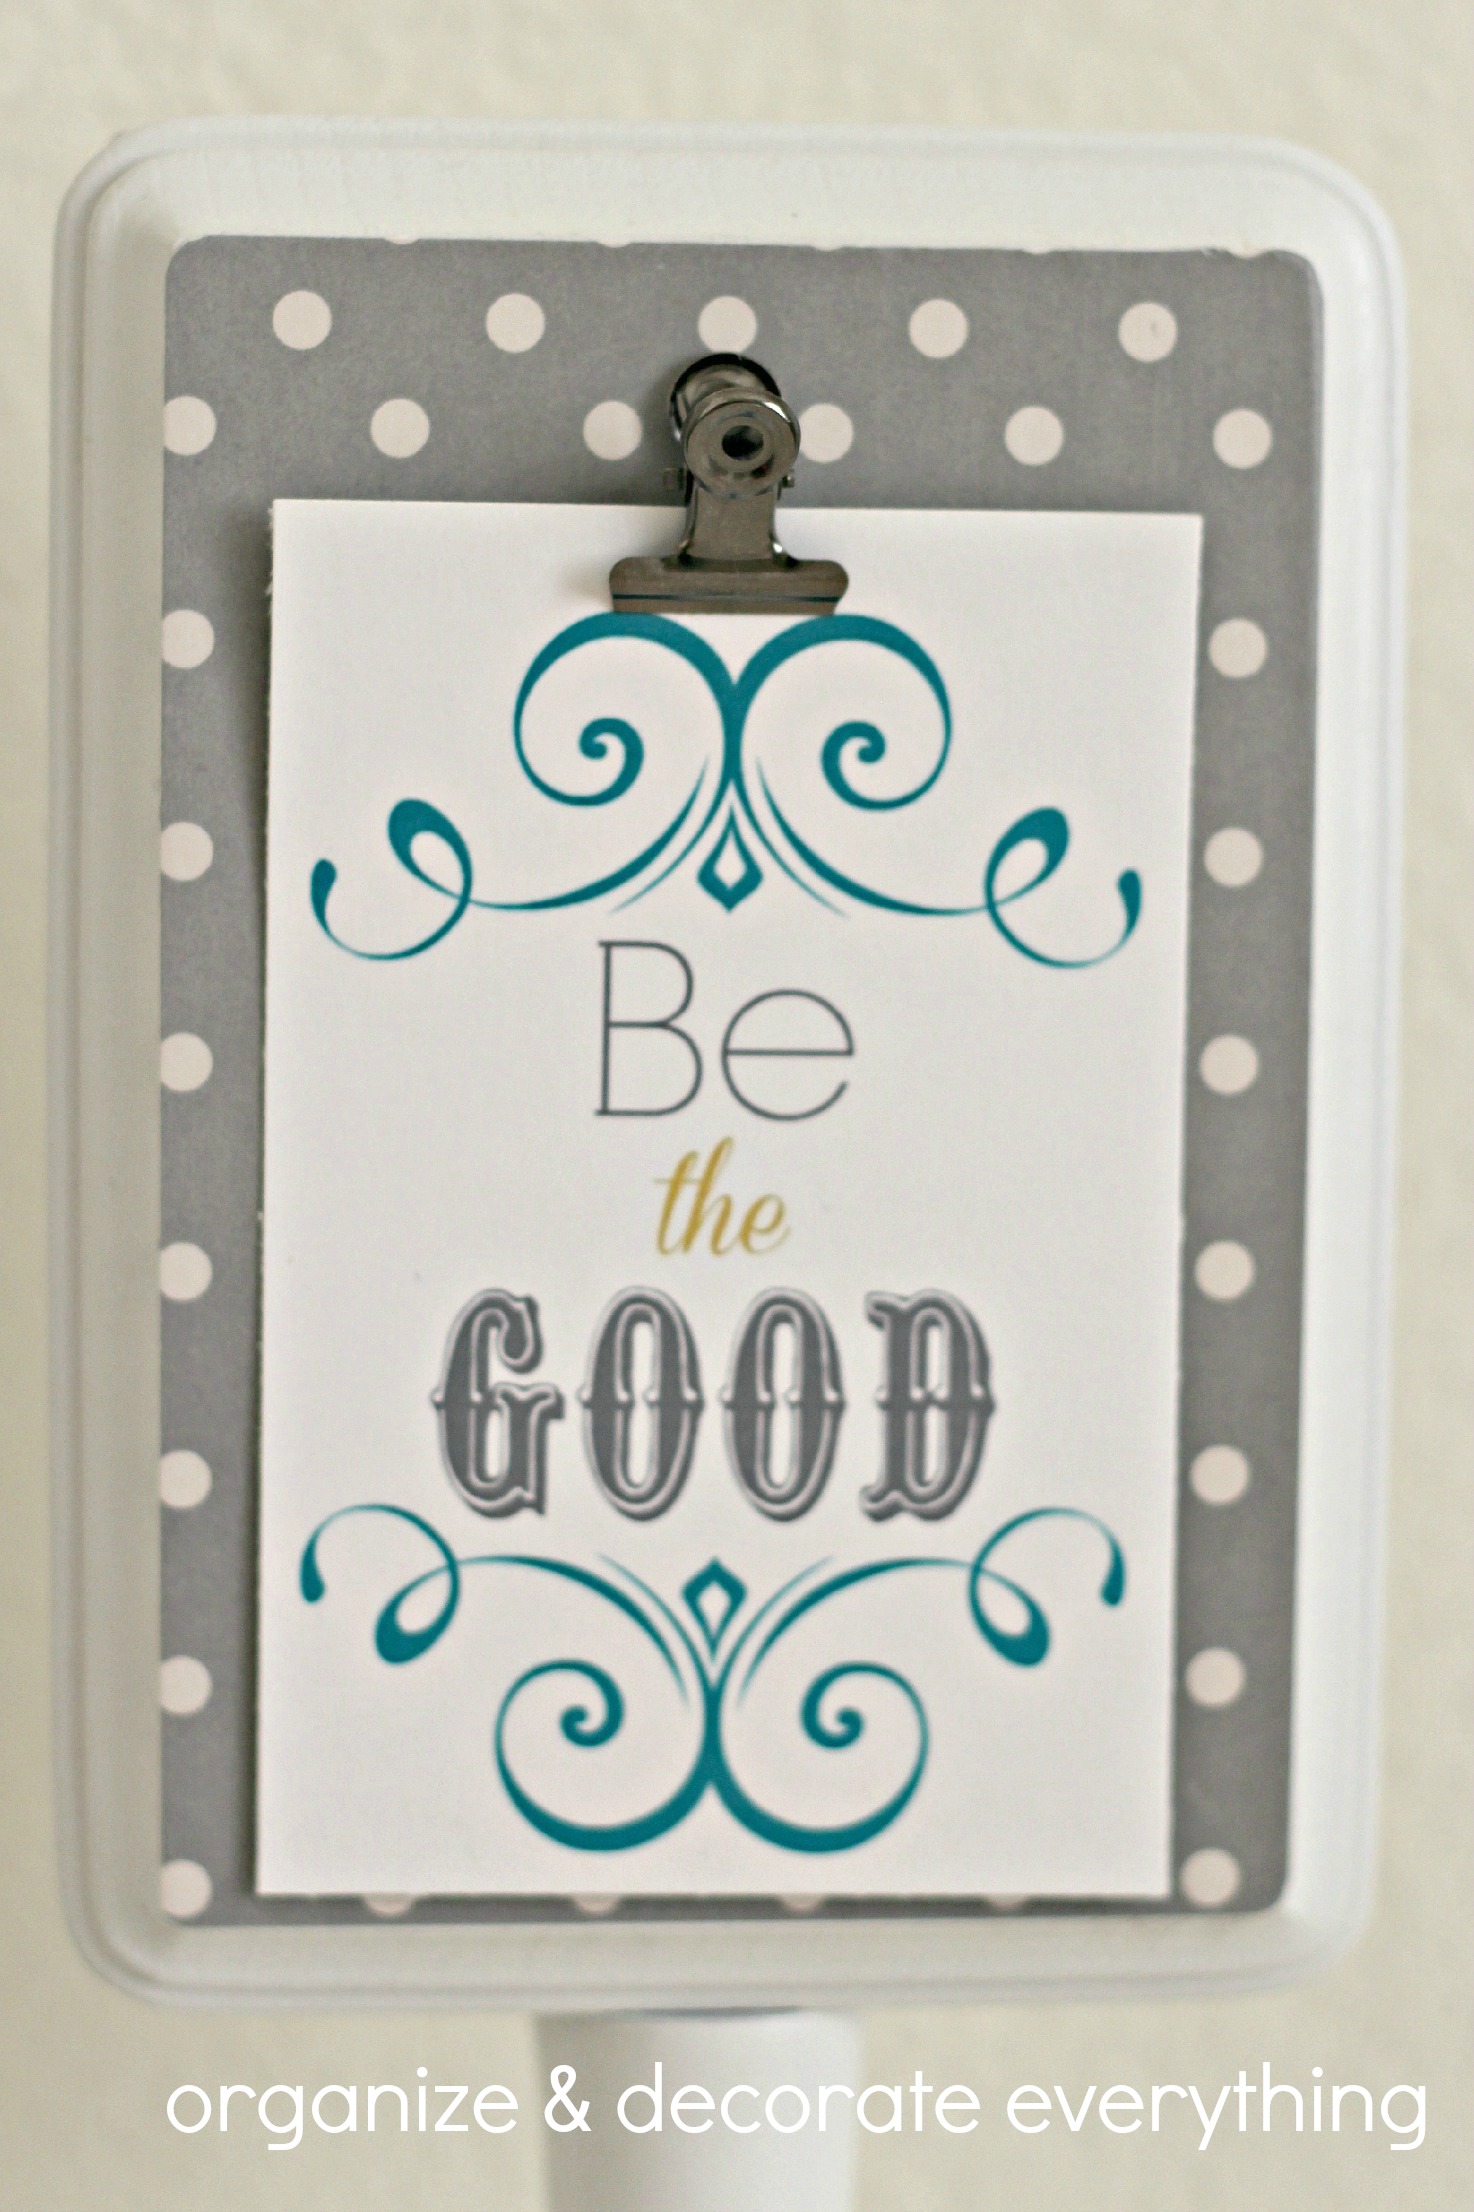
It would be perfect for clipping a recipe to while cooking but right now it is holding one of my favorite printables. You can also get this beautiful free printable for yourself.
What would you use your DIY photo holder for? I’ll be making a few more for gifts with a quote or recipe attached to it. Be creative and customize it to each persons personal style.

Pin it for later: DIY Wood Photo Holder

You might also like these posts:
Wood Shim Sunburst Mirror
Decorative Wood Spheres


This is a great idea. Where do you come up with them!!!!
Ooooh! I love this idea! I’ve been looking for something with a small footprint (I’ve got a small counter) to hold recipes while I’m cooking. When in done I can attach a cute saying or photo and place it on a table as decor until I need it again. Pinning this until my next trip to the craft store. Can’t wait to try this!