
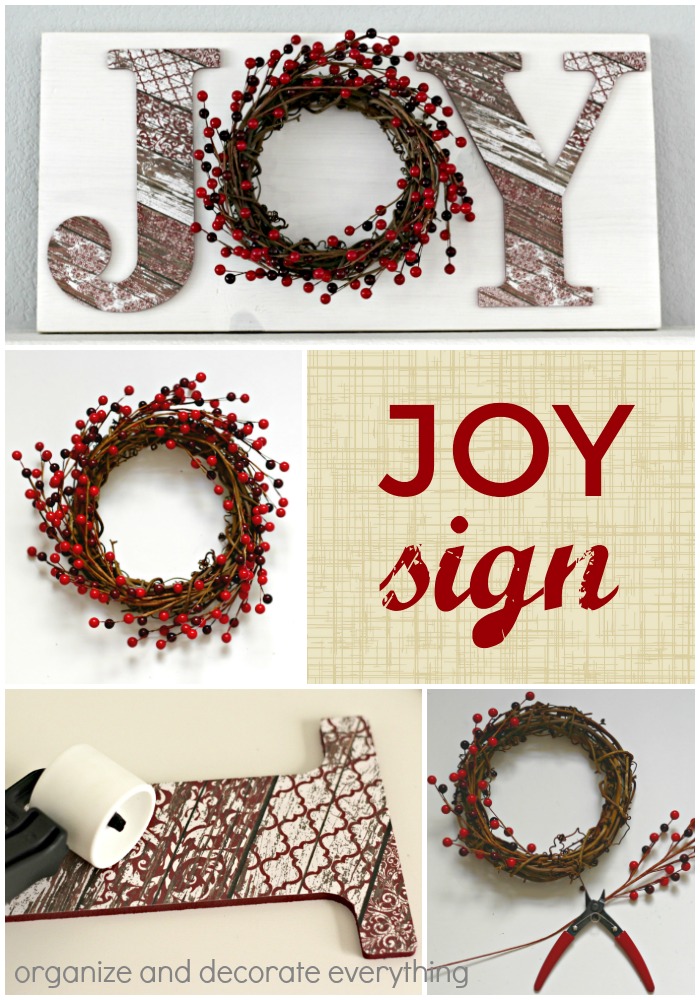
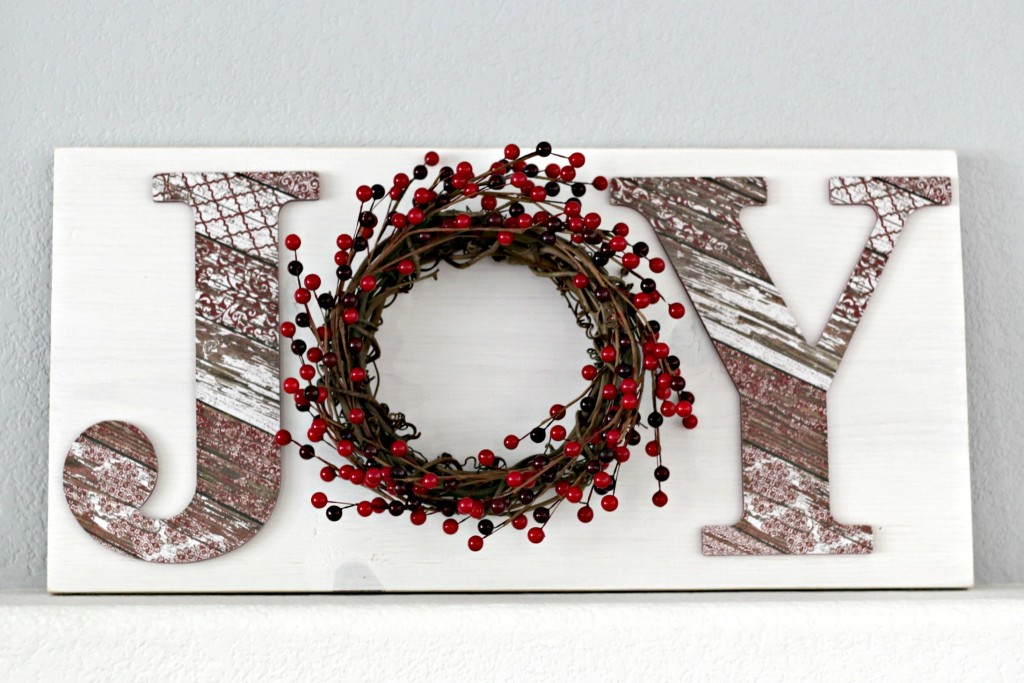
I like to change our Christmas theme and colors a little every year. This year I will be going with traditional red and green colors and a woodland theme. We will be having family in our home this year and I think the little kids will enjoy a more kid friendly Christmas. I’m already planning gold, silver, sparkle, and a more elegant Christmas for next year. Let’s get back to this year and this JOY Sign I’ve been wanting to make since last year. Decide on your Christmas colors so your sign will reflect your theme.
Affiliate links have been added for your convenience.
This post is part of the 31 days of Christmas Ideas series. Click over to the main page to see all of the 31 Christmas posts (they will be added daily).

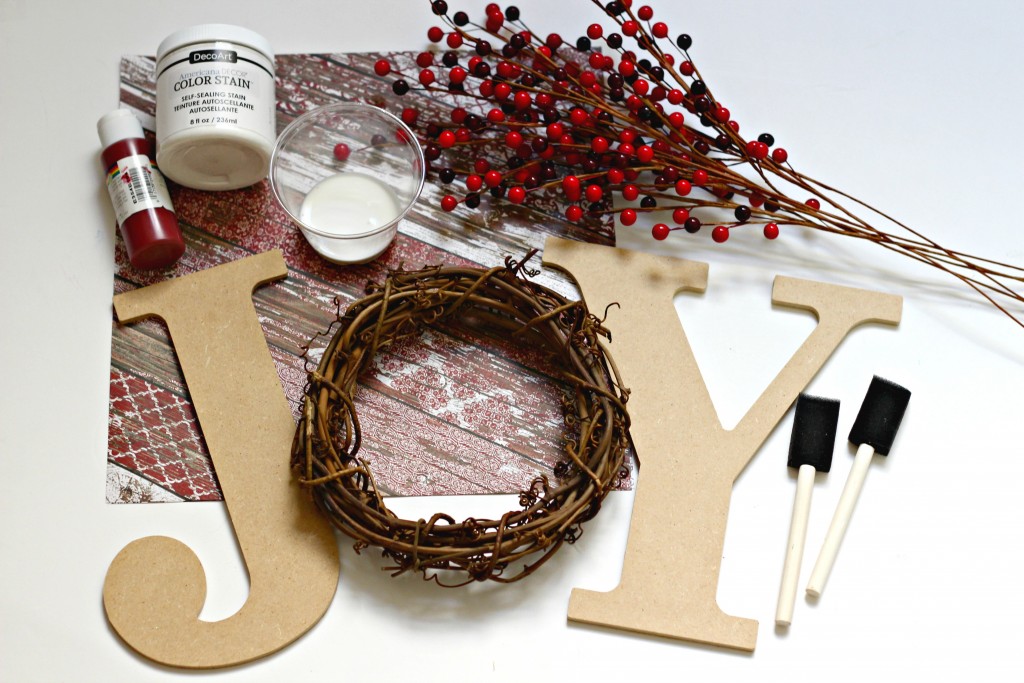
Supplies needed:
wood board (I used a scrap piece from another project)
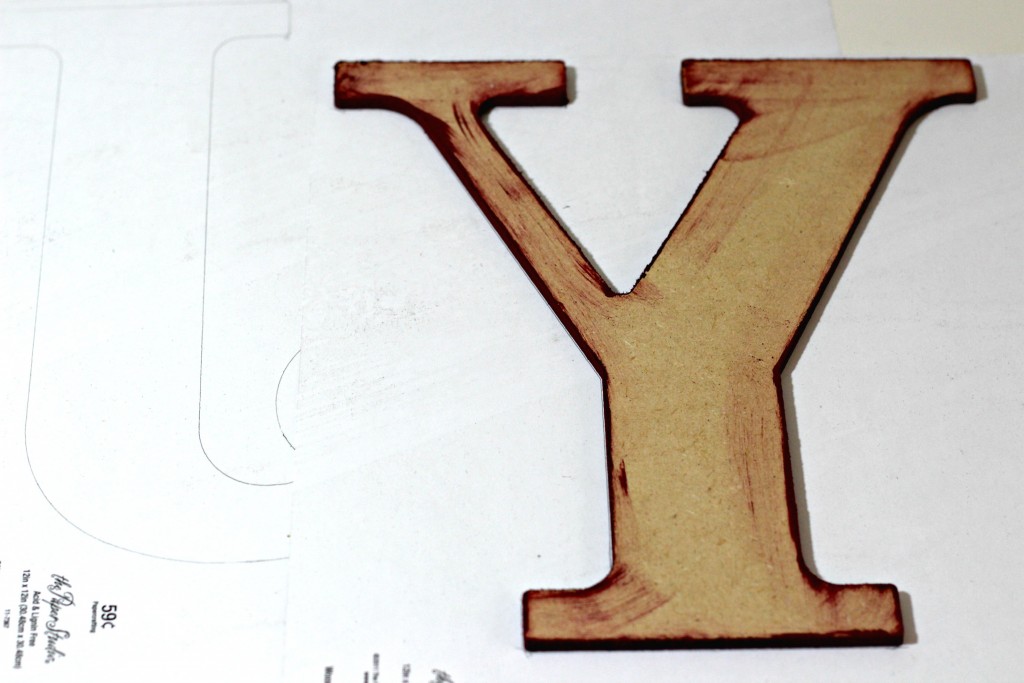
J & Y chipboard or wood letters
grapevine wreath
red berry picks
wood look scrapbook paper (Hobby Lobby)
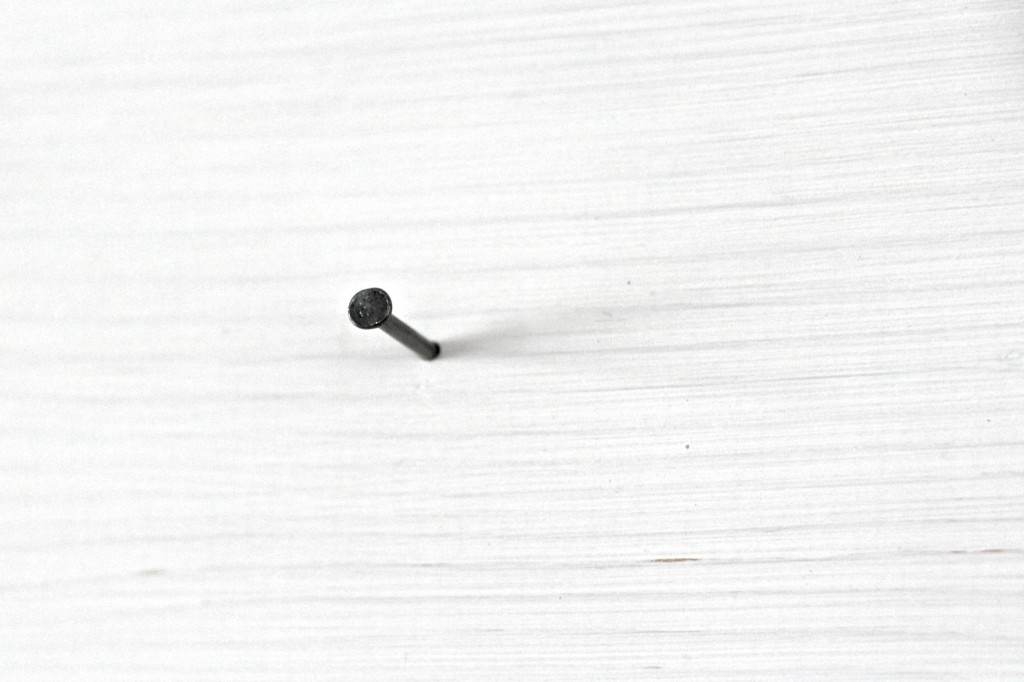
nail
wire cutter
scissors
mod podge
white DecoArt color stain
red barn paint
sponge brushes
sand paper
liquid nails
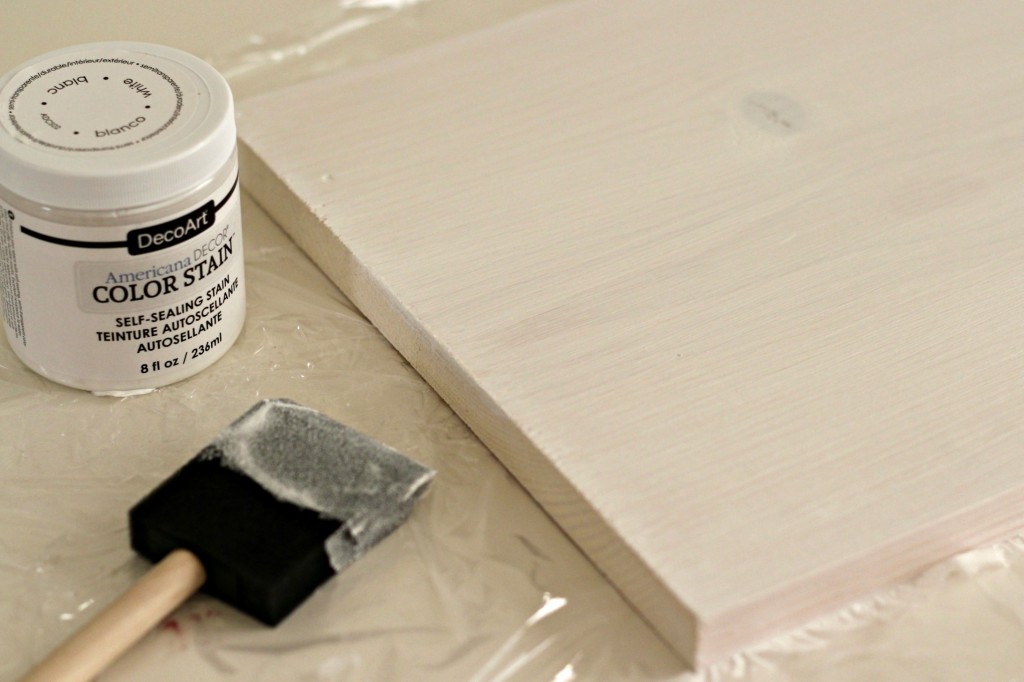
Start by painting the board with paint or stain. I used 2 coats of stain to give it more color but have the wood grain still show through.
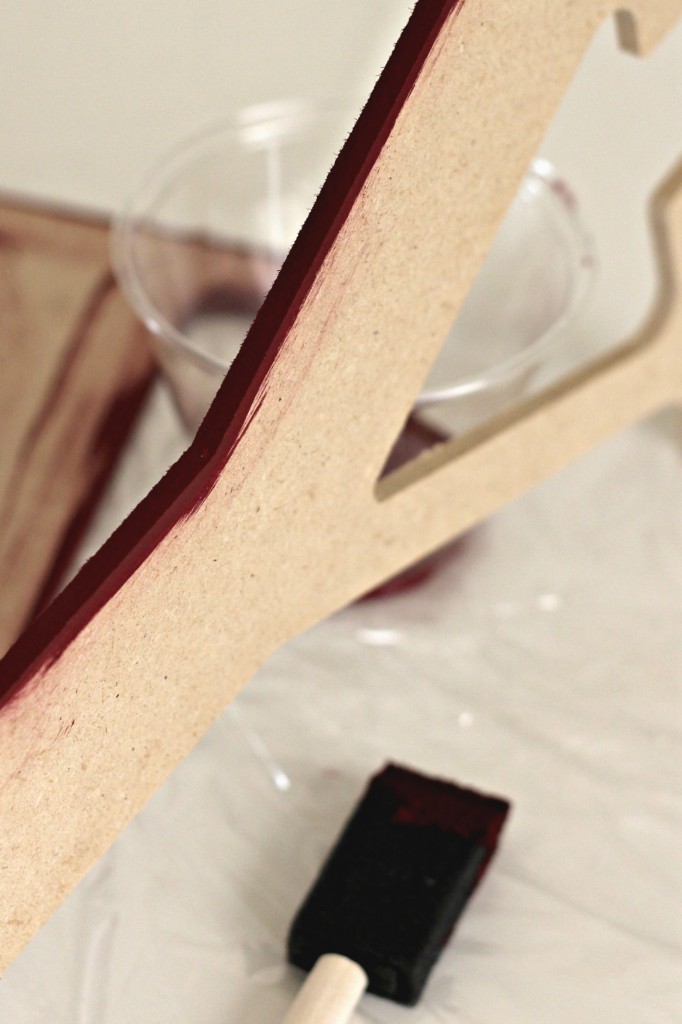
While the board is drying paint the edges of the letters. There is no need to paint the front or back because they won’t be showing.
While all the paint is drying you can assemble the wreath. I started with a grapevine wreath and added simple red berries. You could also add greenery if you like. Cut the stems off of the berries. I used 6 stems for this wreath.
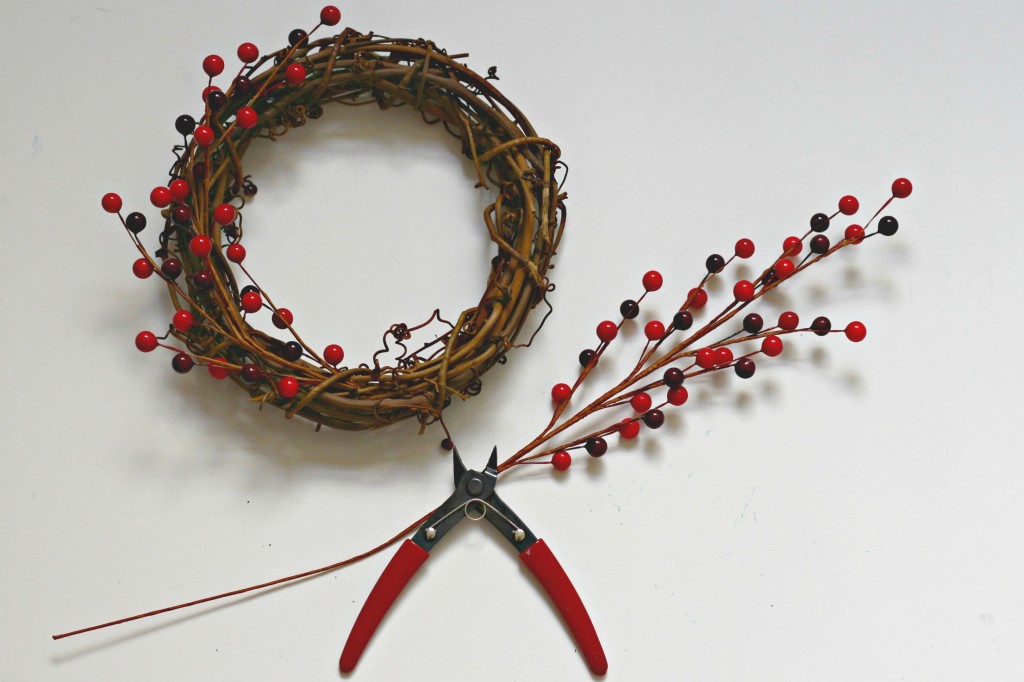
Insert the berries into the wreath. Space and shape them evenly around the grapevine wreath.

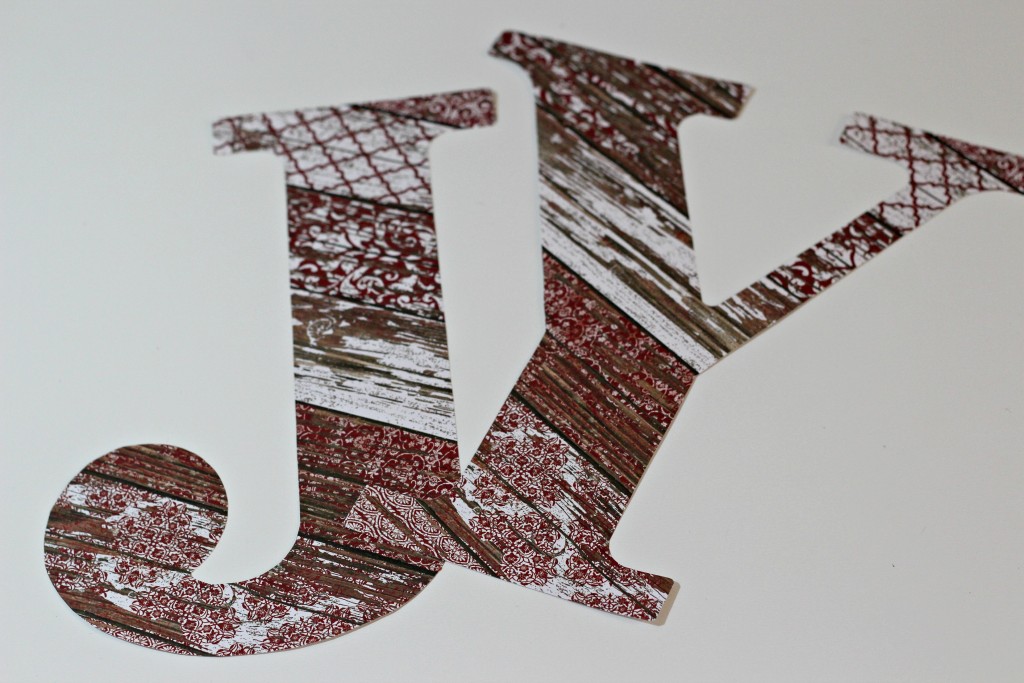
Once the letters are dry, trace them in reverse on the back side of the scrapbook paper.
Cut the letters out and use mod podge to adhere them to the chipboard letters.
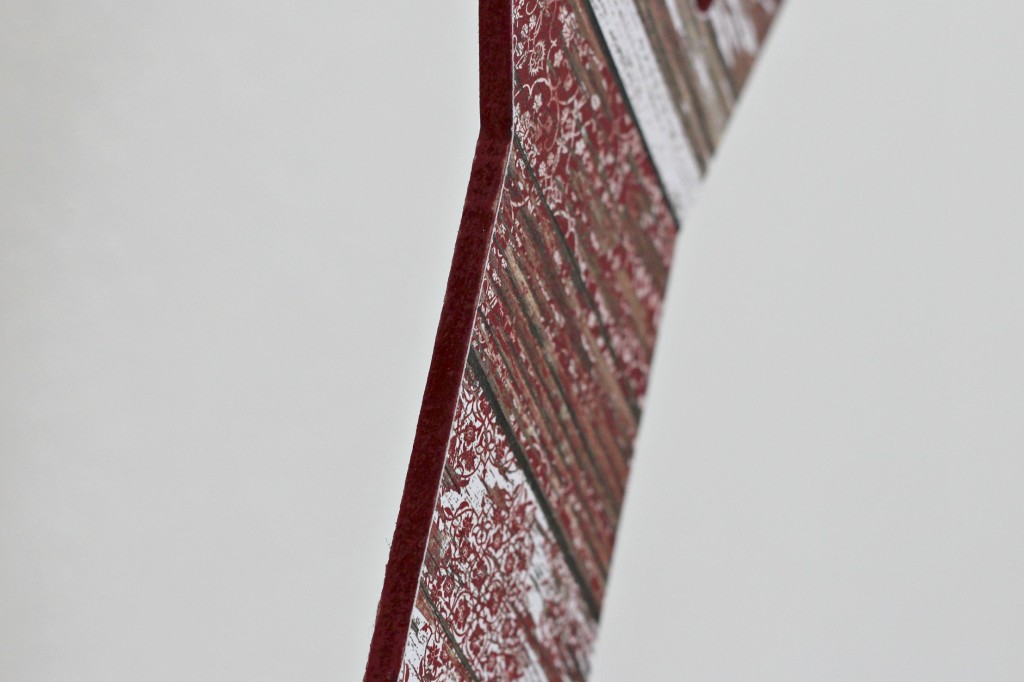
I like to use a wall paper seam roller to make sure the paper is adhered well and there are no air bubbles.

Let the paper dry for about a half hour then sand the edges for a finished and distressed look. I love the way the sanded edges look.
Once the board is dry, sand the edges and the top of the board to distress it and show a bit more of the wood grain. Adhere the letters to the board using liquid nails, then place something heavy on them (like a couple books) for a couple hours. Hammer a nail in the center of the 2 letters for the wreath.
Hang the wreath in the center to make the word JOY.

Use colors for your sign that fit your theme. I love this rustic wood and patterned paper for my sign. I would love to see your sign if you decide to make one.
Come back tomorrow for the next 31 Days of Christmas Ideas post.


This is totes adorbs!!!
Oh my word. I love this! Great job and super cute sign!
Love this JOY sign – you make it look easy – I will have to try it – thanks!