
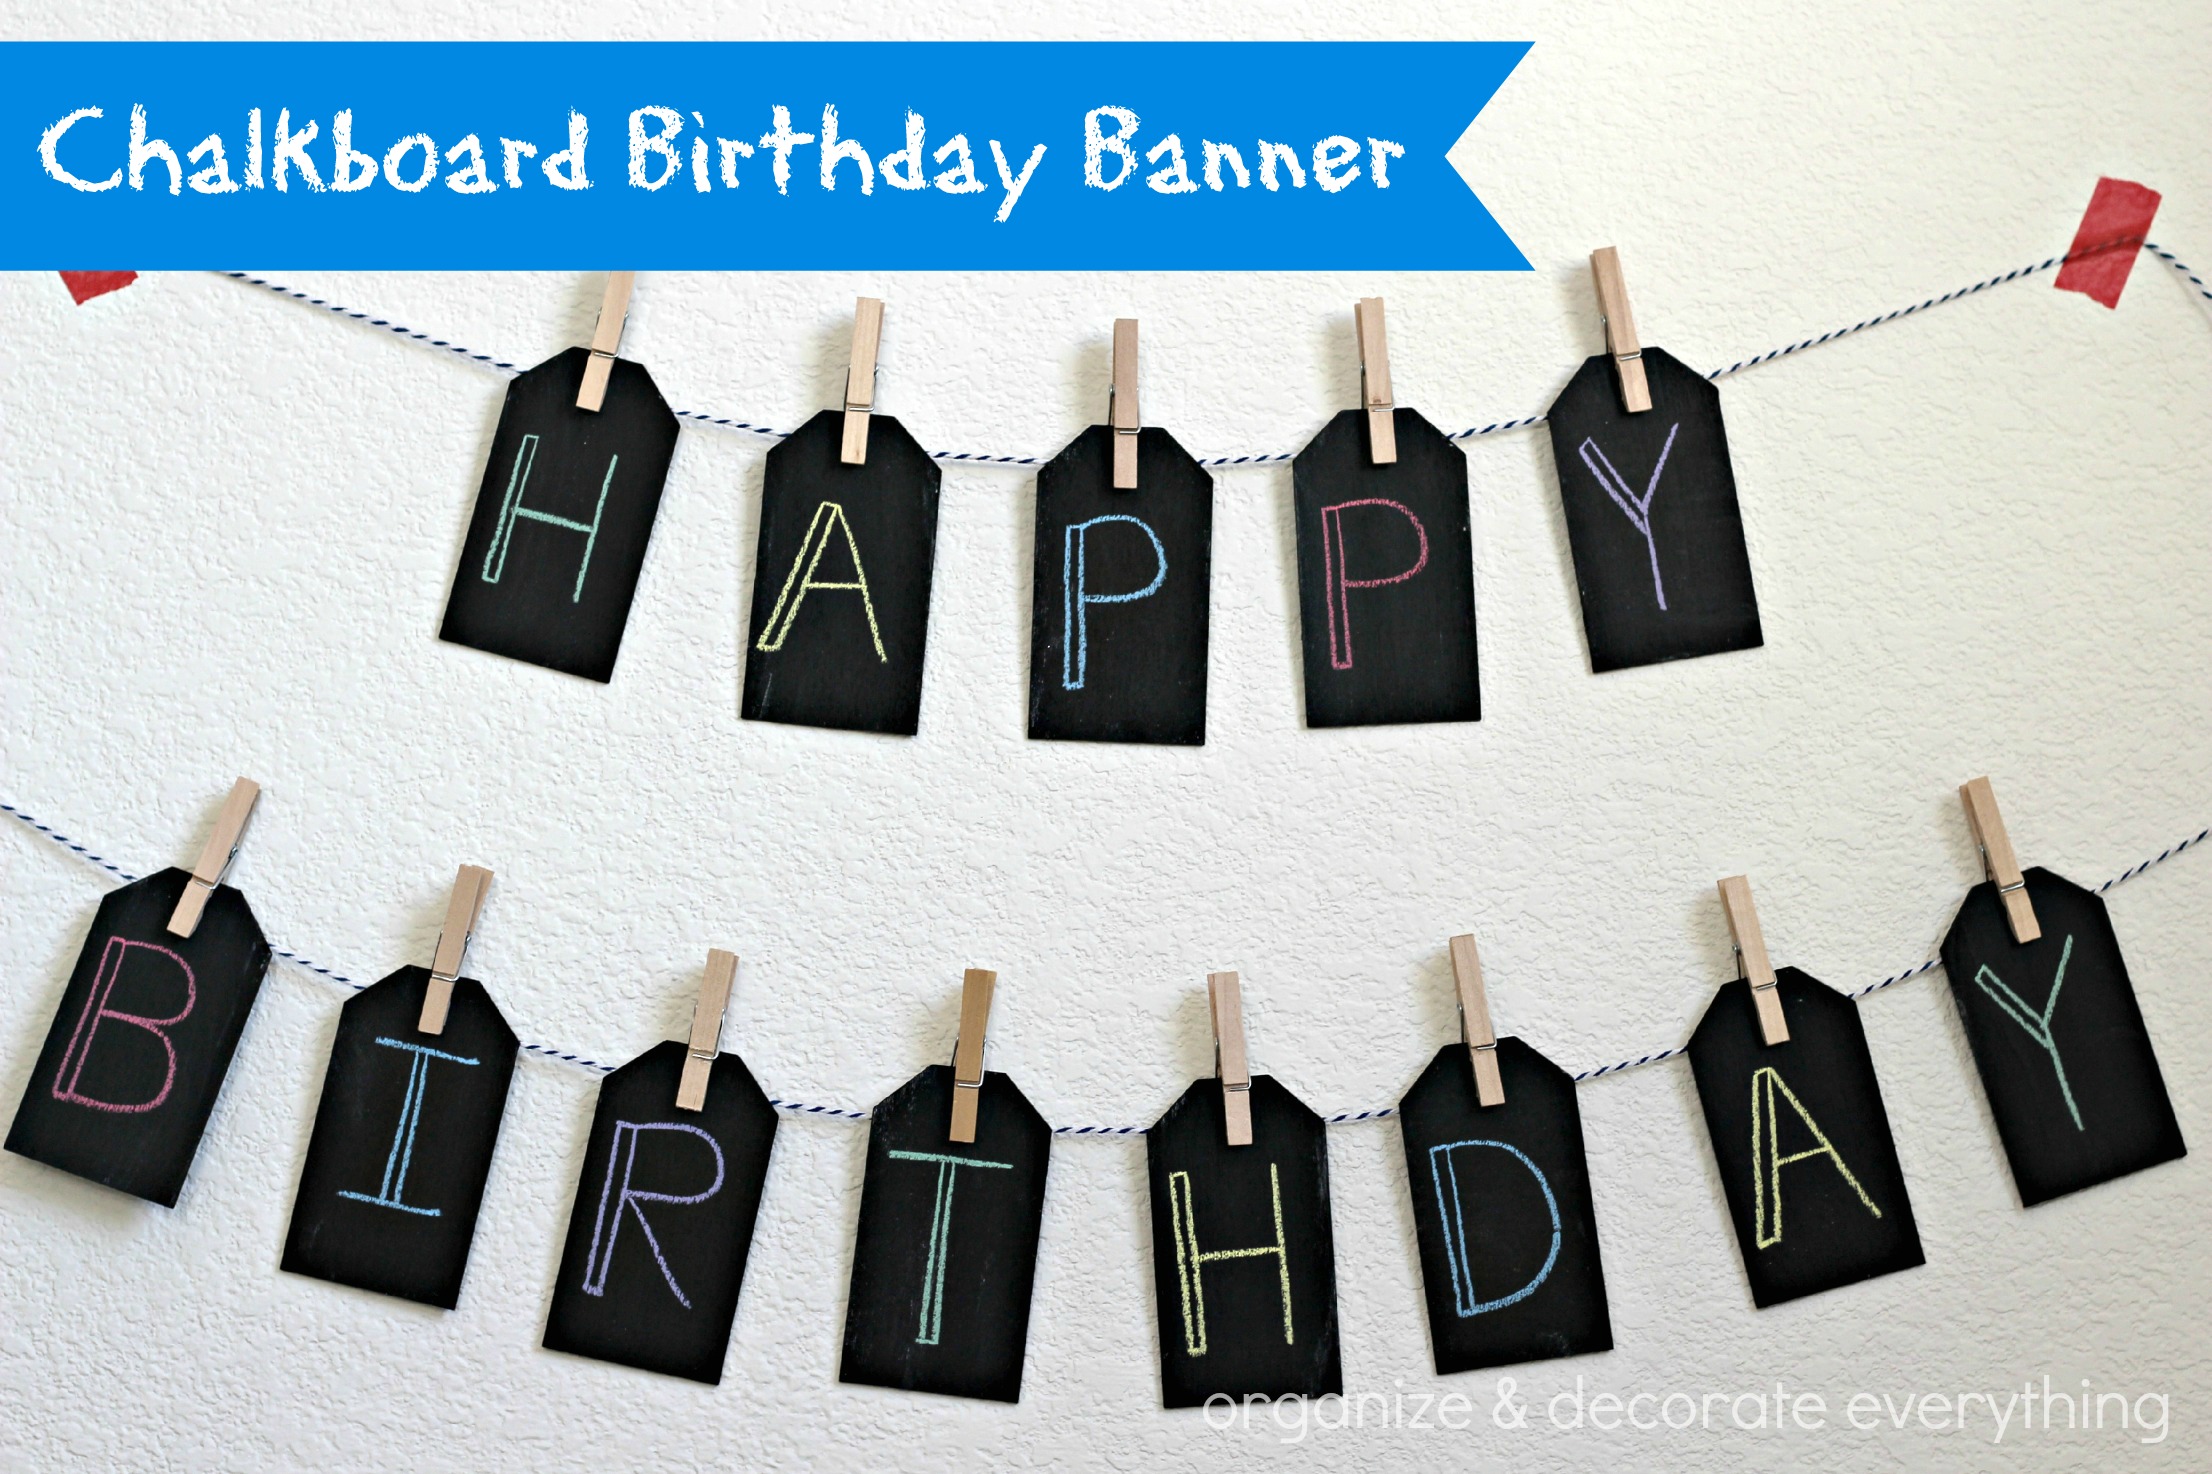
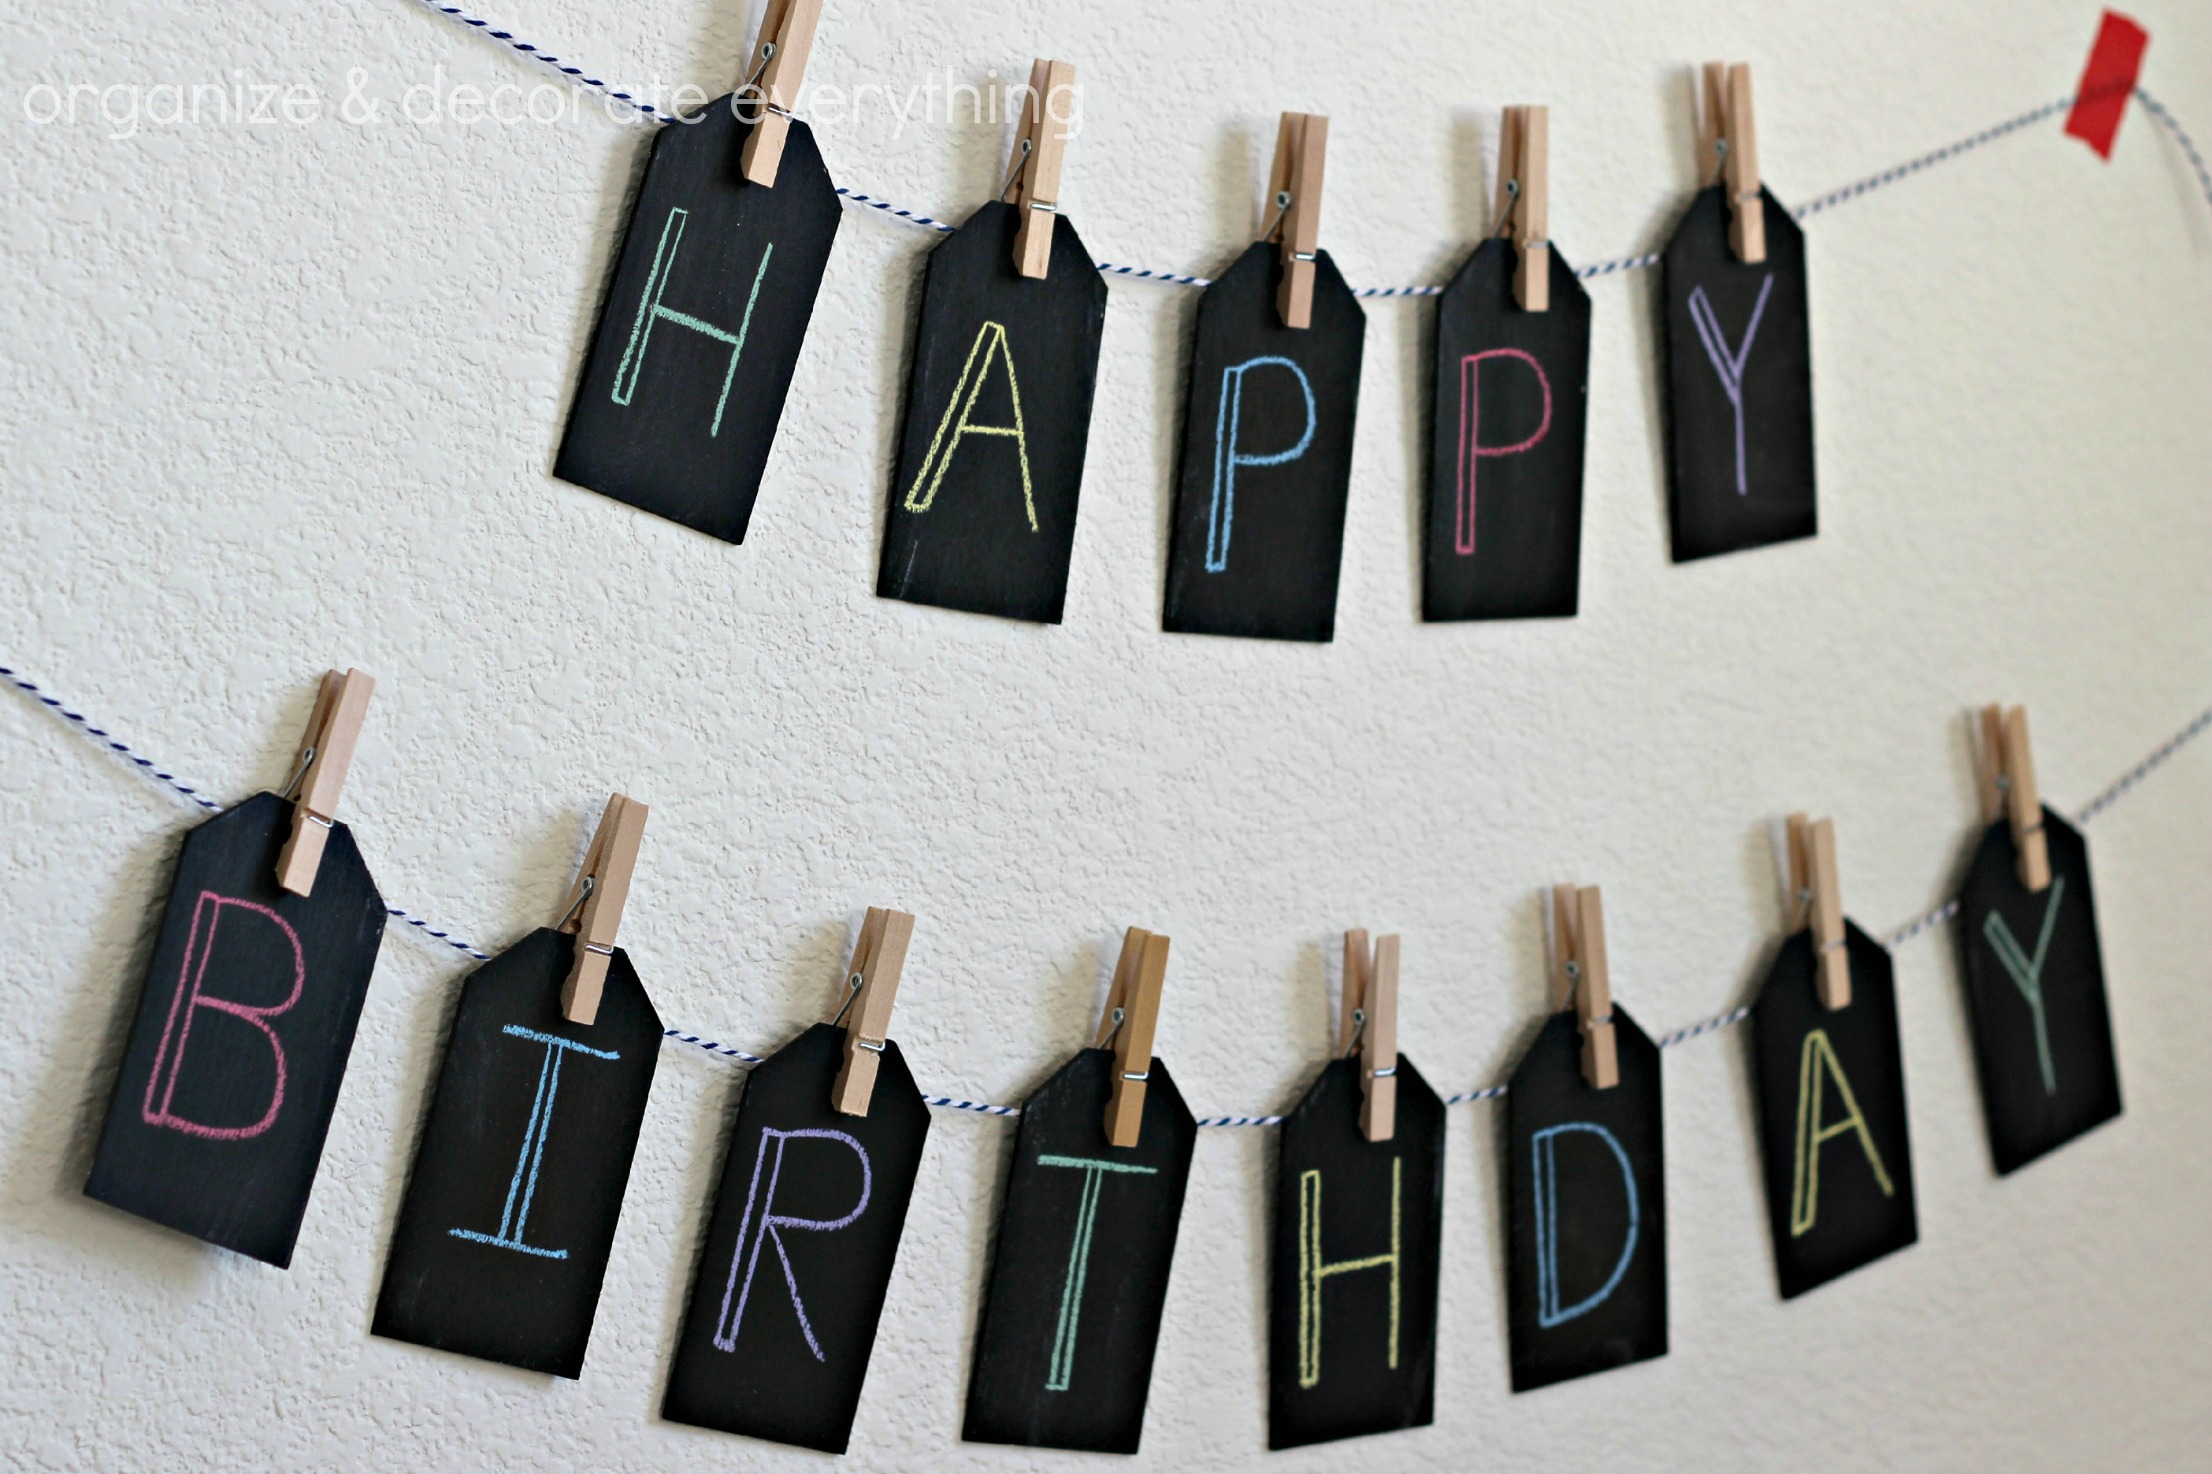
I pretty much love everything chalkboard. I’m on my way to having at least one chalkboard item in each room of my house. My favorite thing about it is that it can be changed on a whim. This Happy Birthday banner can easily be changed to say something else for any kind of celebration.
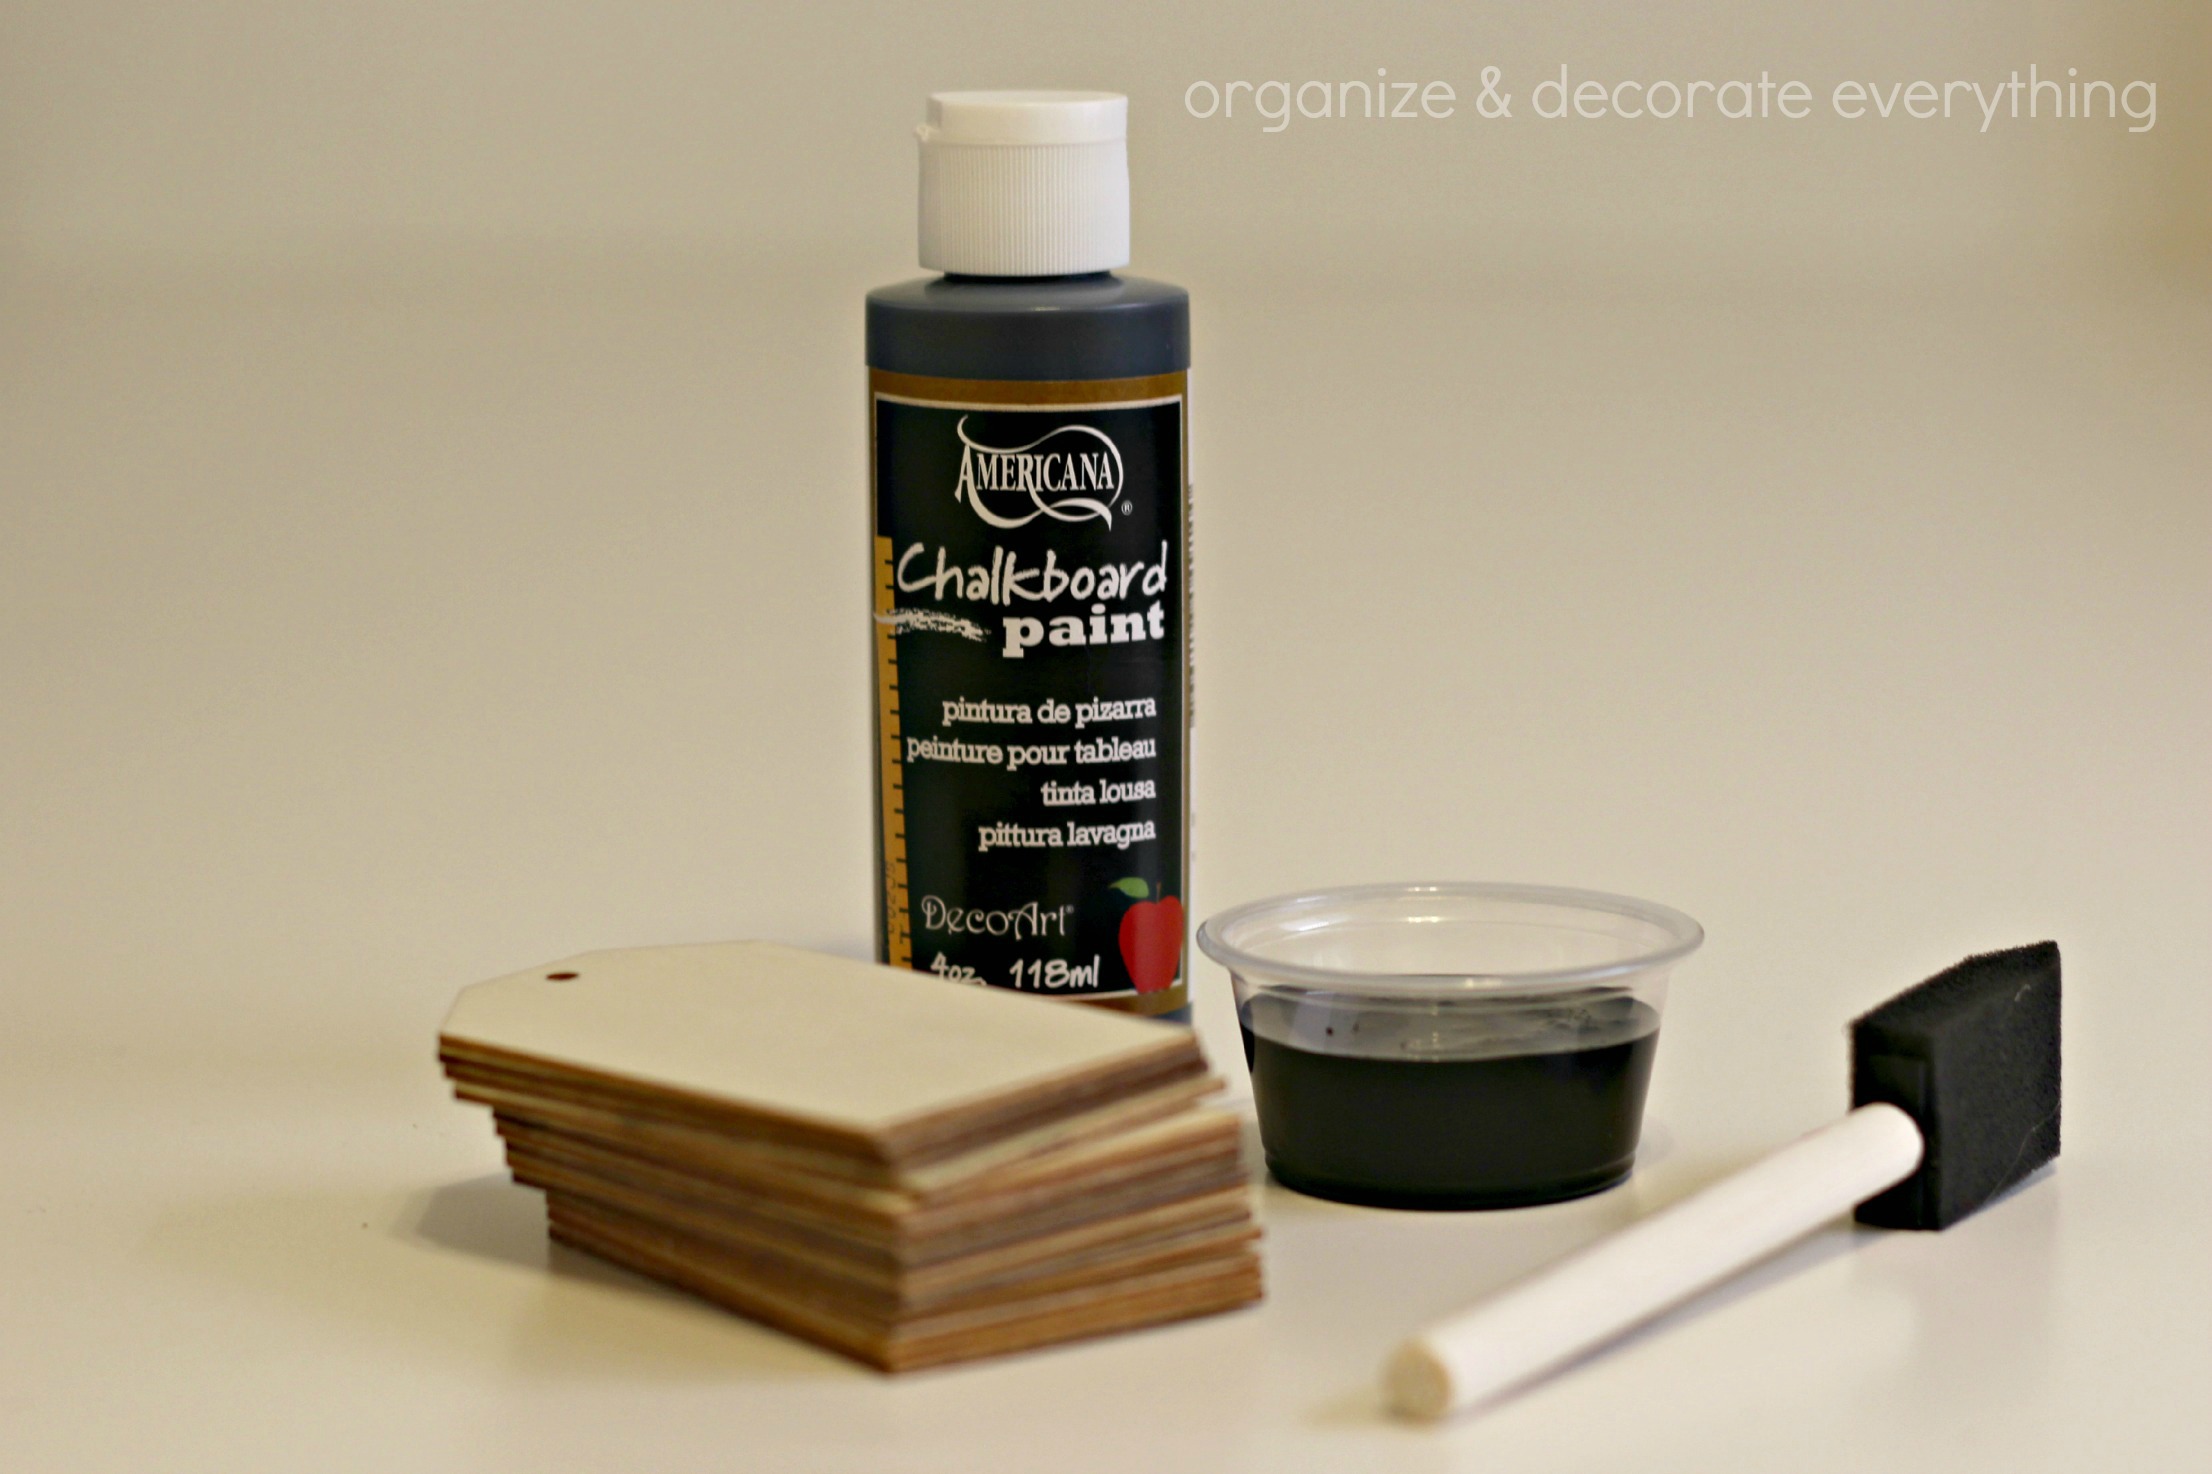
What you’ll need:
–DecoArt Americana Chalkboard Paint
-Wood Tags
-Twine
-Clothespins
-Chalk

Paint the tags with the chalkboard paint. Paint in one direction, wait one hour, then paint in the other direction. I like to paint horizontal first, then vertical. Let paint dry 24 hours then season by rubbing a piece of chalk on it’s side over the tags.

Use a damp lint-free cloth to wipe the chalk off the tags. Mine have a slight chalk residue left over, but I like them that way. If you don’t want a residue then wipe again with the cloth.
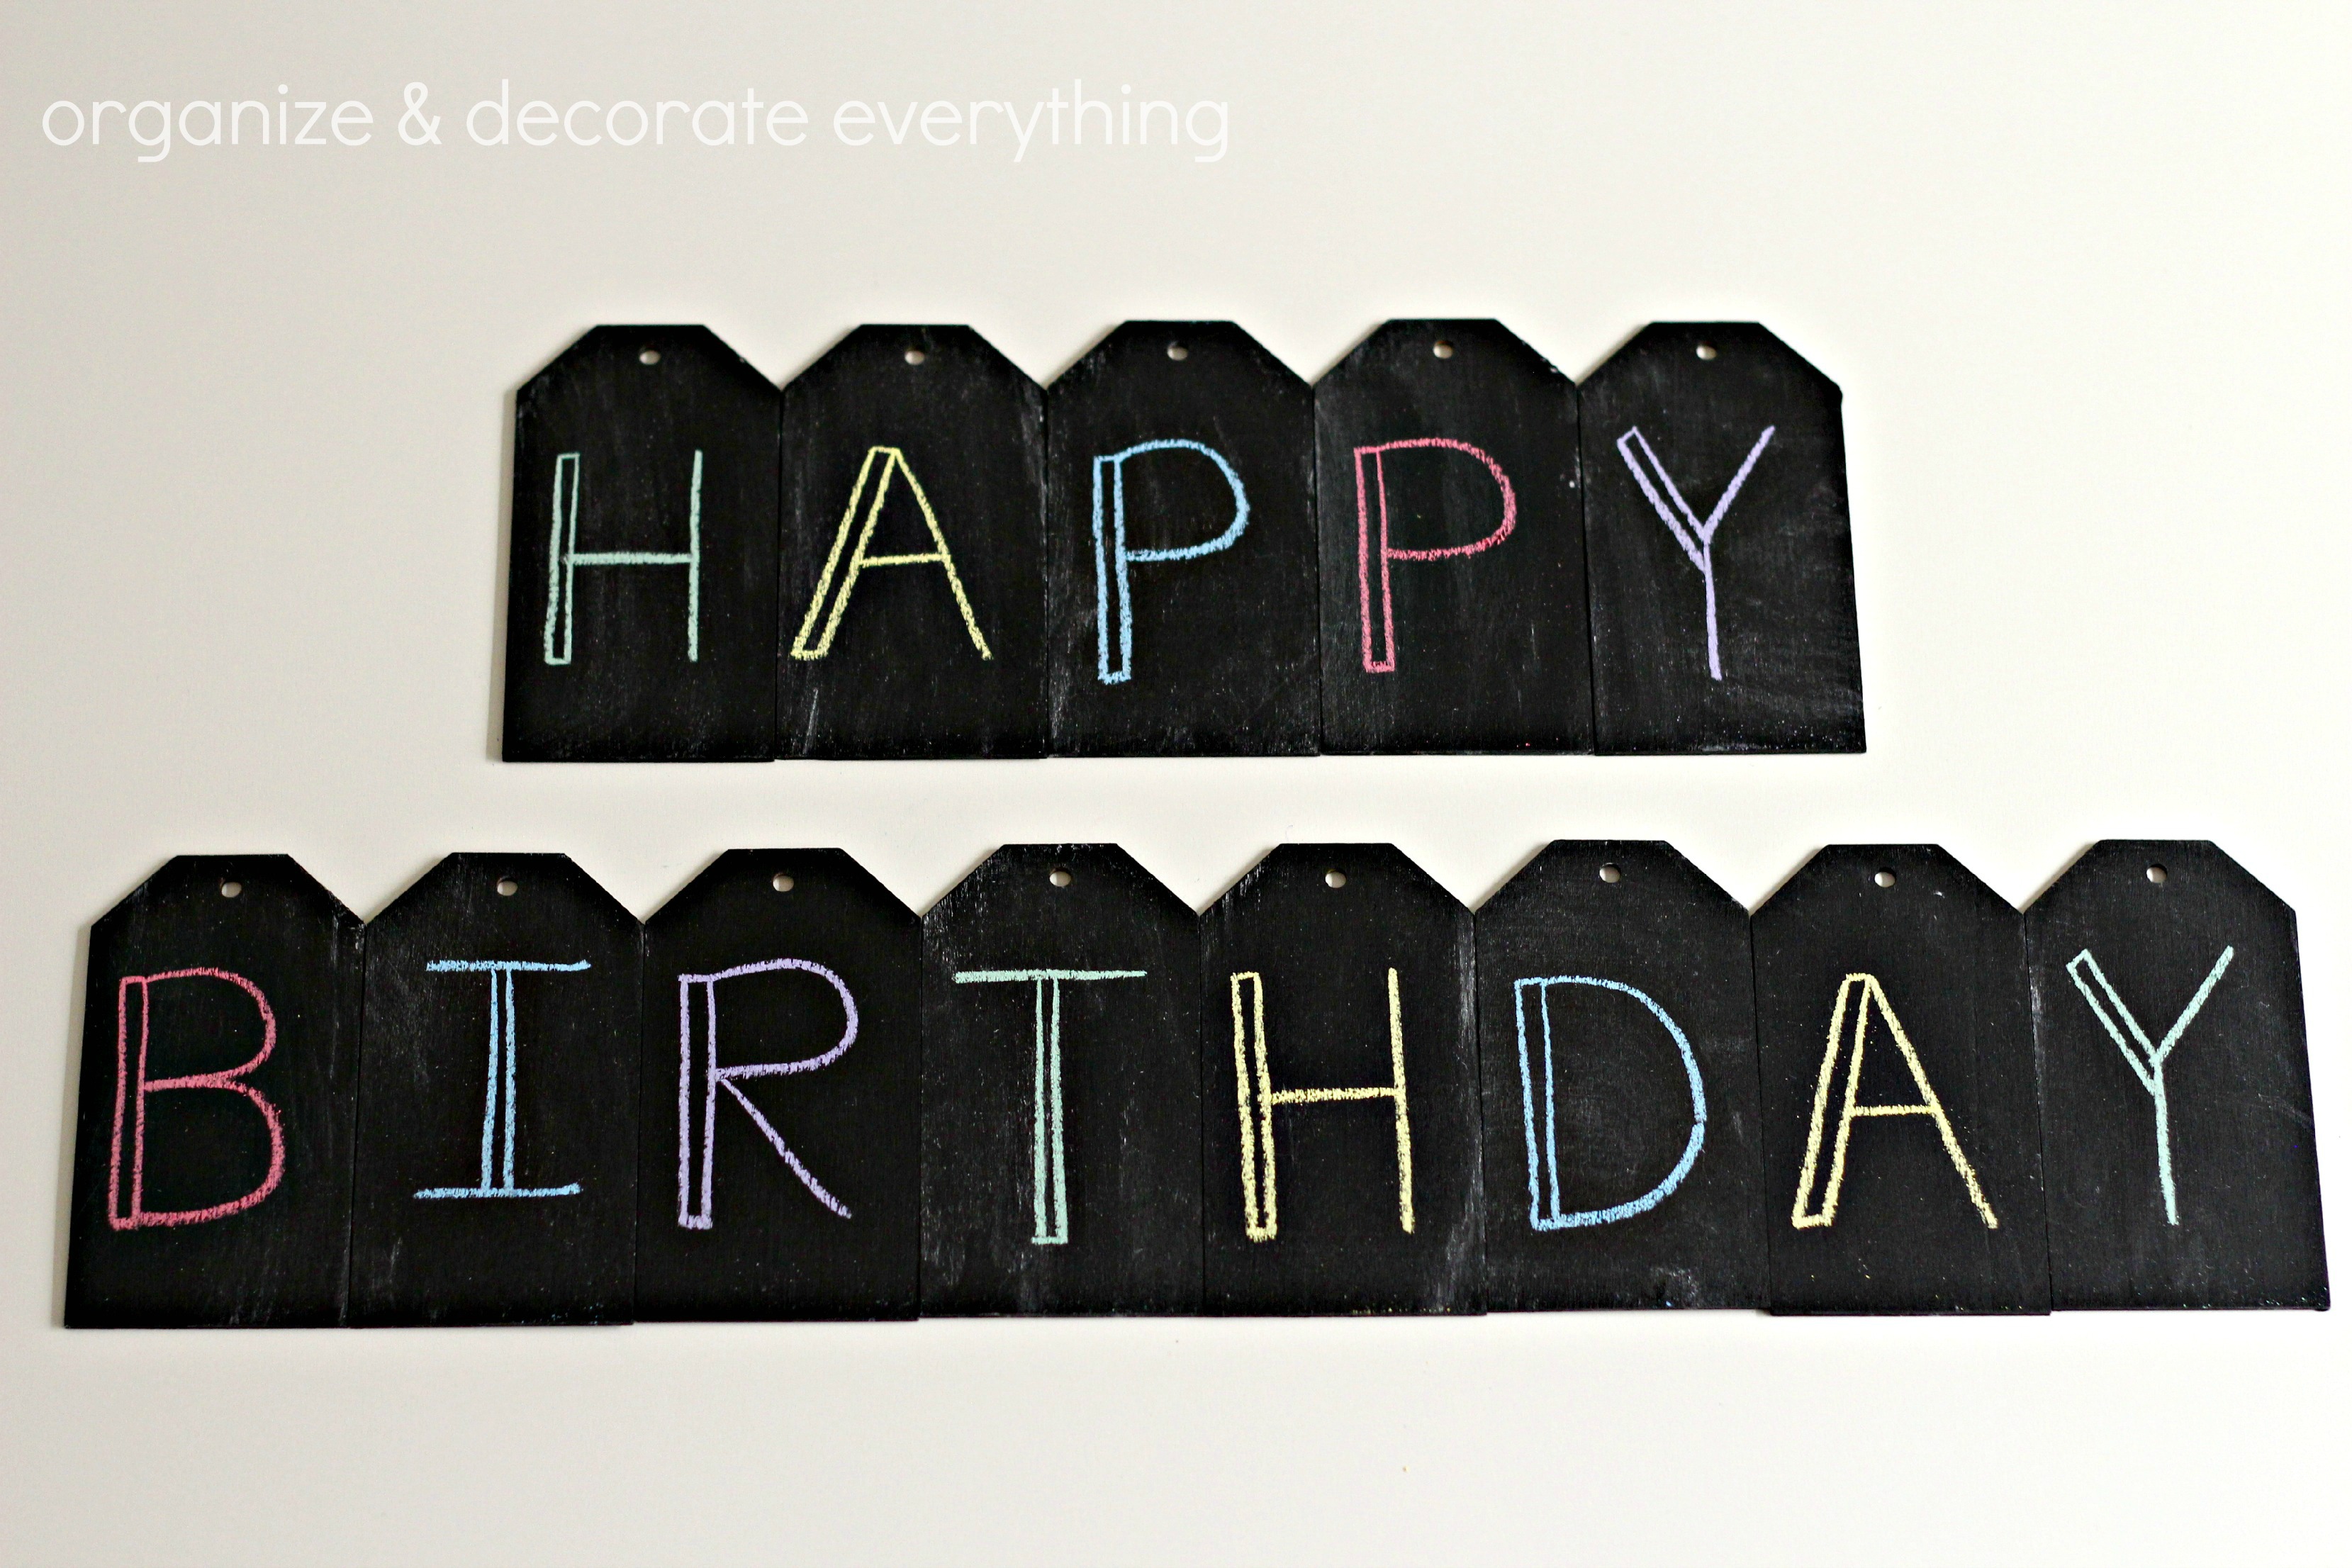
I used colored chalk to make the Happy Birthday more fun and youthful. The lettering is simple but since it’s for a teen boy, I think it’s perfect.
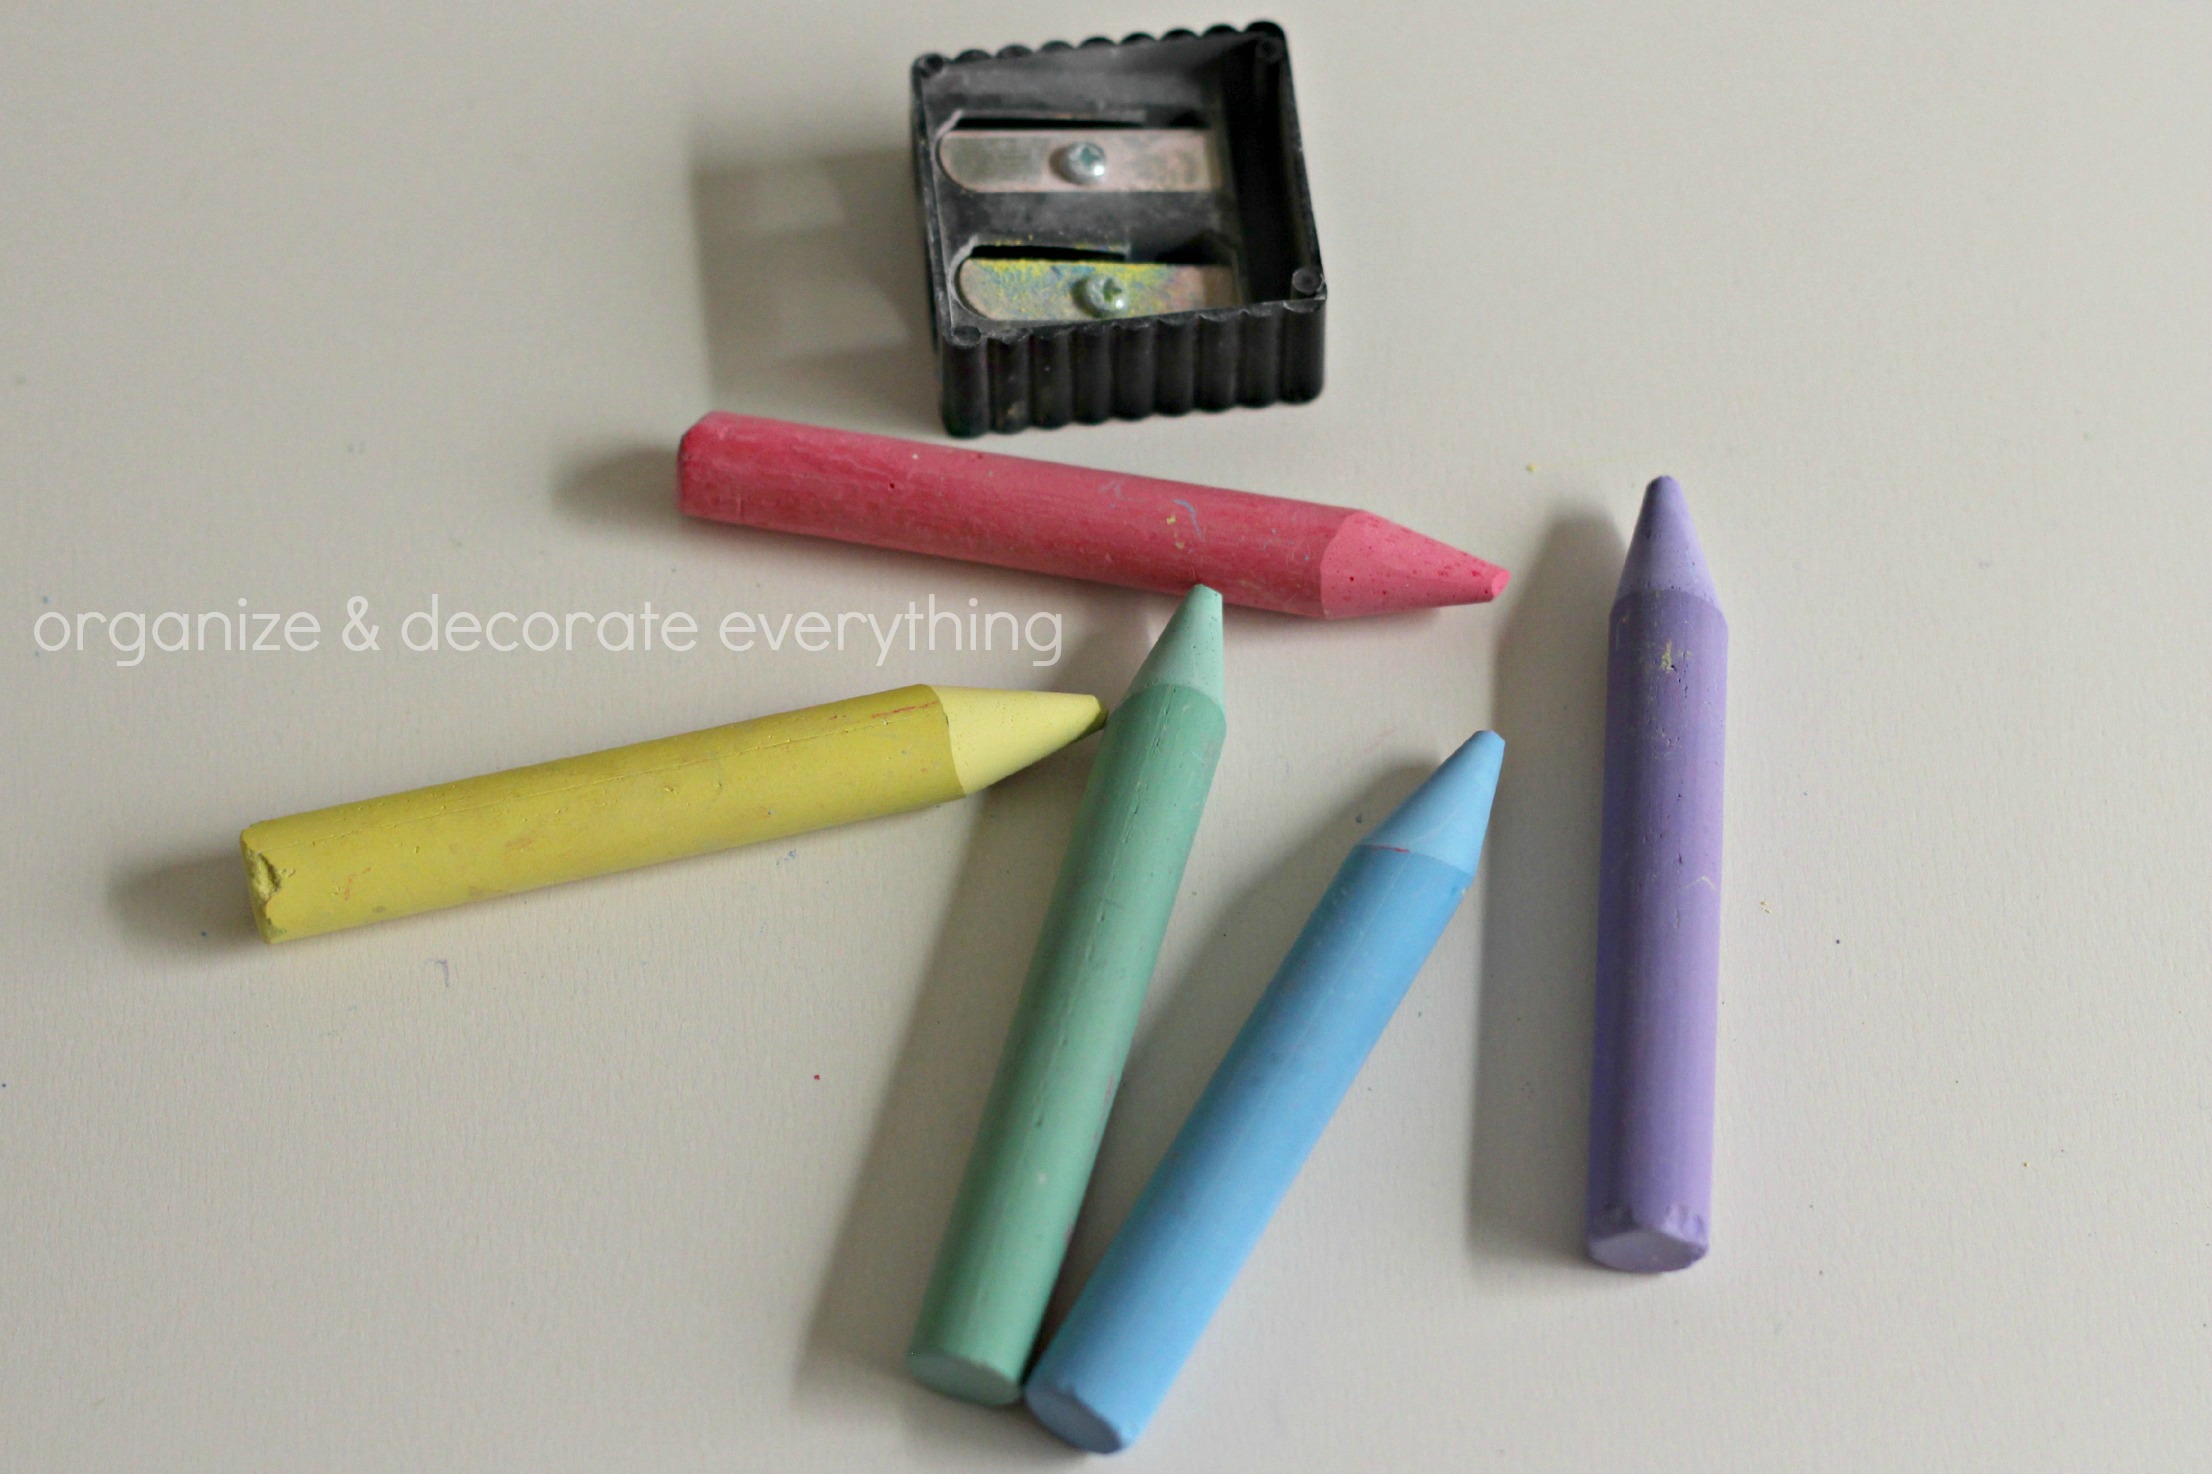
Here’s a little trick to make your chalkboard art look great: Sharpen you chalk multiple times as you use it. I prefer using real chalk compared to chalk pens since I can get a sharp line by sharpening the chalk. I like the imperfection of it also.

I used clothespins to hang the banner from the baker’s twine. You could tie the tags on the twine, but I wanted to be able to change the number of tags for the next occasion. I also painted on the back side so if the banner is hanging in door way you can write a sentiment on each side.
Zach’s birthday is today so I’ll have a post about another fun thing I made to surprise him on the blog tomorrow.


This! Incredible. I can’t wait to create one of my own! Thanks so much for sharing!!